Orion Township, Michigan
Project completed August 2026
Project Preview
The Walter family returned to The Exterior Zone after previously working with our team on roof and chimney repairs at their Orion Township lakefront home.
This time, the goal was much larger.
Visible wood rot, aging T1-11 siding, deteriorated fascia and soffit, older exterior finishes, and ventilation concerns had developed across multiple areas of the home. Rather than continuing to repair individual components one at a time, the project evolved into a coordinated whole-exterior renovation.
The completed project brought the siding, trim, flashing, ventilation, gutters, painting, and surrounding exterior details together into one cohesive system.
What We Found
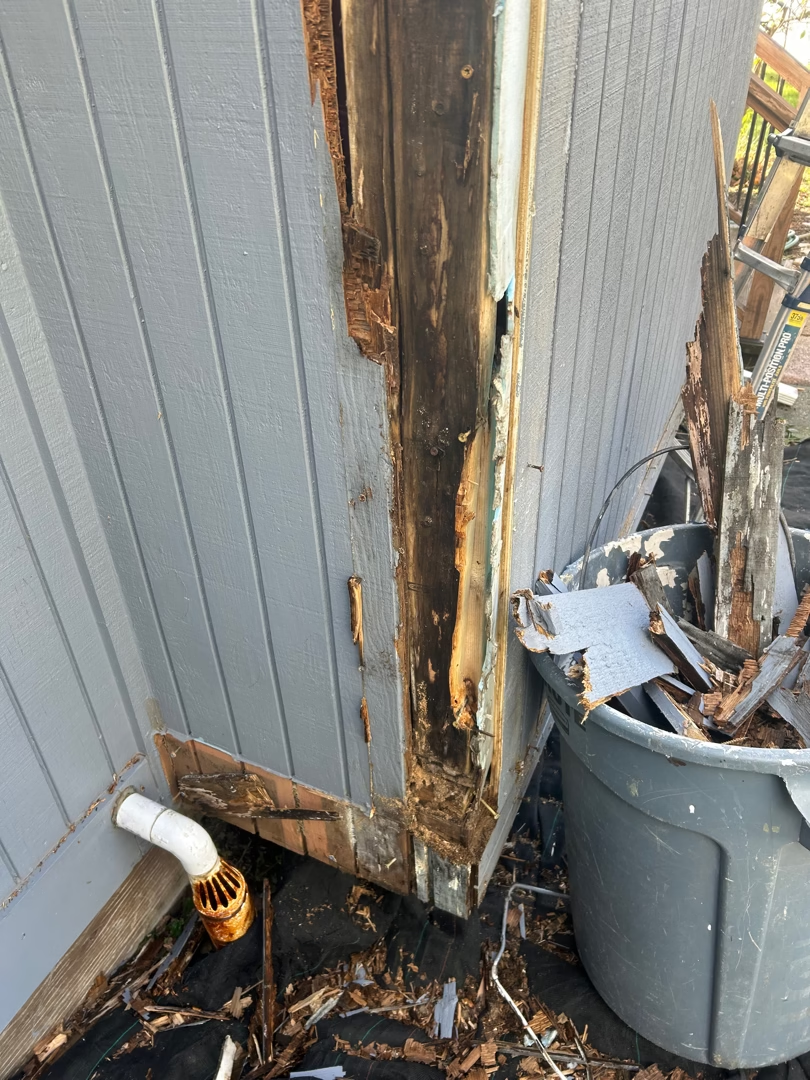
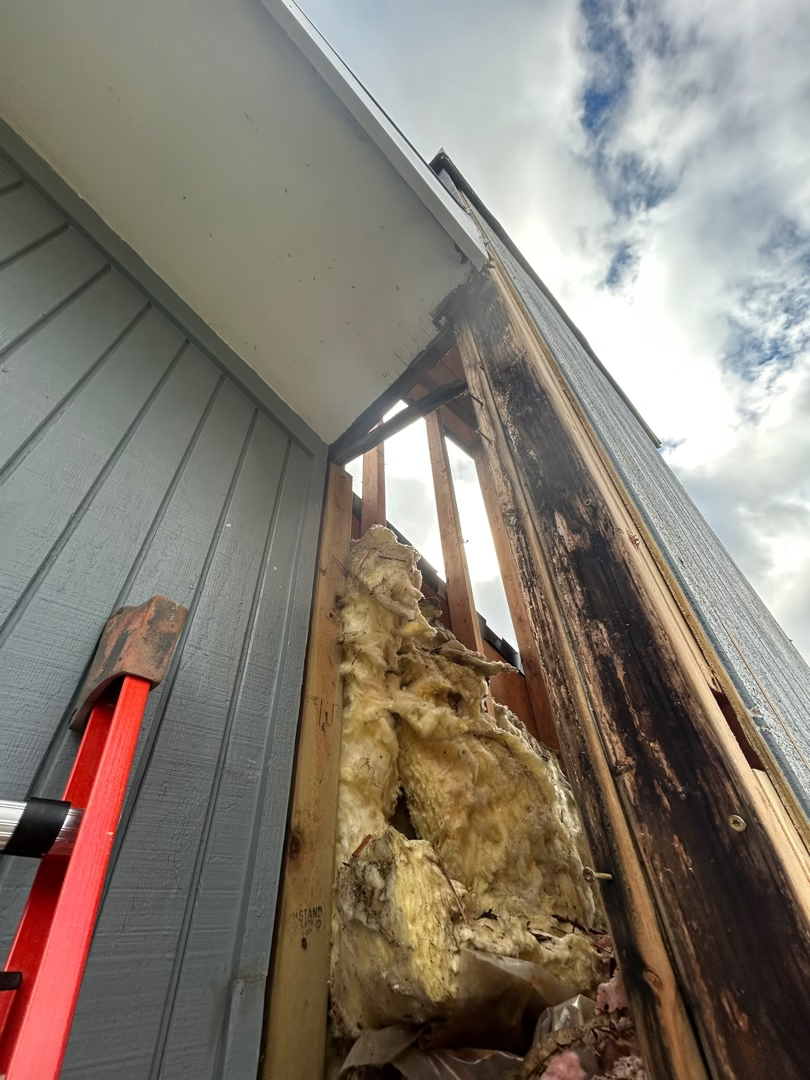
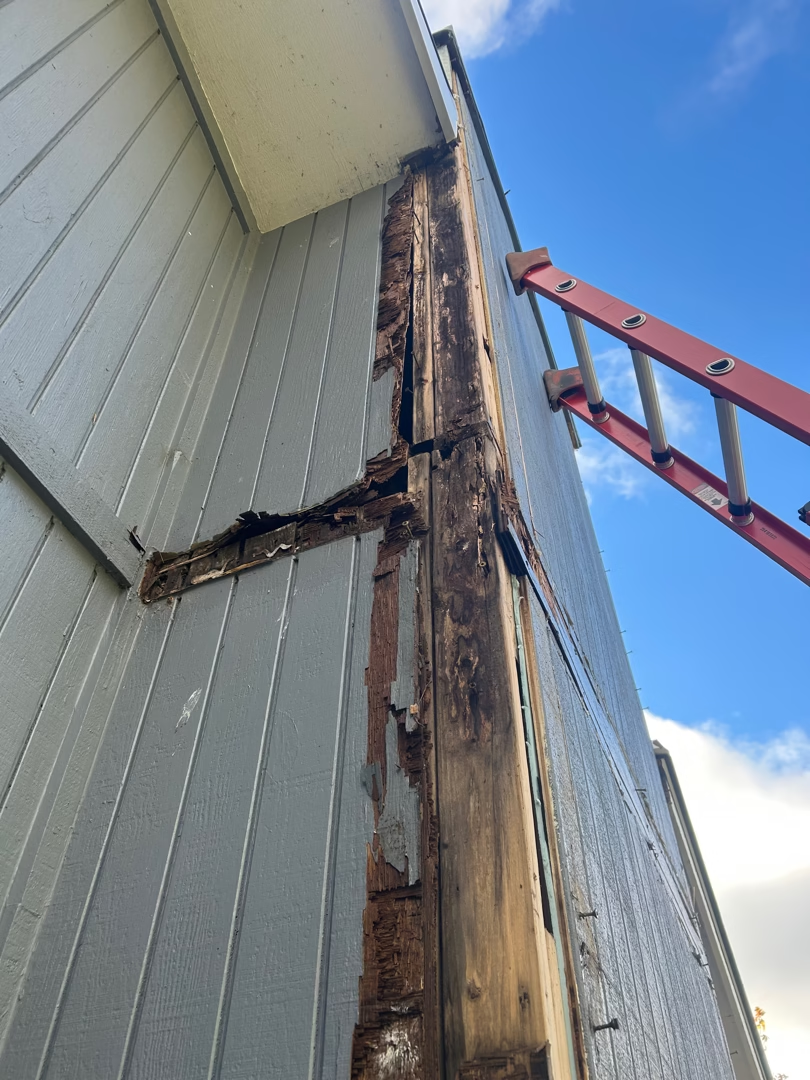
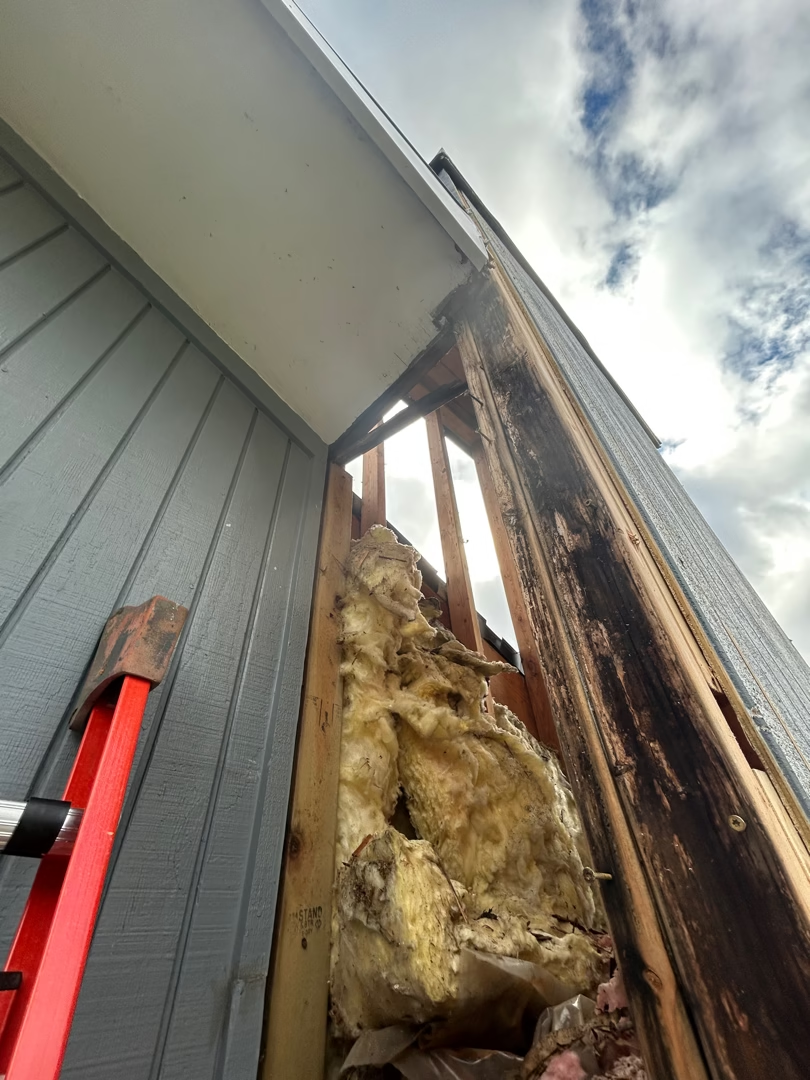
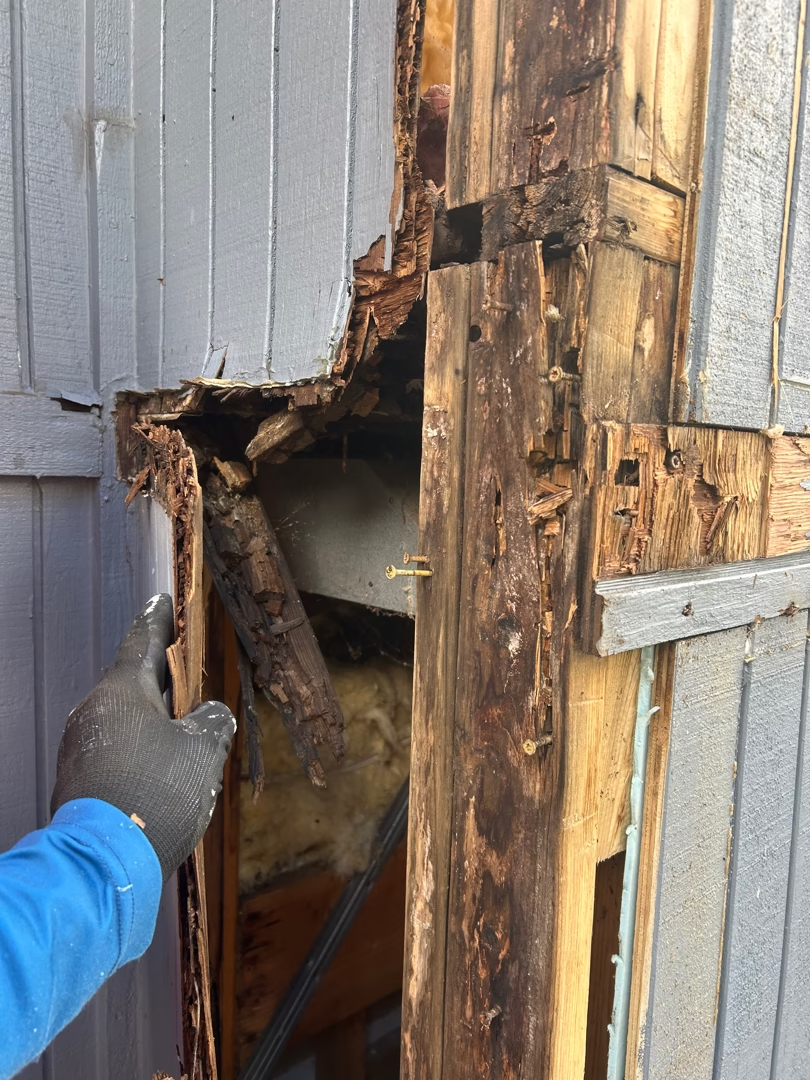
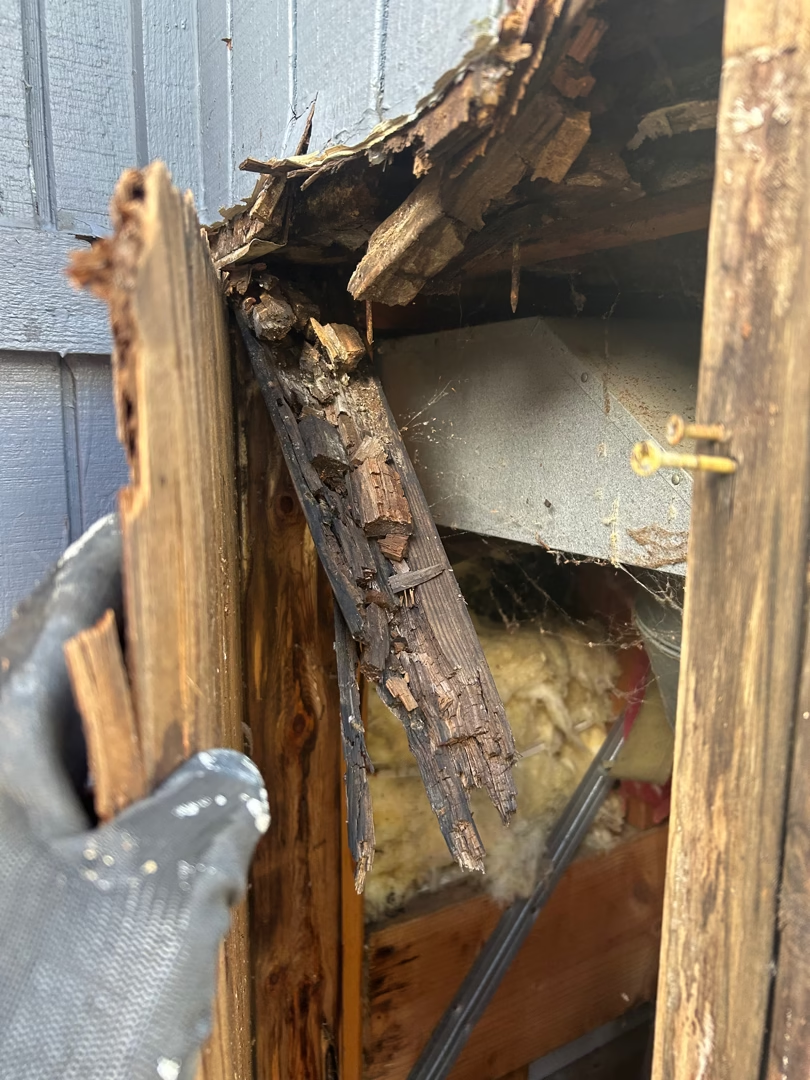
The visible wood deterioration was not limited to one area of the home.
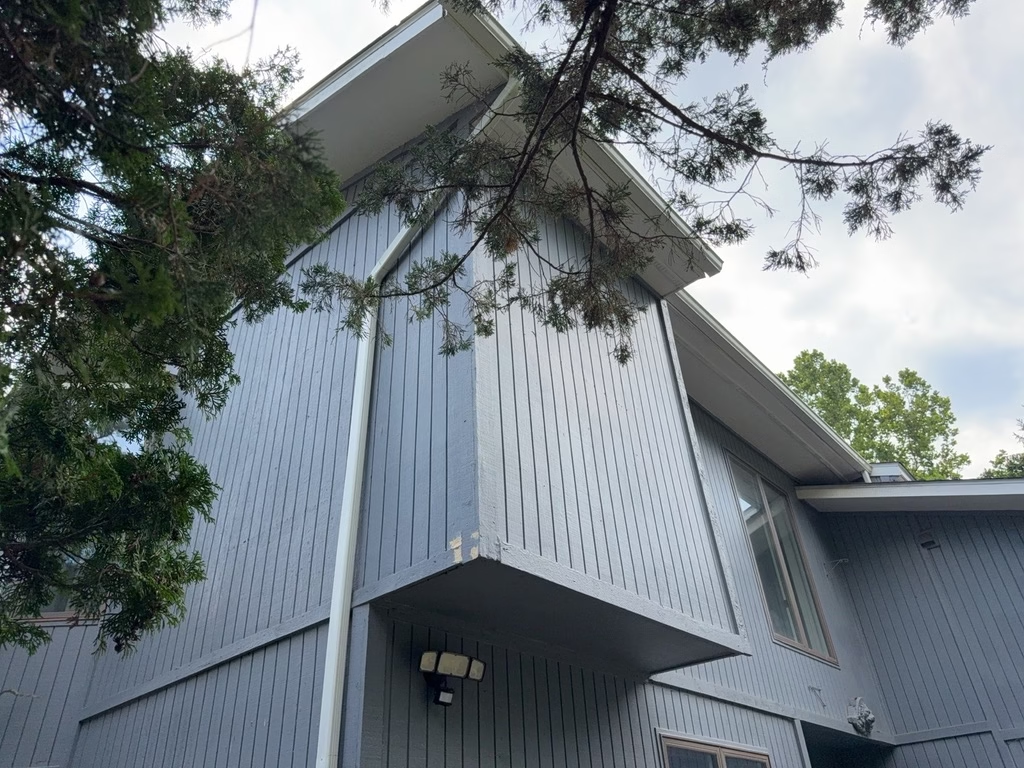
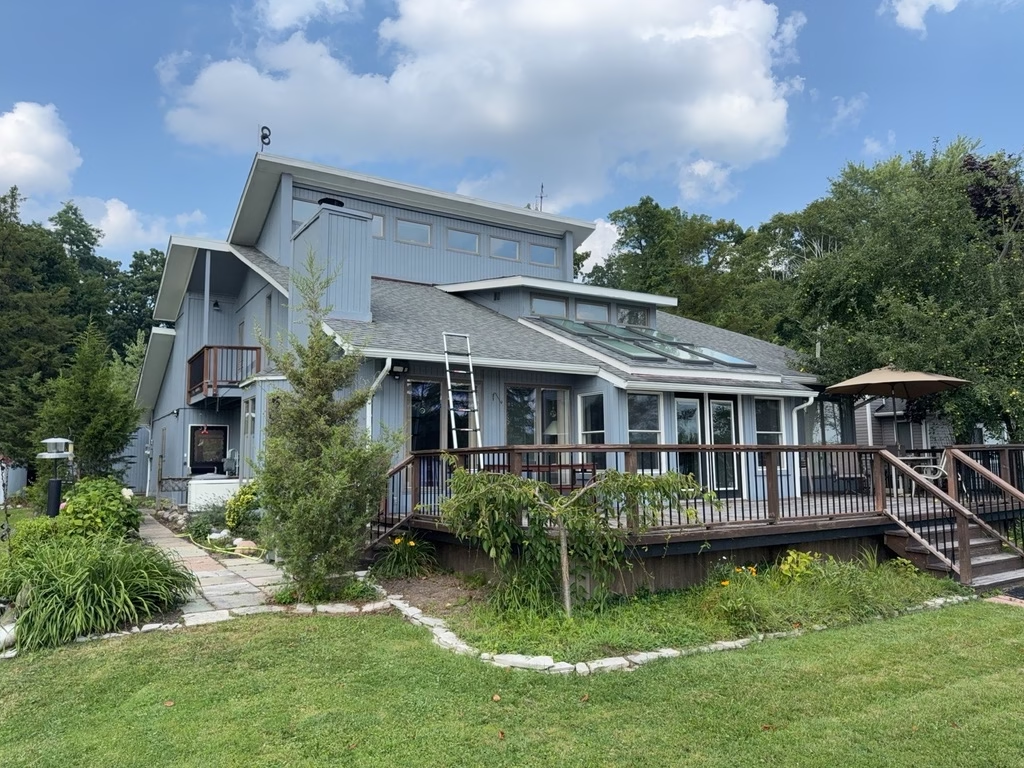
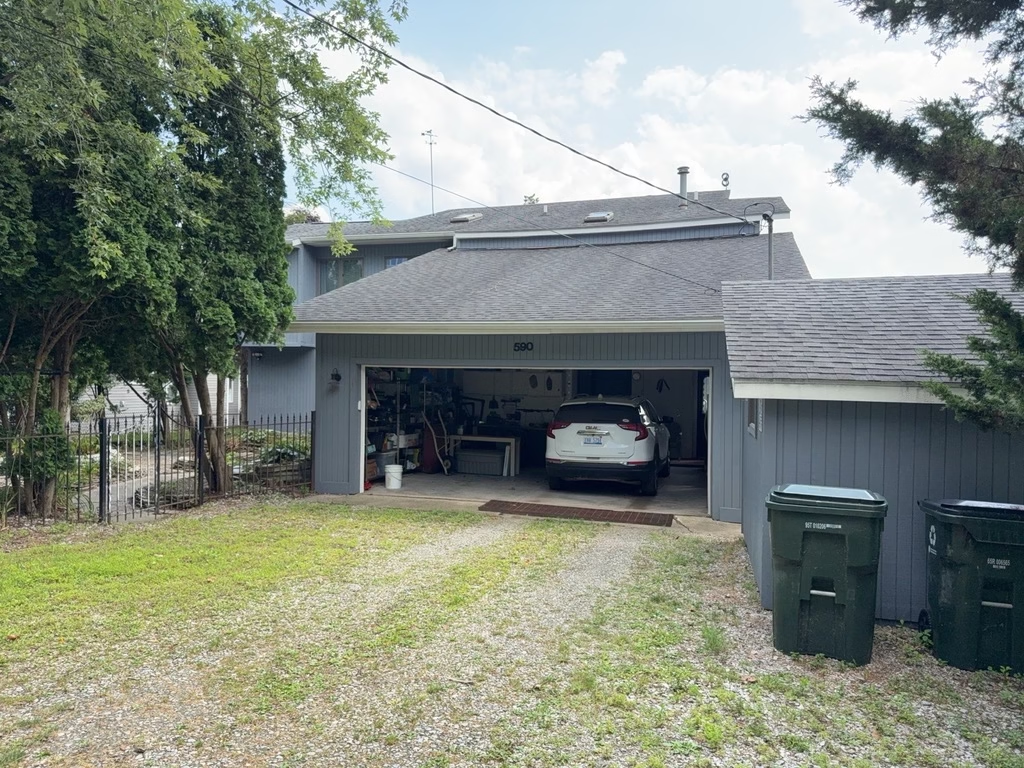
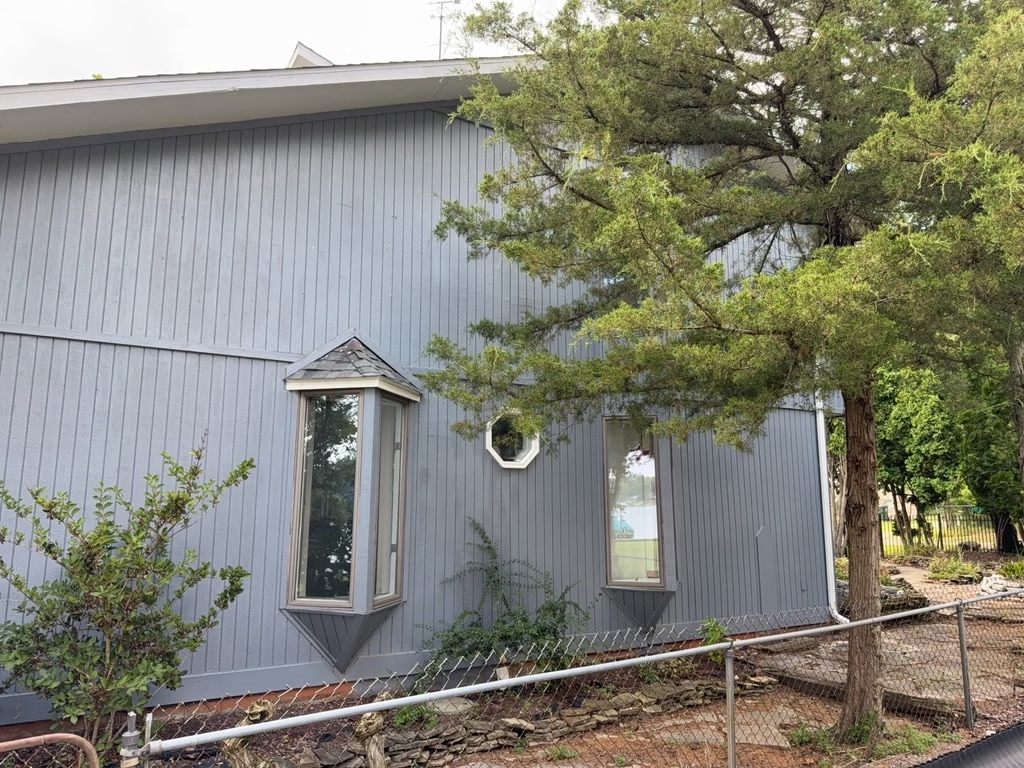
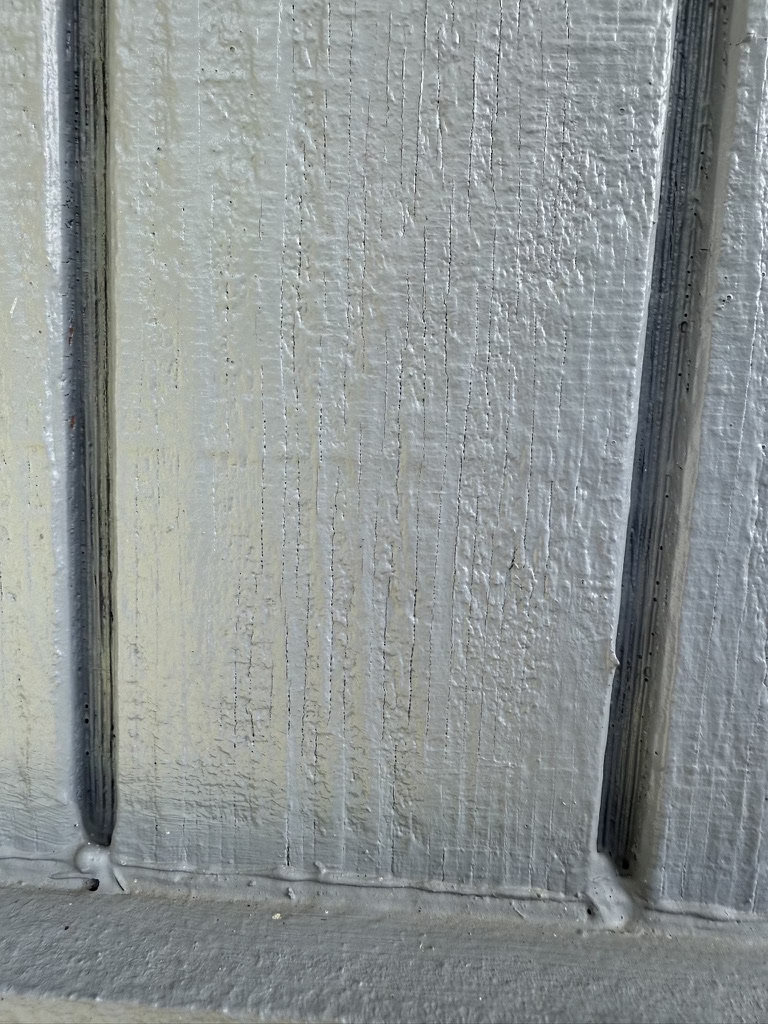
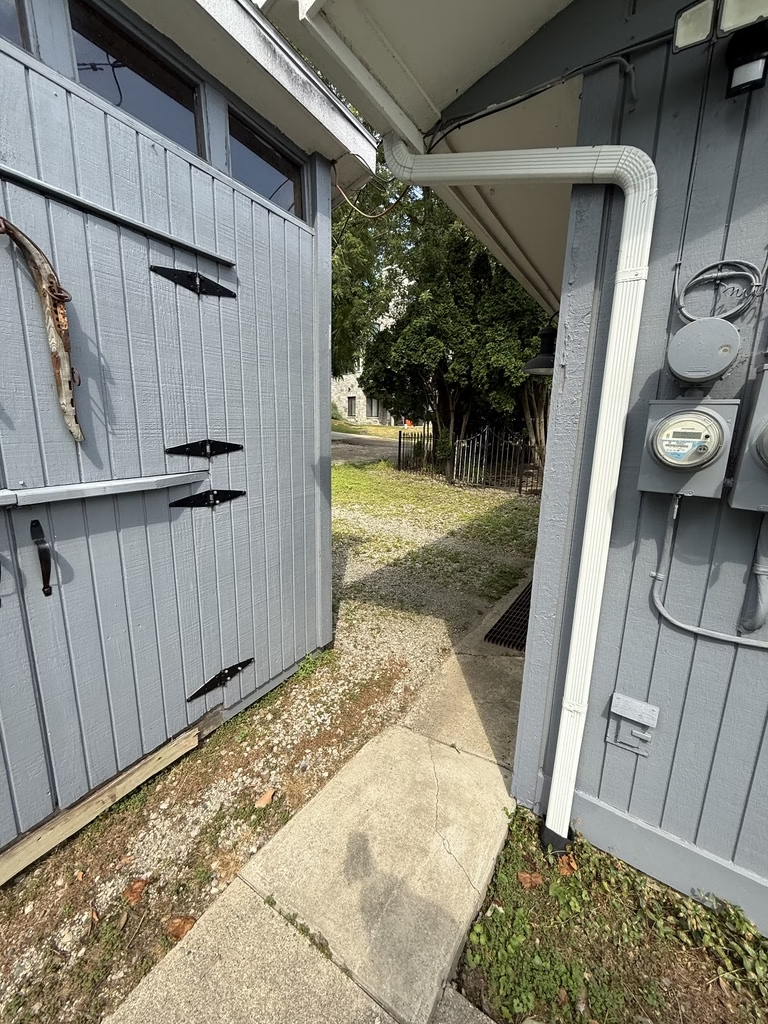
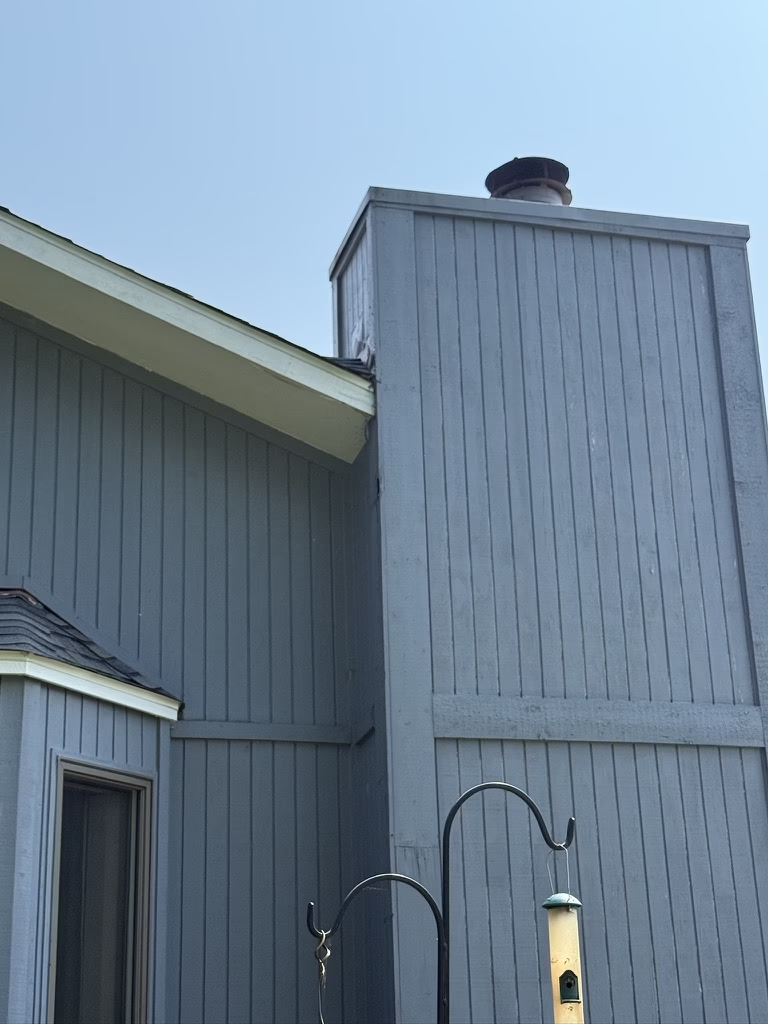
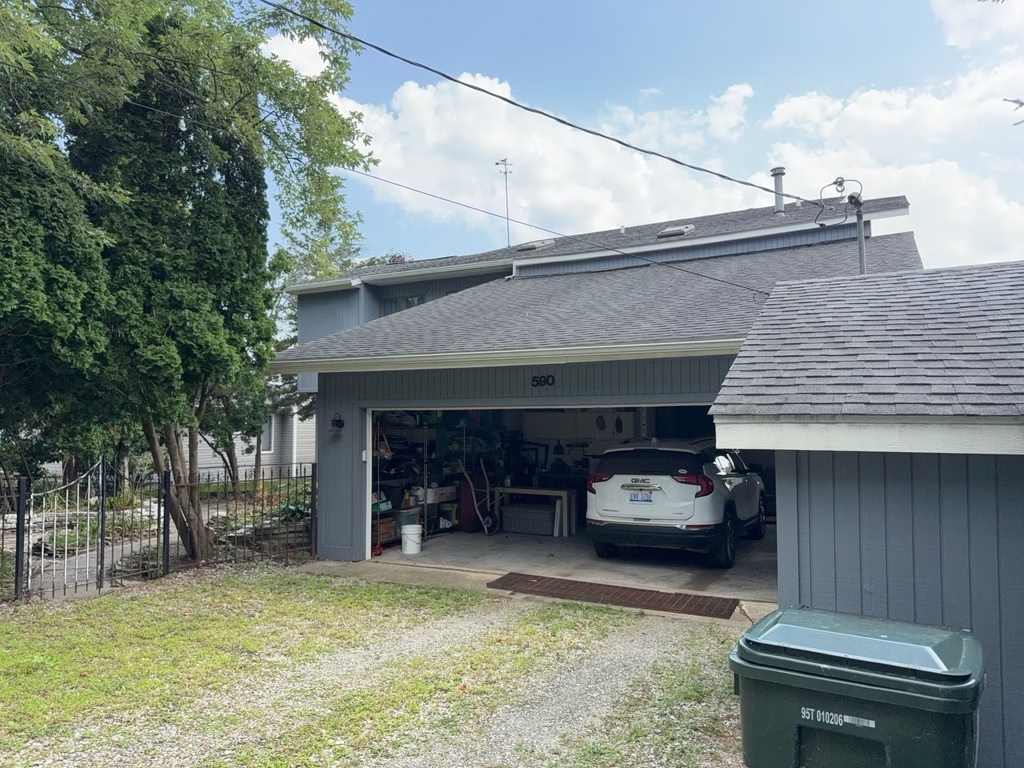
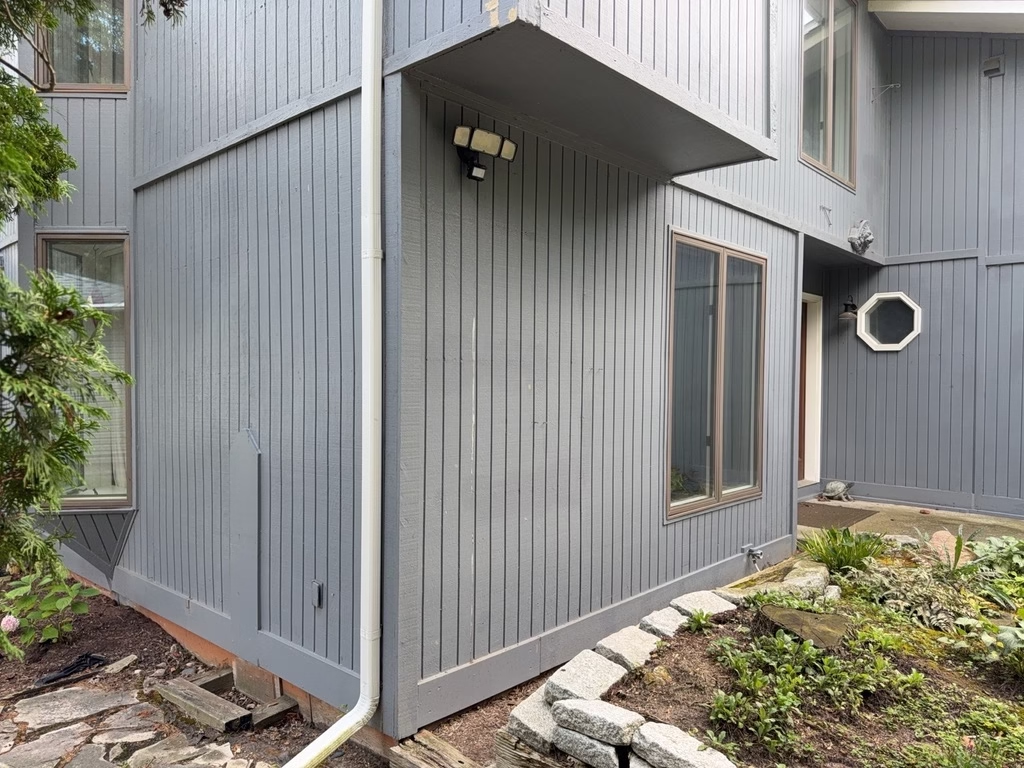
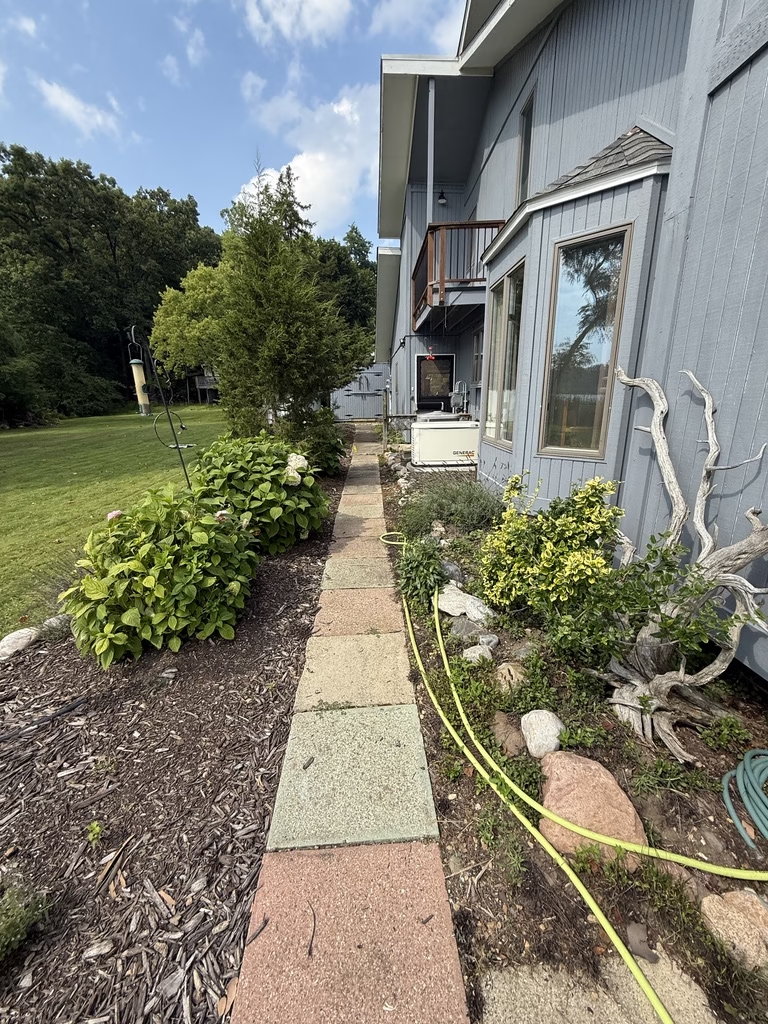
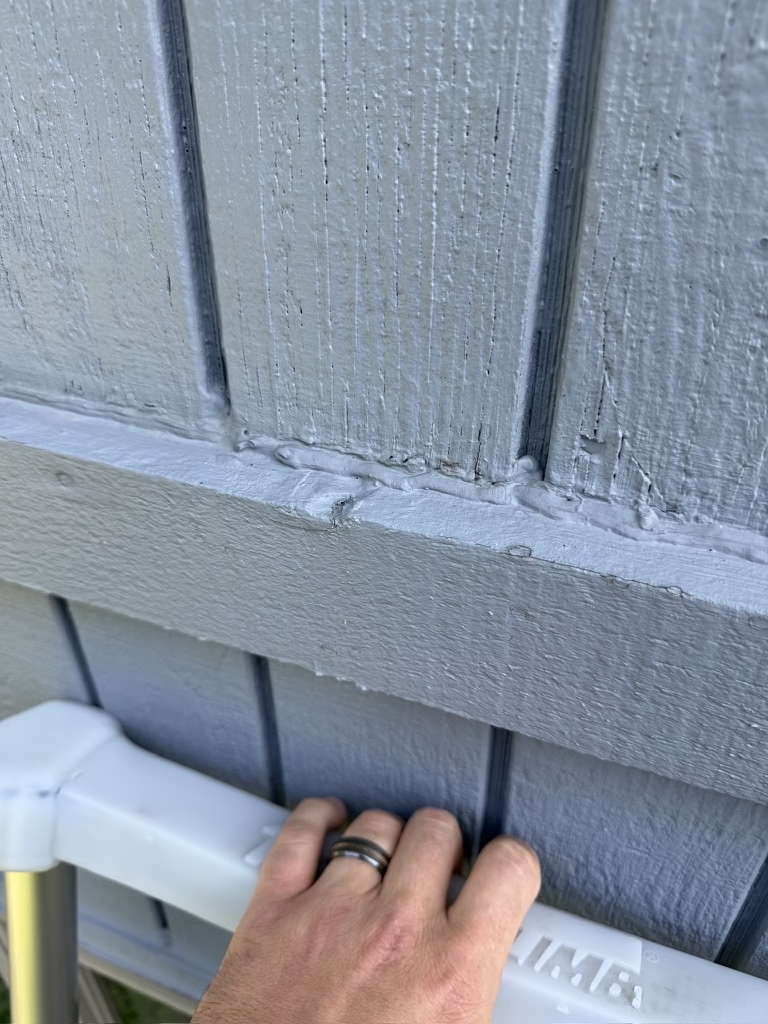
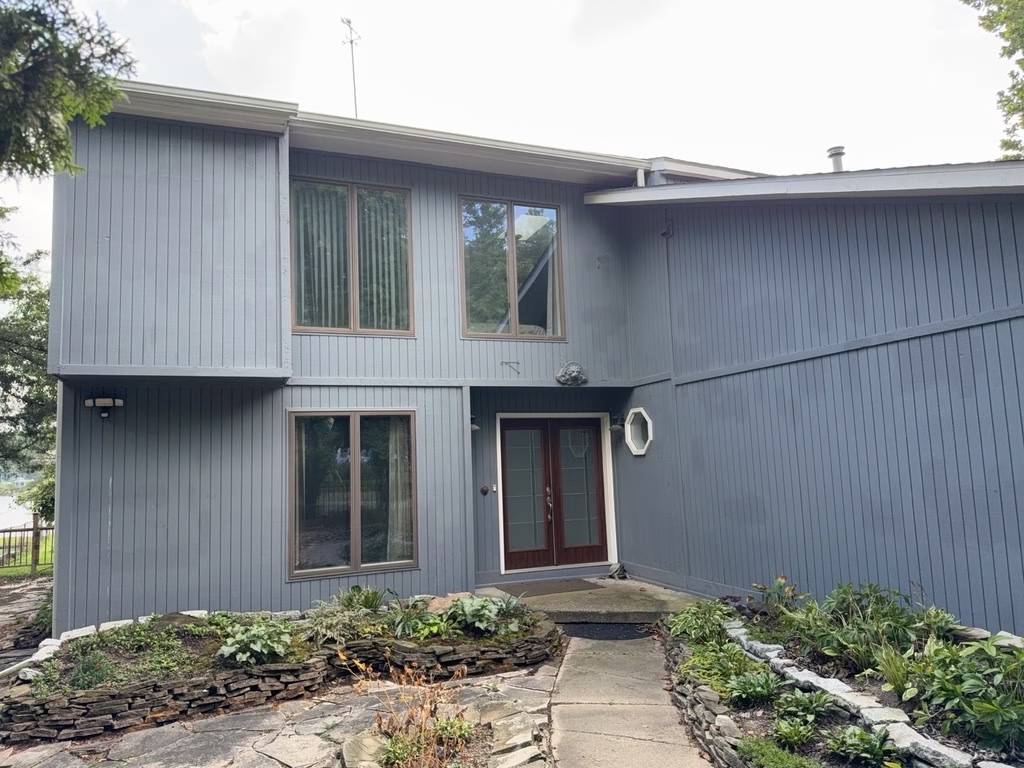
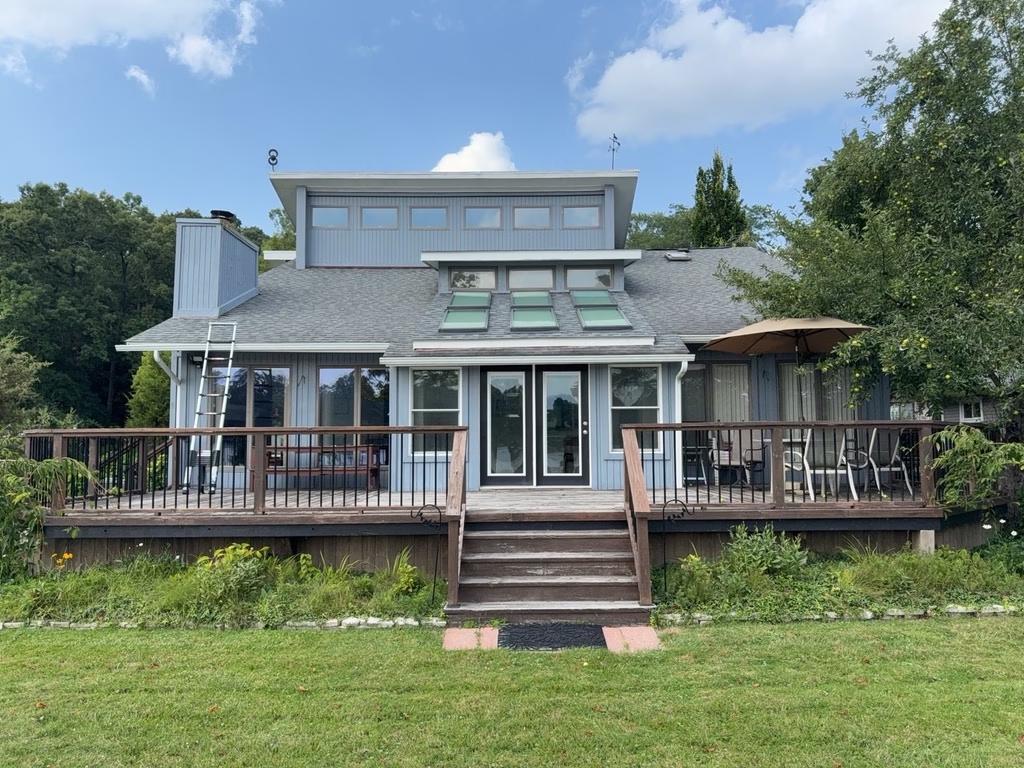
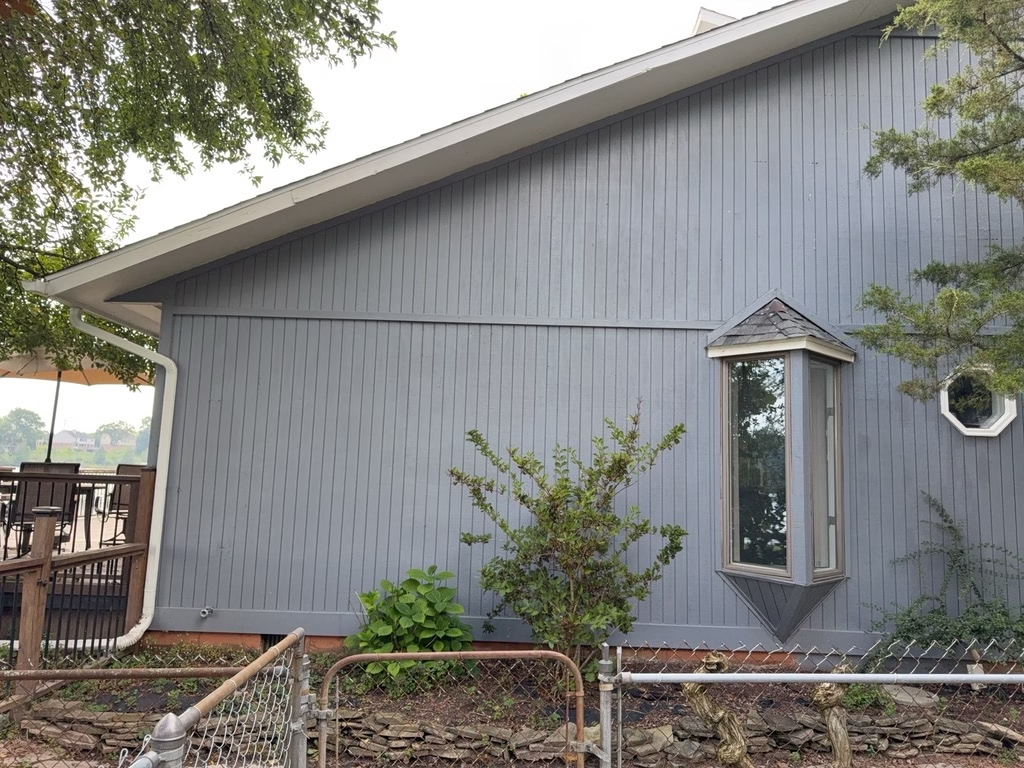
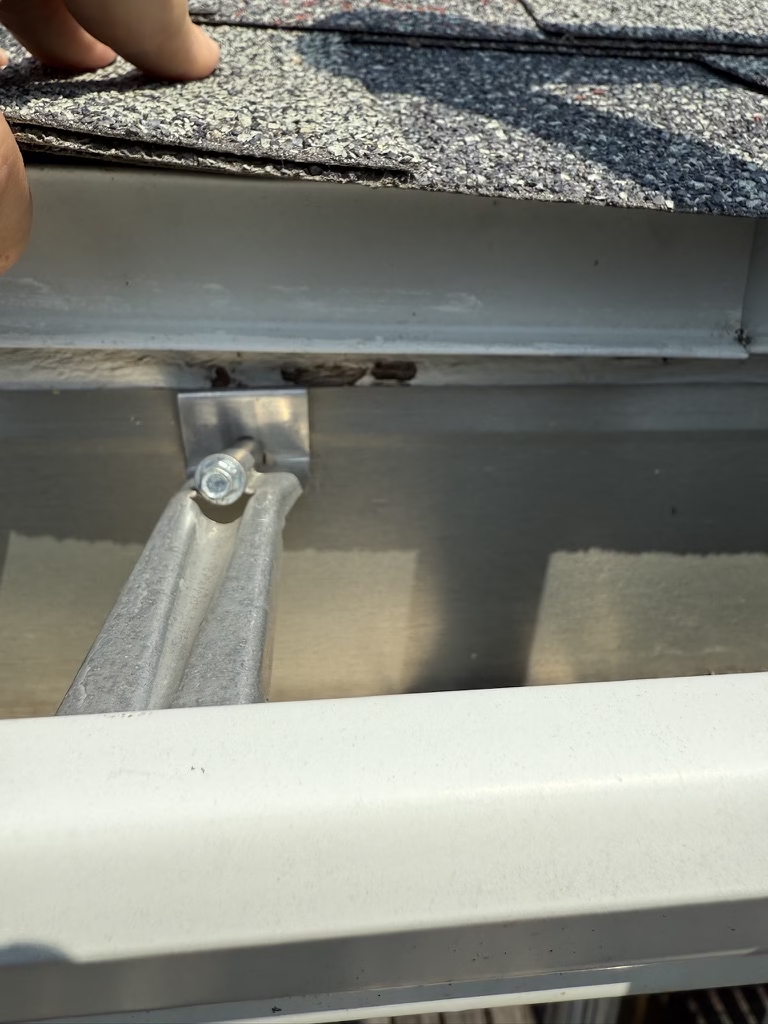
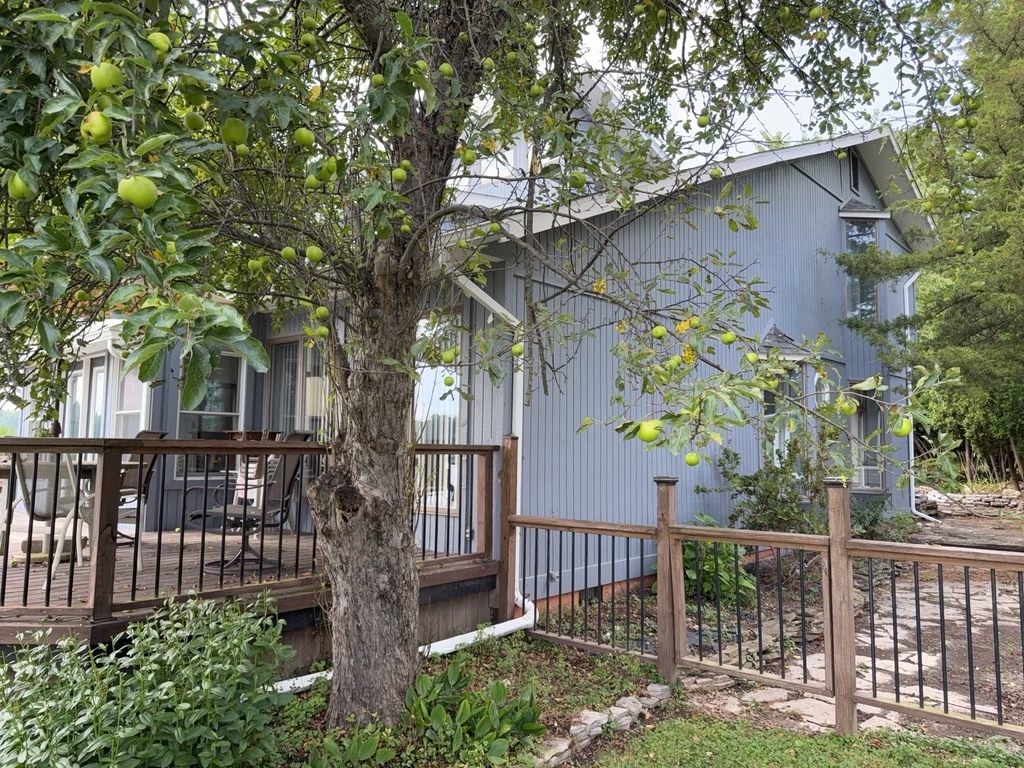
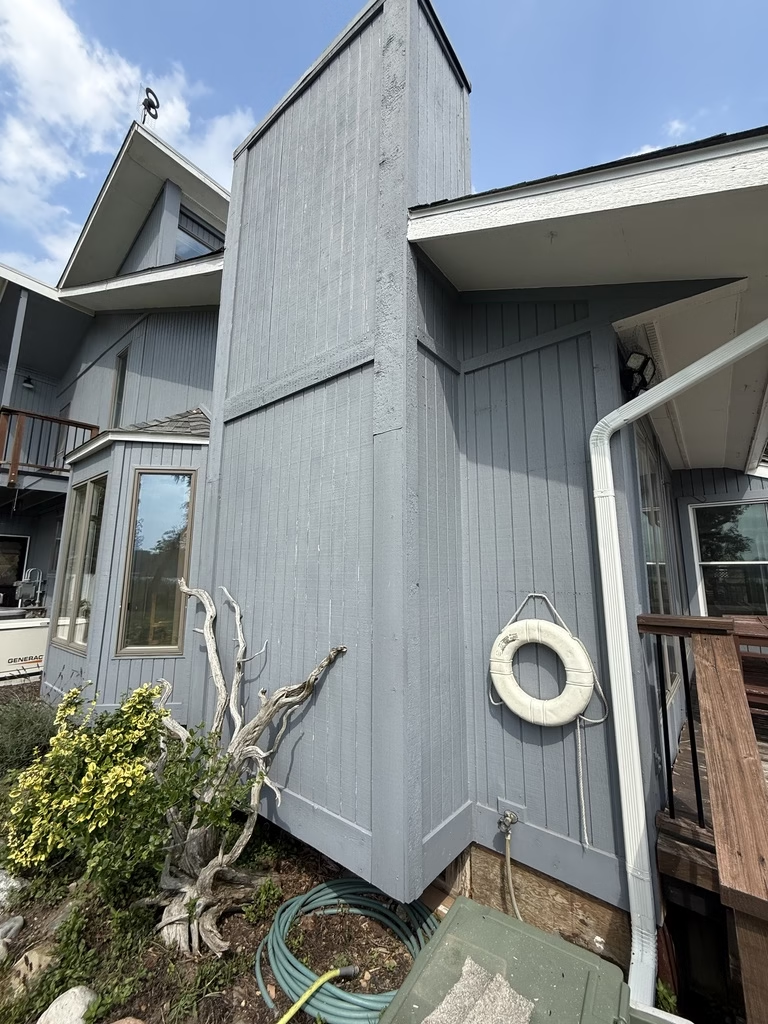
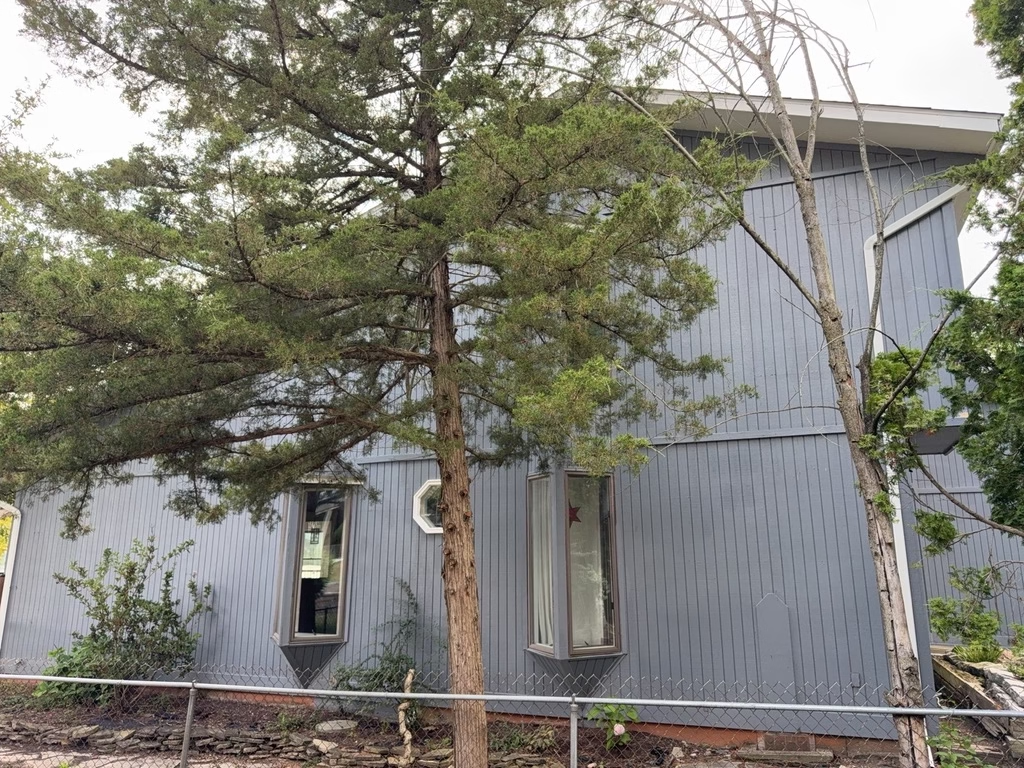
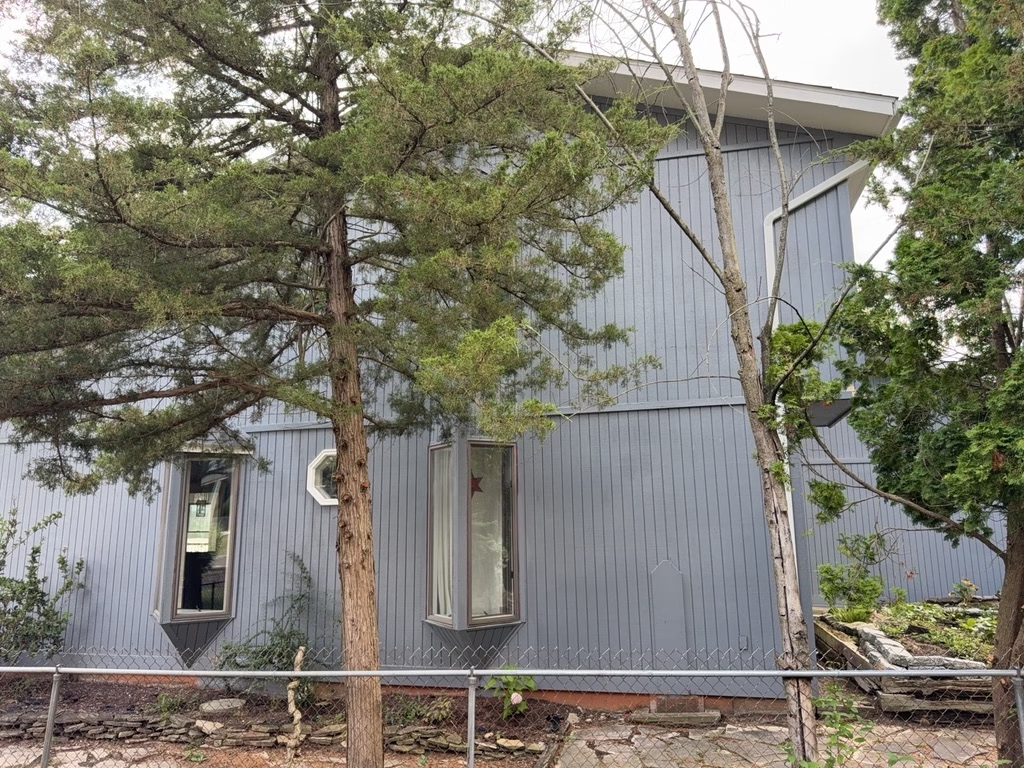
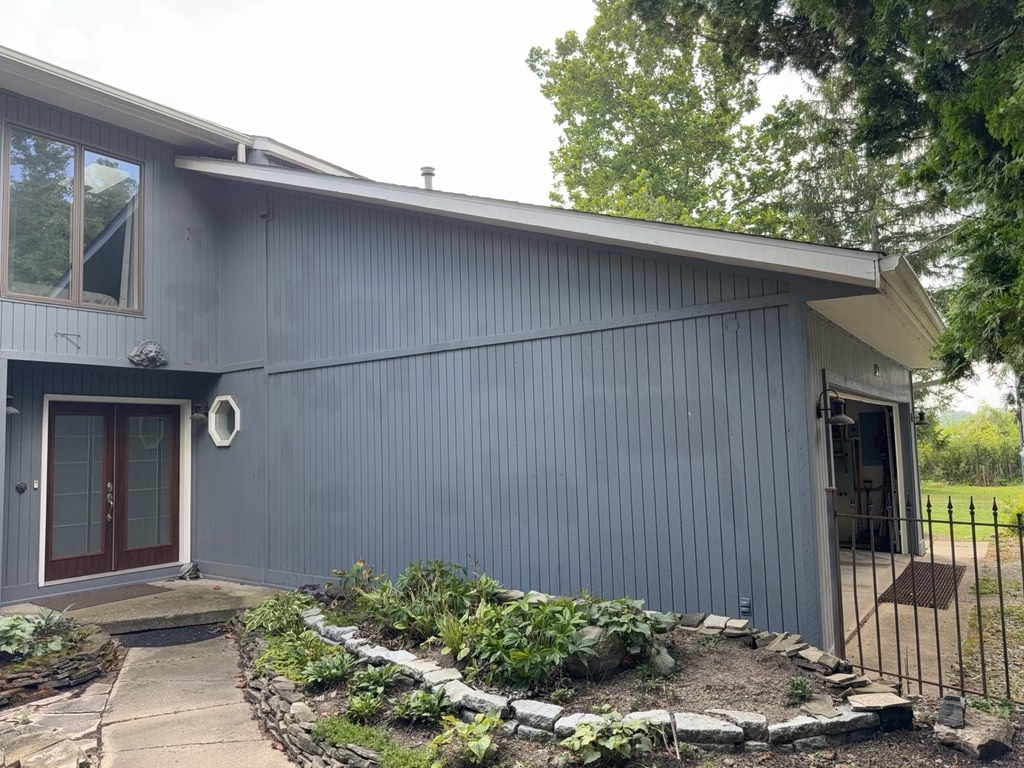
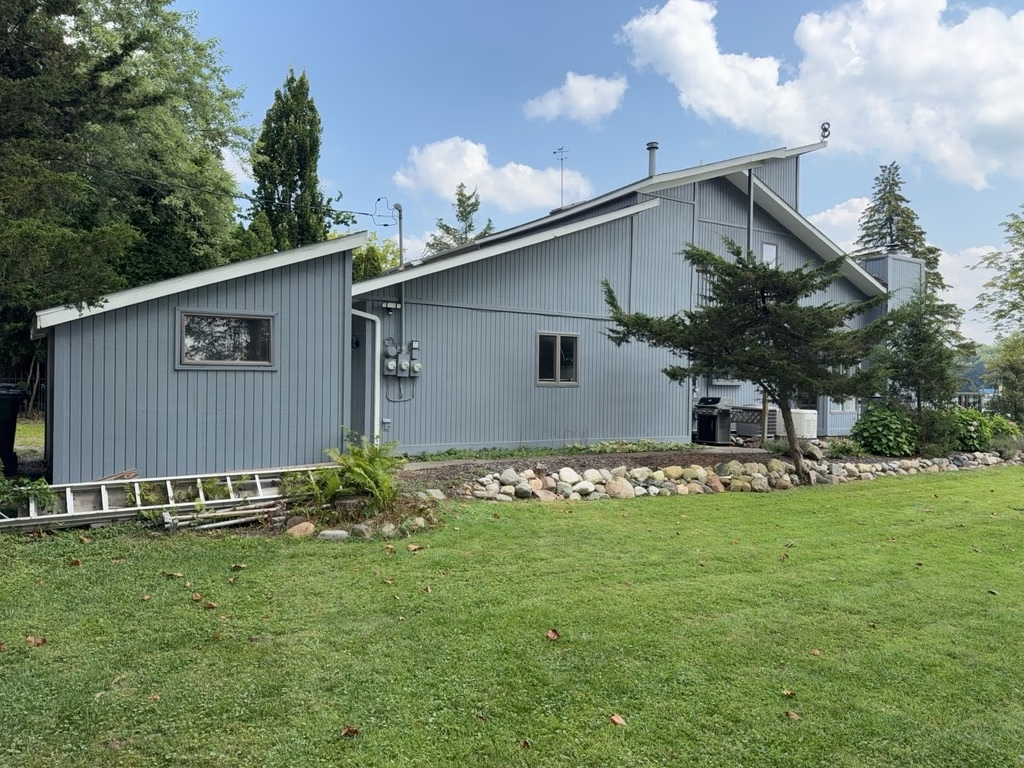
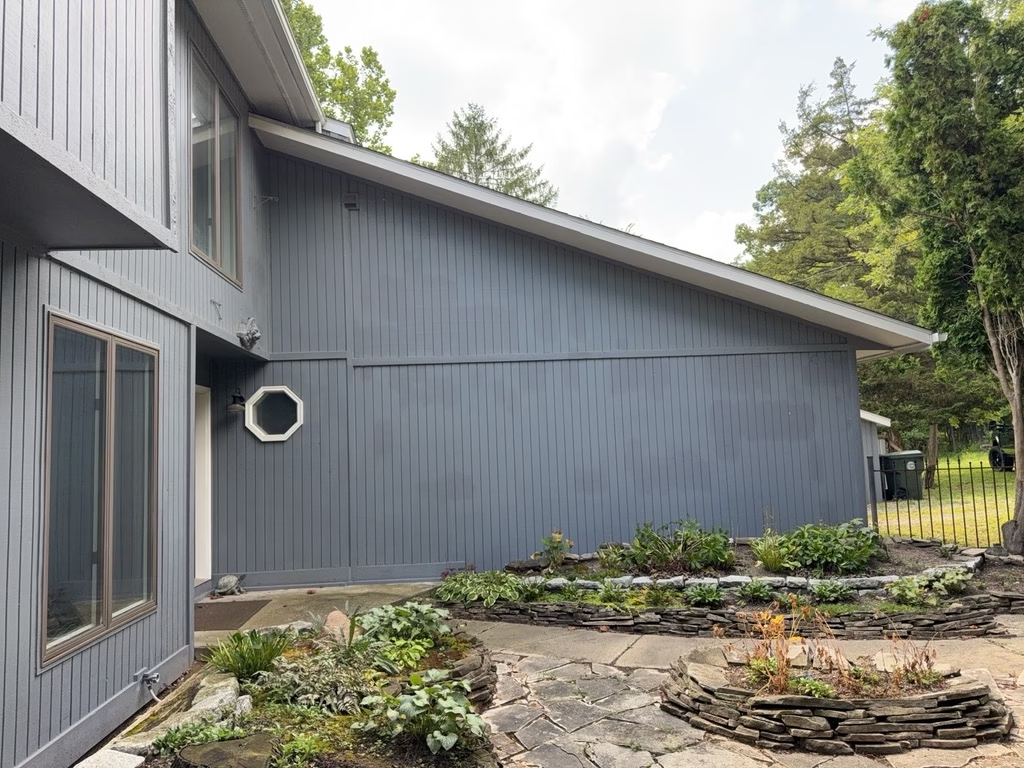
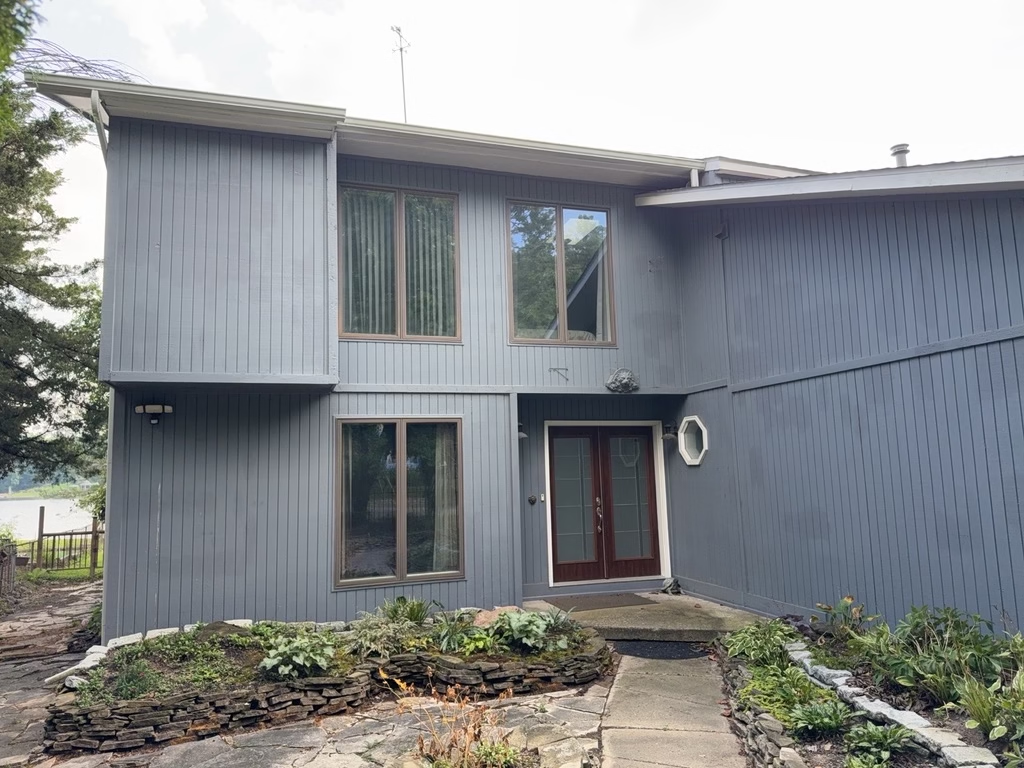
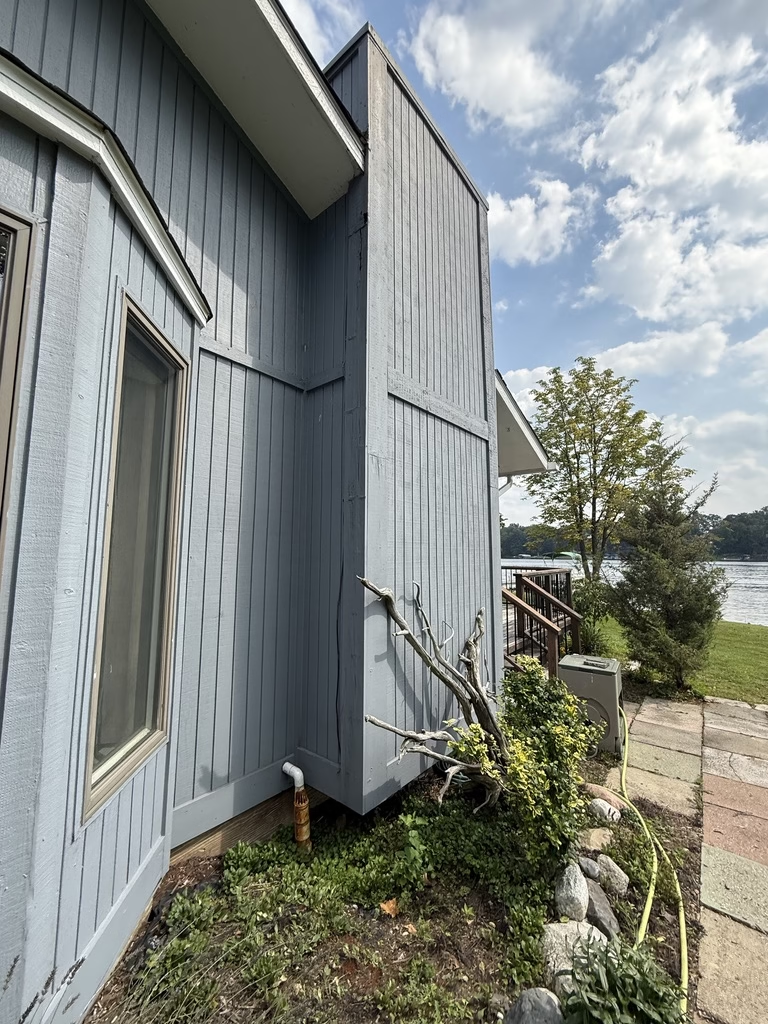
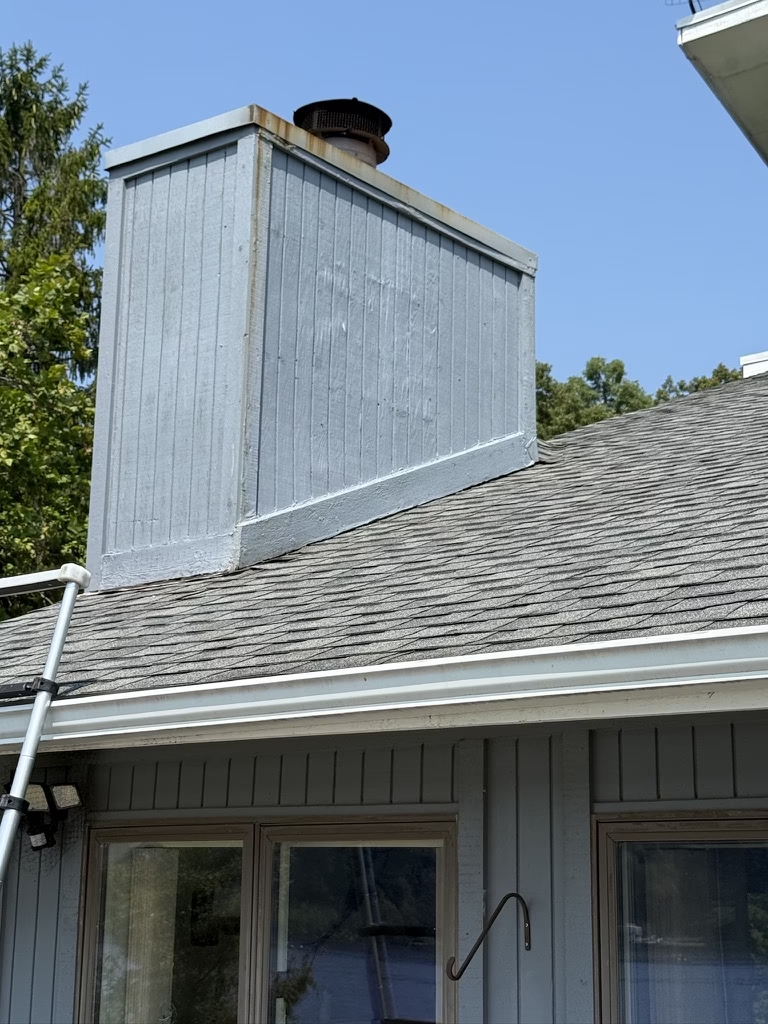
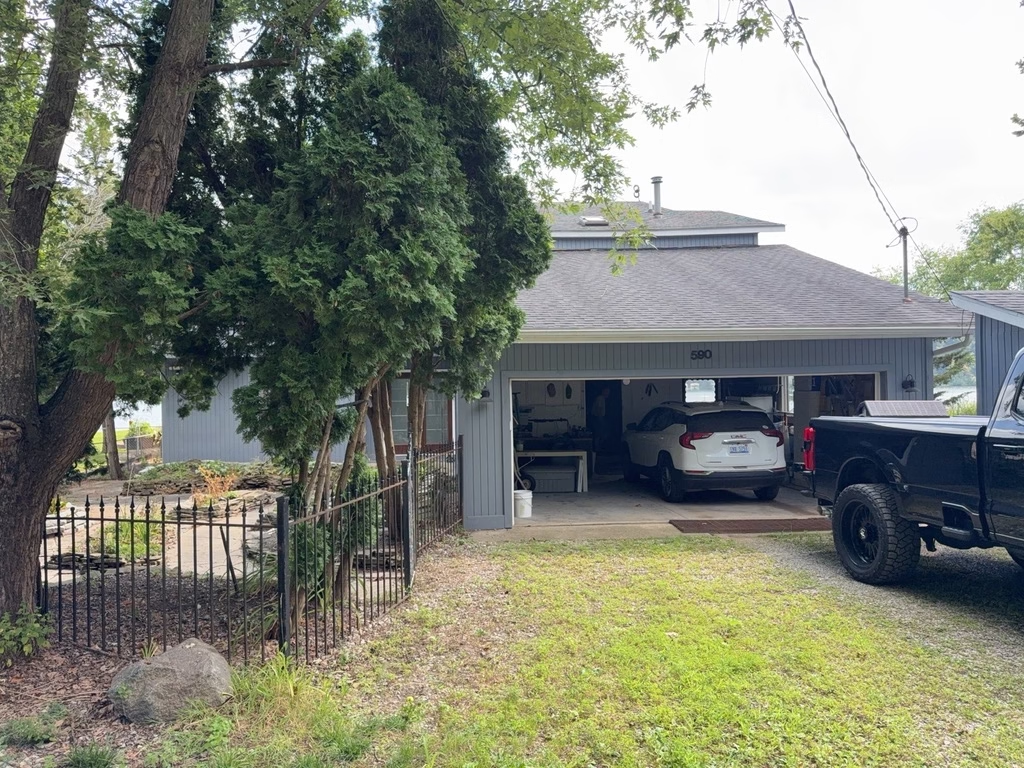
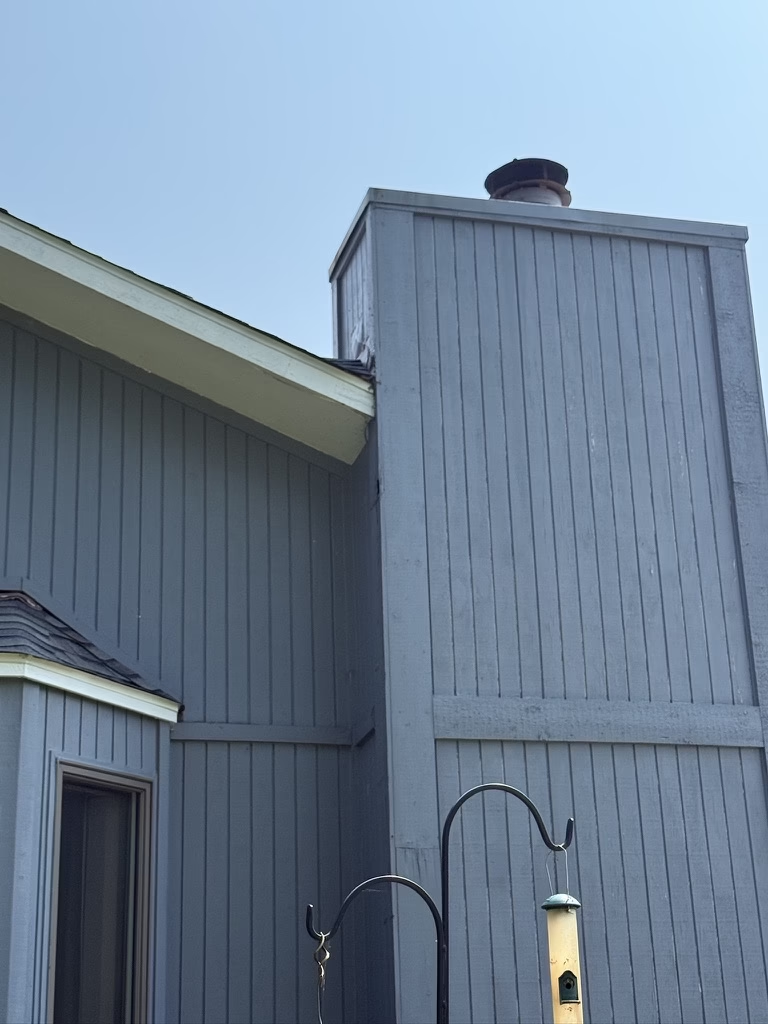
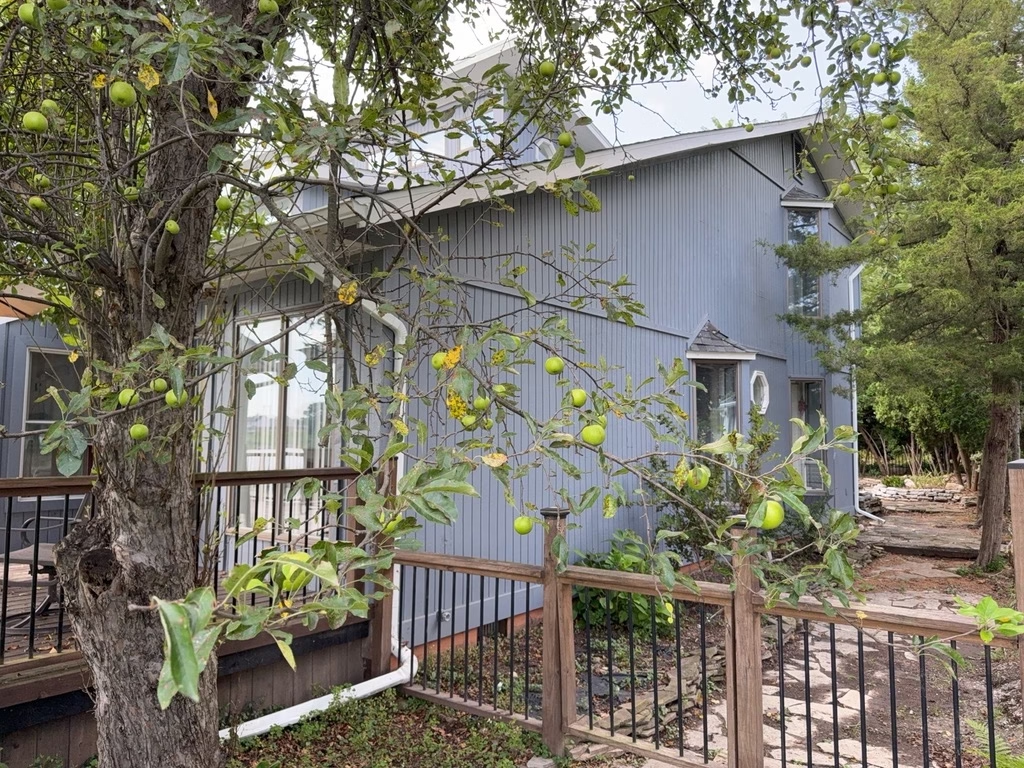
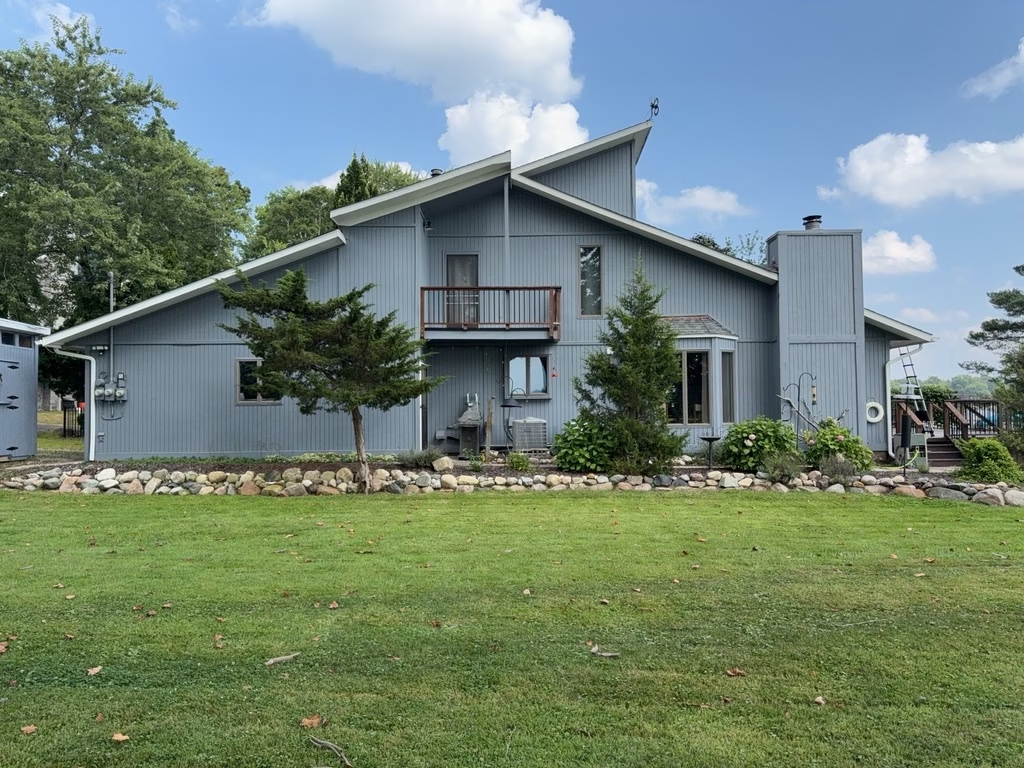
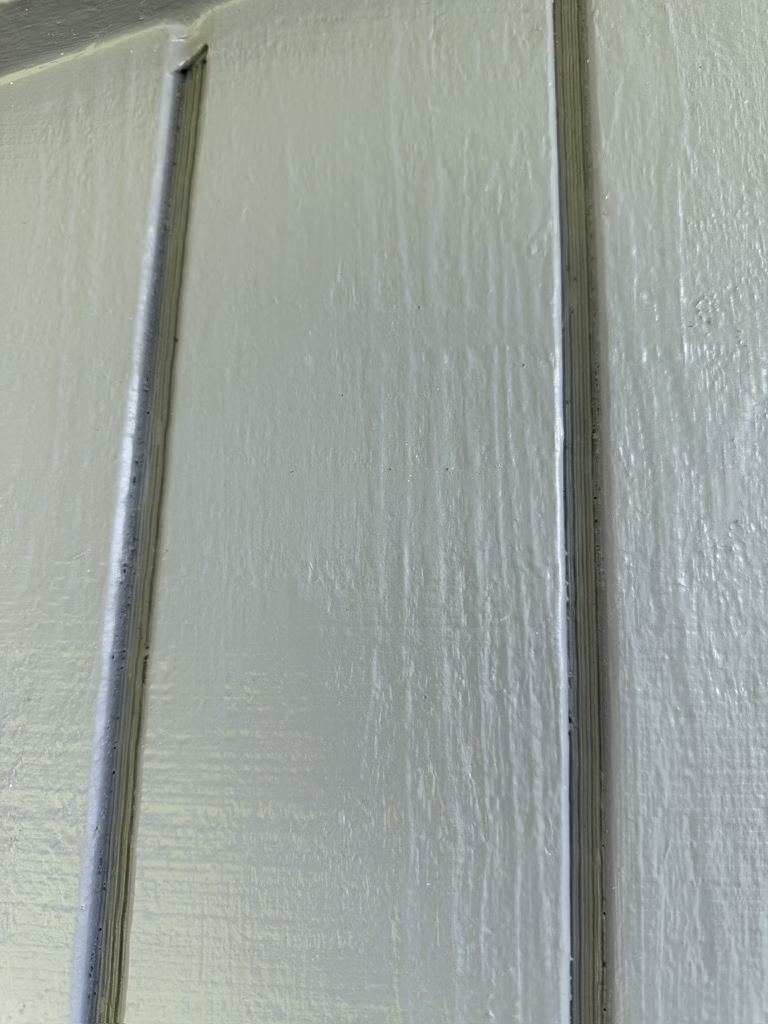
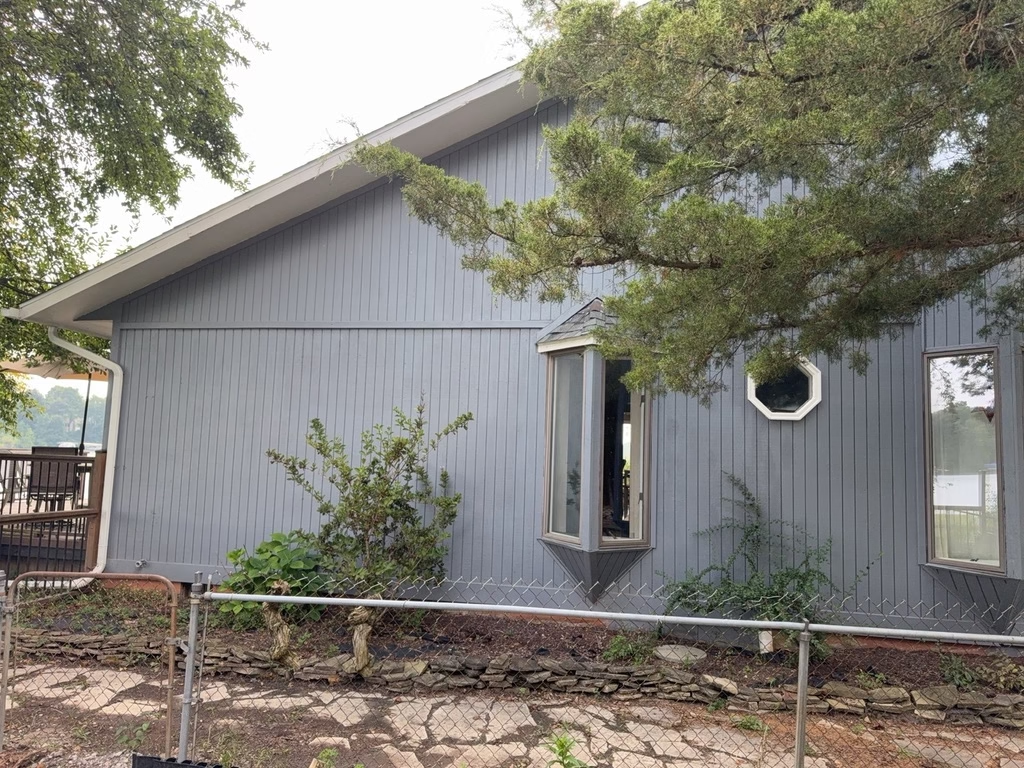
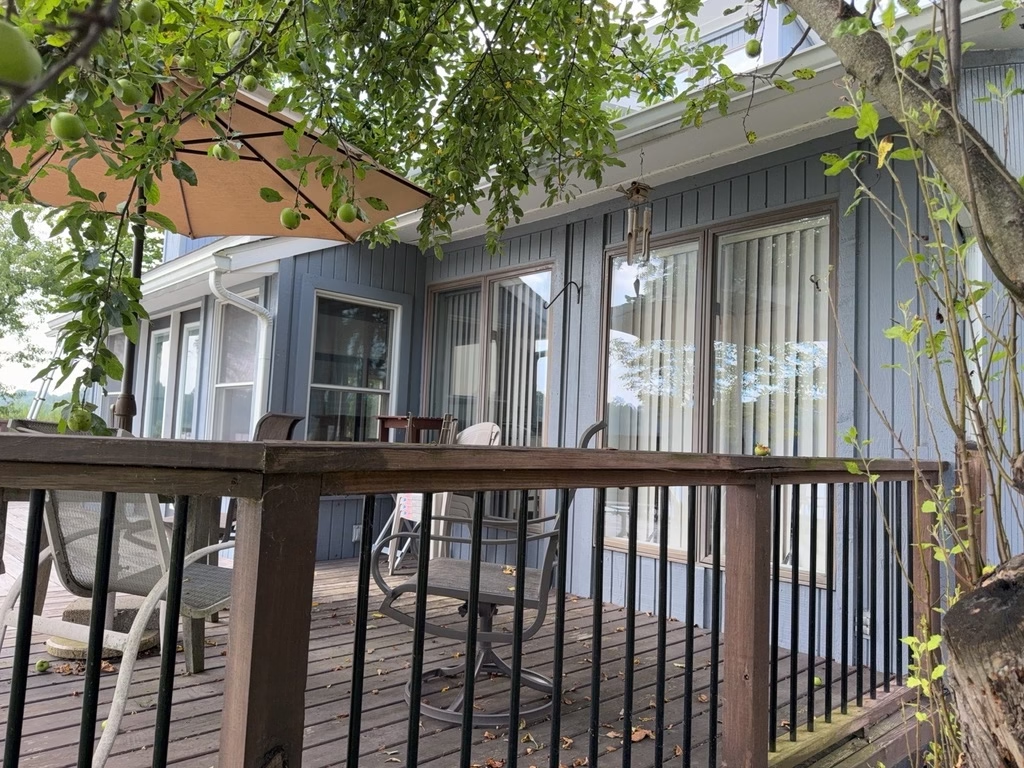
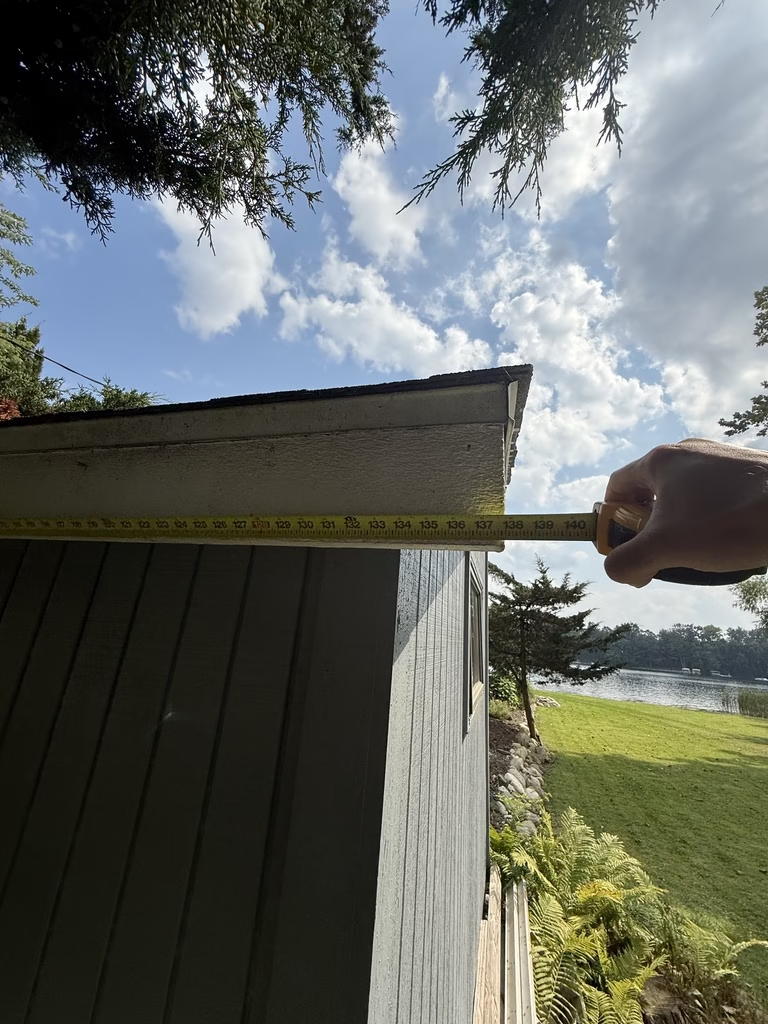
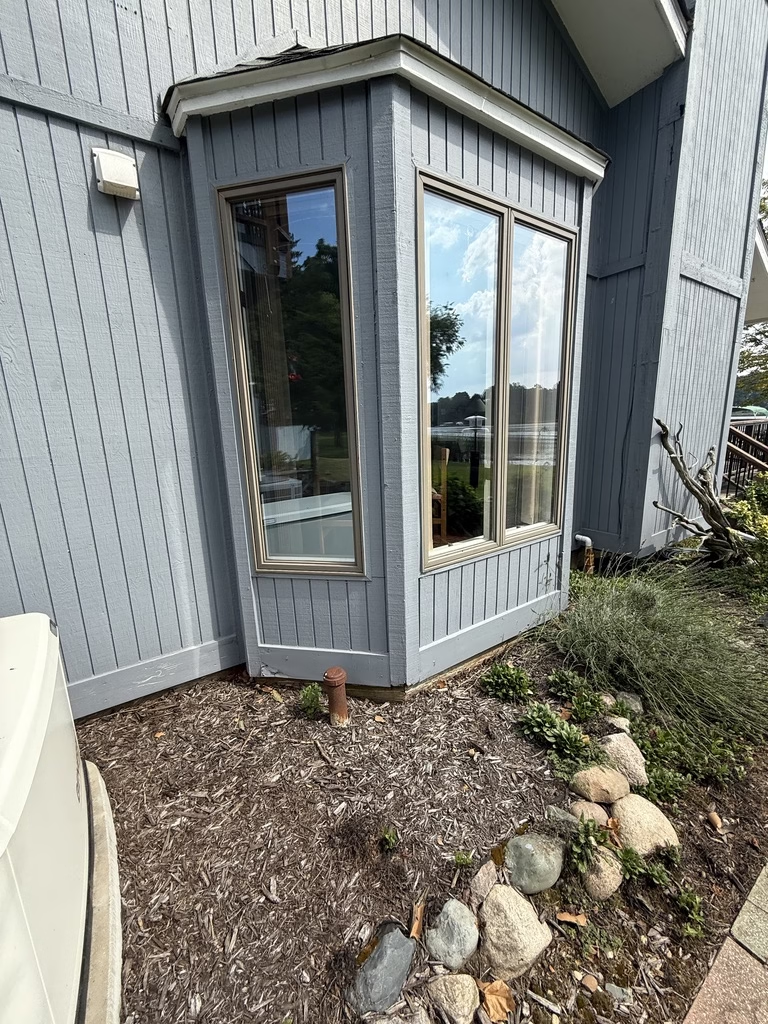
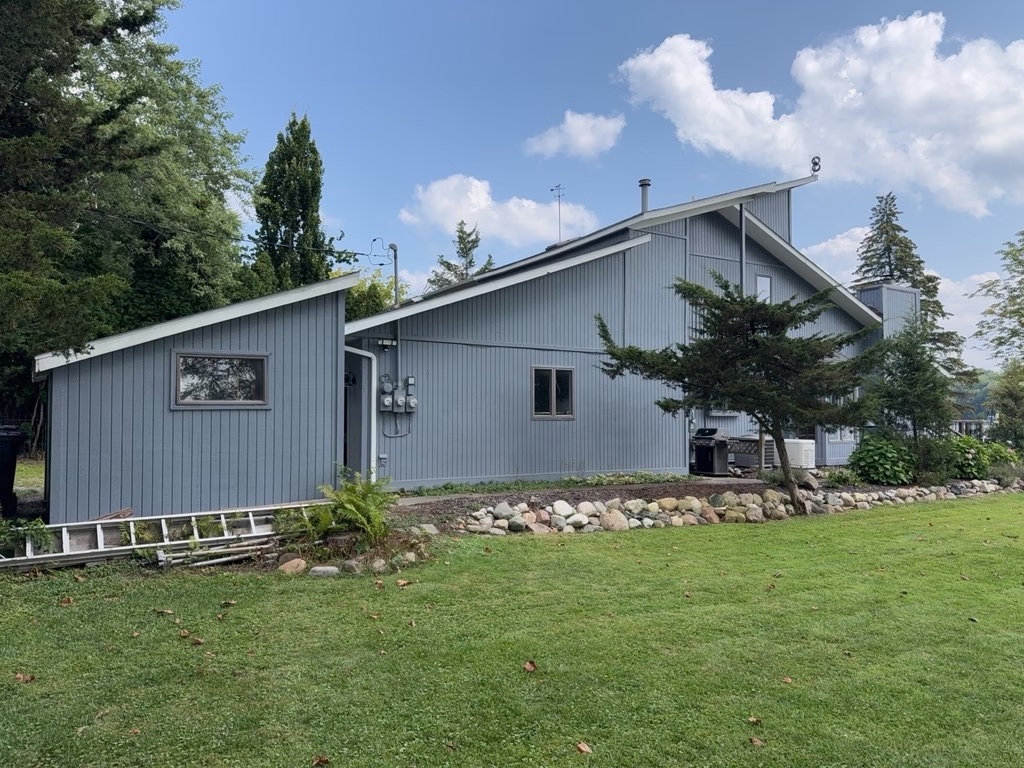
The exterior showed a combination of:
- Deteriorated fascia and wood trim
- Aging T1-11 siding
- Damaged wall materials in select locations
- Soffit ventilation that needed improvement
- Roof-to-wall and exterior transition details that needed attention
- Aging gutters and drainage components
- Exterior penetrations, windows, doors, and architectural features that needed to be properly integrated into the new siding system
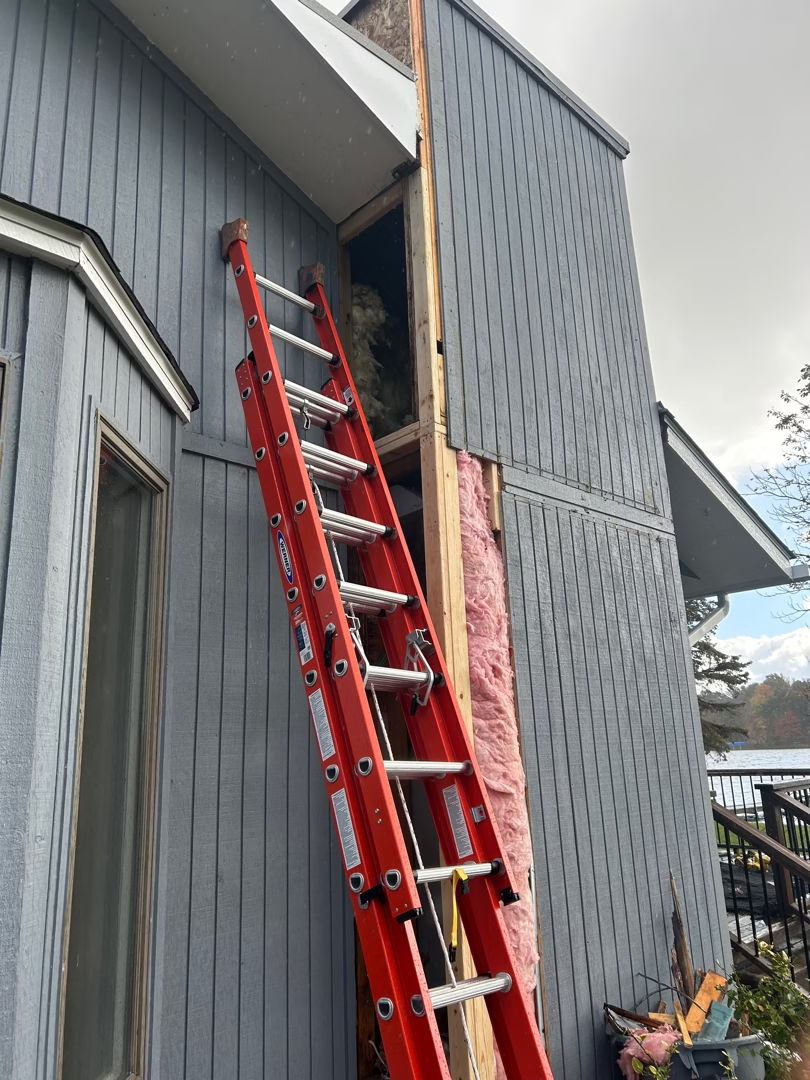
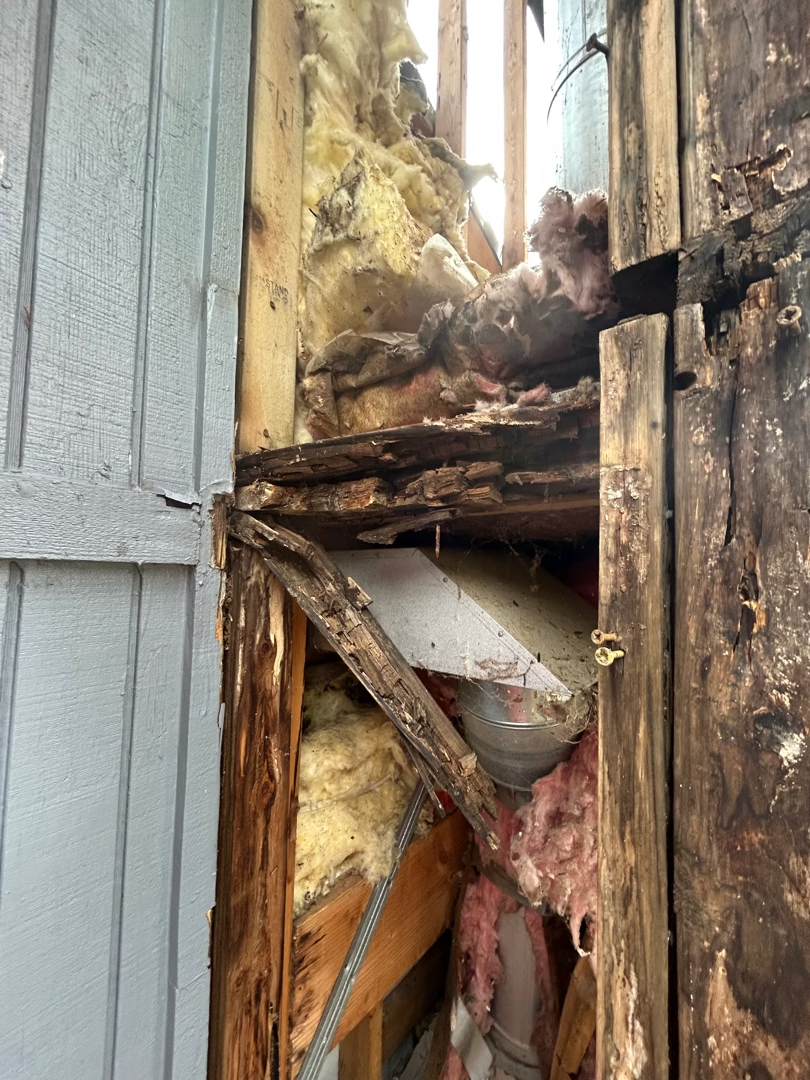
Some additional deterioration only became visible as the renovation progressed.
Instead of covering those areas, damaged materials were repaired or replaced before the new exterior finishes were completed.
Why a Simple Paint and Wood-Rot Repair Was Not Enough
The original concern included wood repair and exterior painting.
But replacing deteriorated trim while leaving the larger siding and water-management conditions unchanged would have addressed only part of the problem.
The existing T1-11 remained structurally useful in many areas, but it needed to be resecured and incorporated correctly into the new wall assembly. Roofline transitions, wall penetrations, soffit ventilation, windows, doors, fascia, and drainage also had to be considered before the new exterior could go on.
That changed the project from a maintenance job into a coordinated exterior renovation.
The Renovation Plan
The Exterior Zone developed the project around several connected systems:
- Remove the existing gutters and prepare the exterior
- Replace deteriorated fascia and other damaged materials
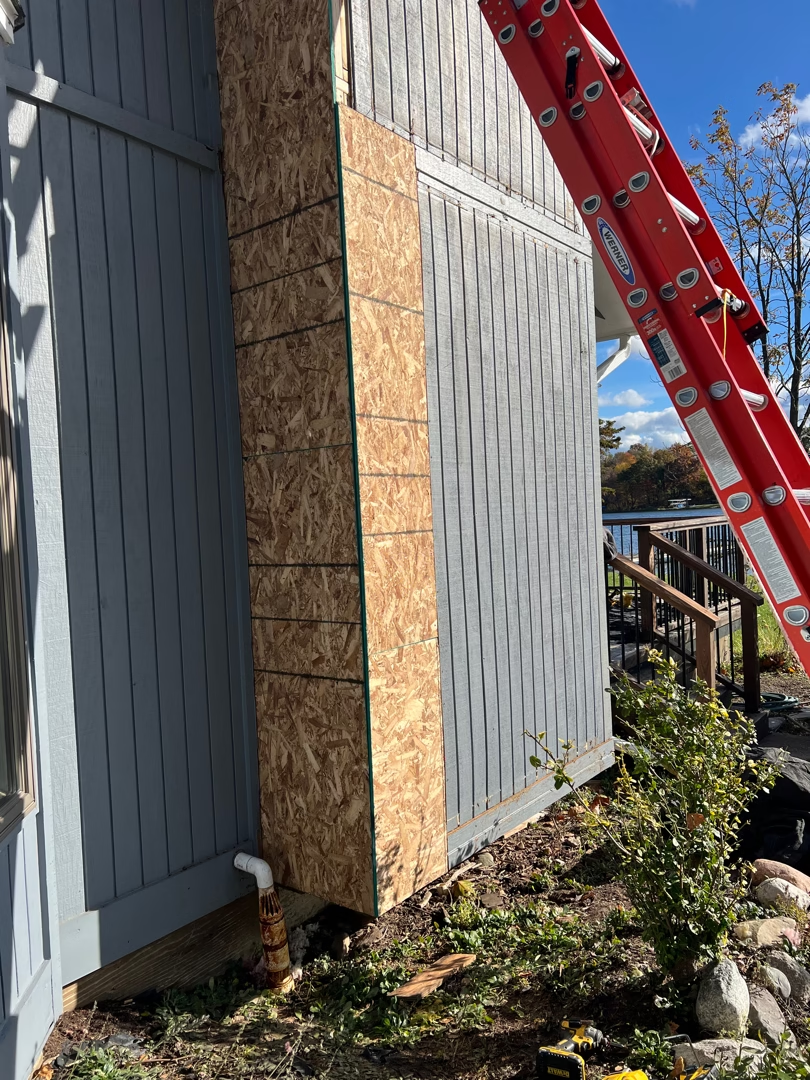
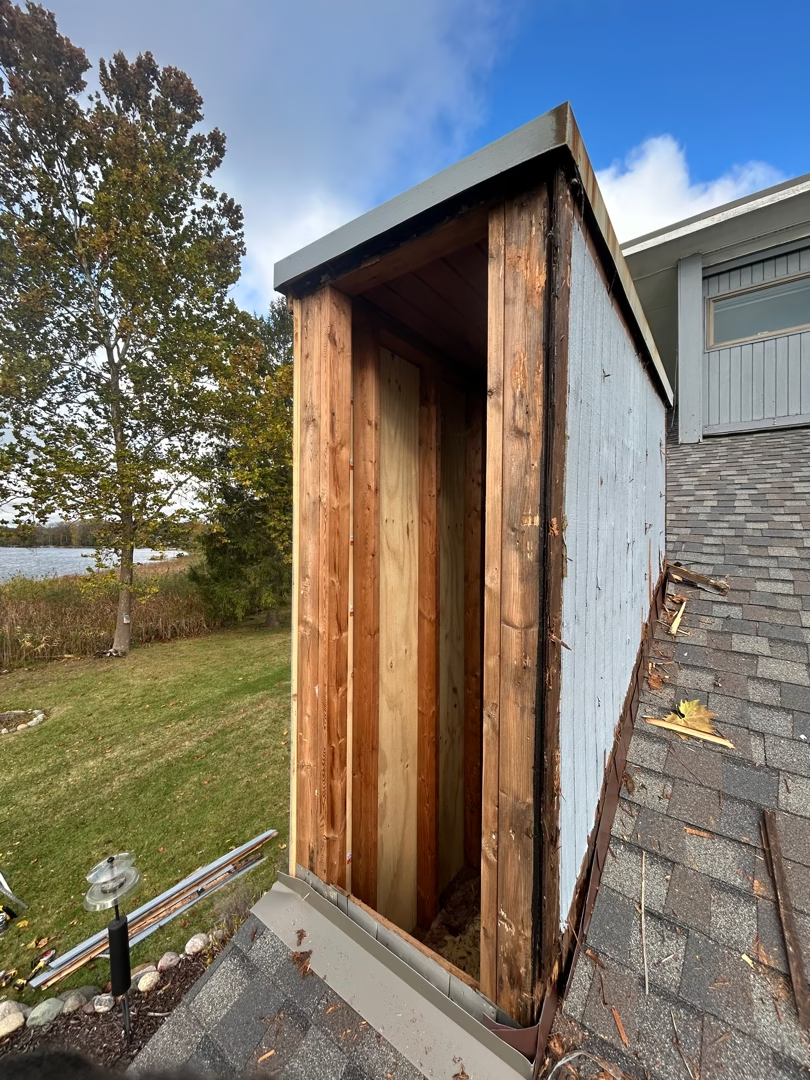
- Secure the existing T1-11 wall surface
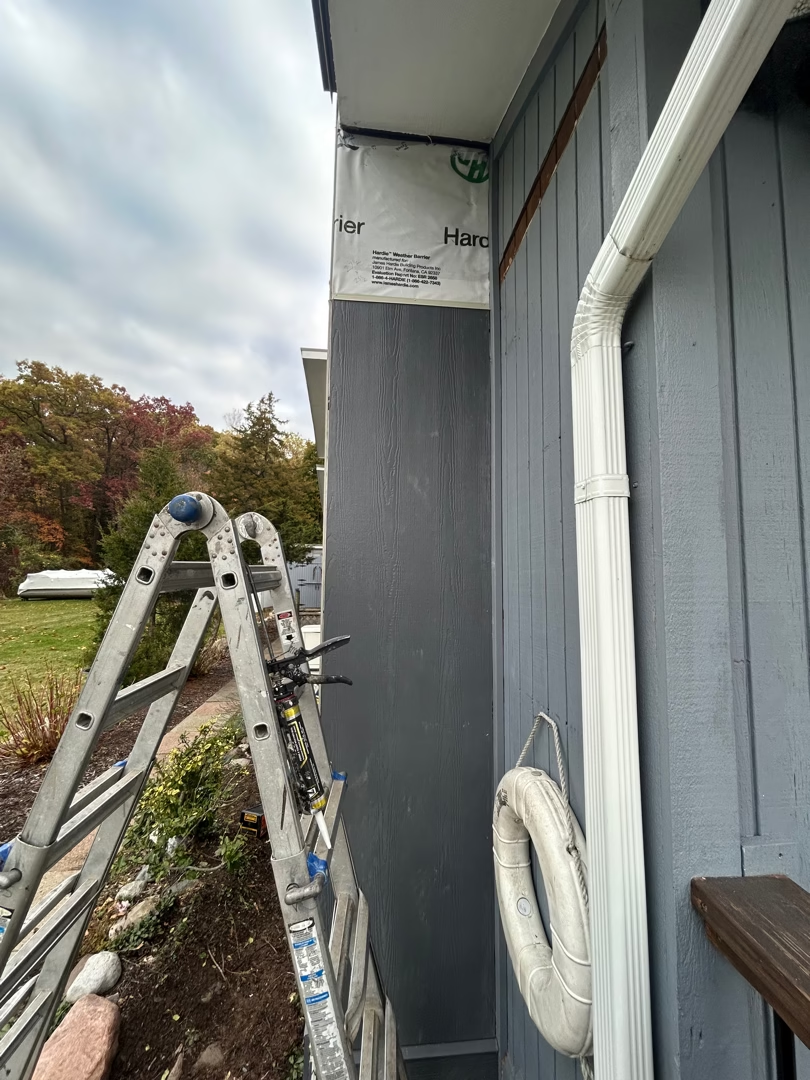
- Install new weather-resistant barrier and flashing
- Improve soffit intake and roof-edge exhaust ventilation
- Install James Hardie siding and trim
- Correct roof-to-wall and exterior transition details as they were exposed
- Restore and paint remaining exterior components
- Install a new 6-inch gutter and downspout system
- Reinstall exterior lights, outlets, utilities, and accessories
- Complete final cleaning, touch-ups, and quality review
The work progressed around the home in sections so exposed areas could be prepared and protected as installation continued.
Repairing the Existing Exterior
Before the new siding system could be installed, deteriorated materials had to be addressed.
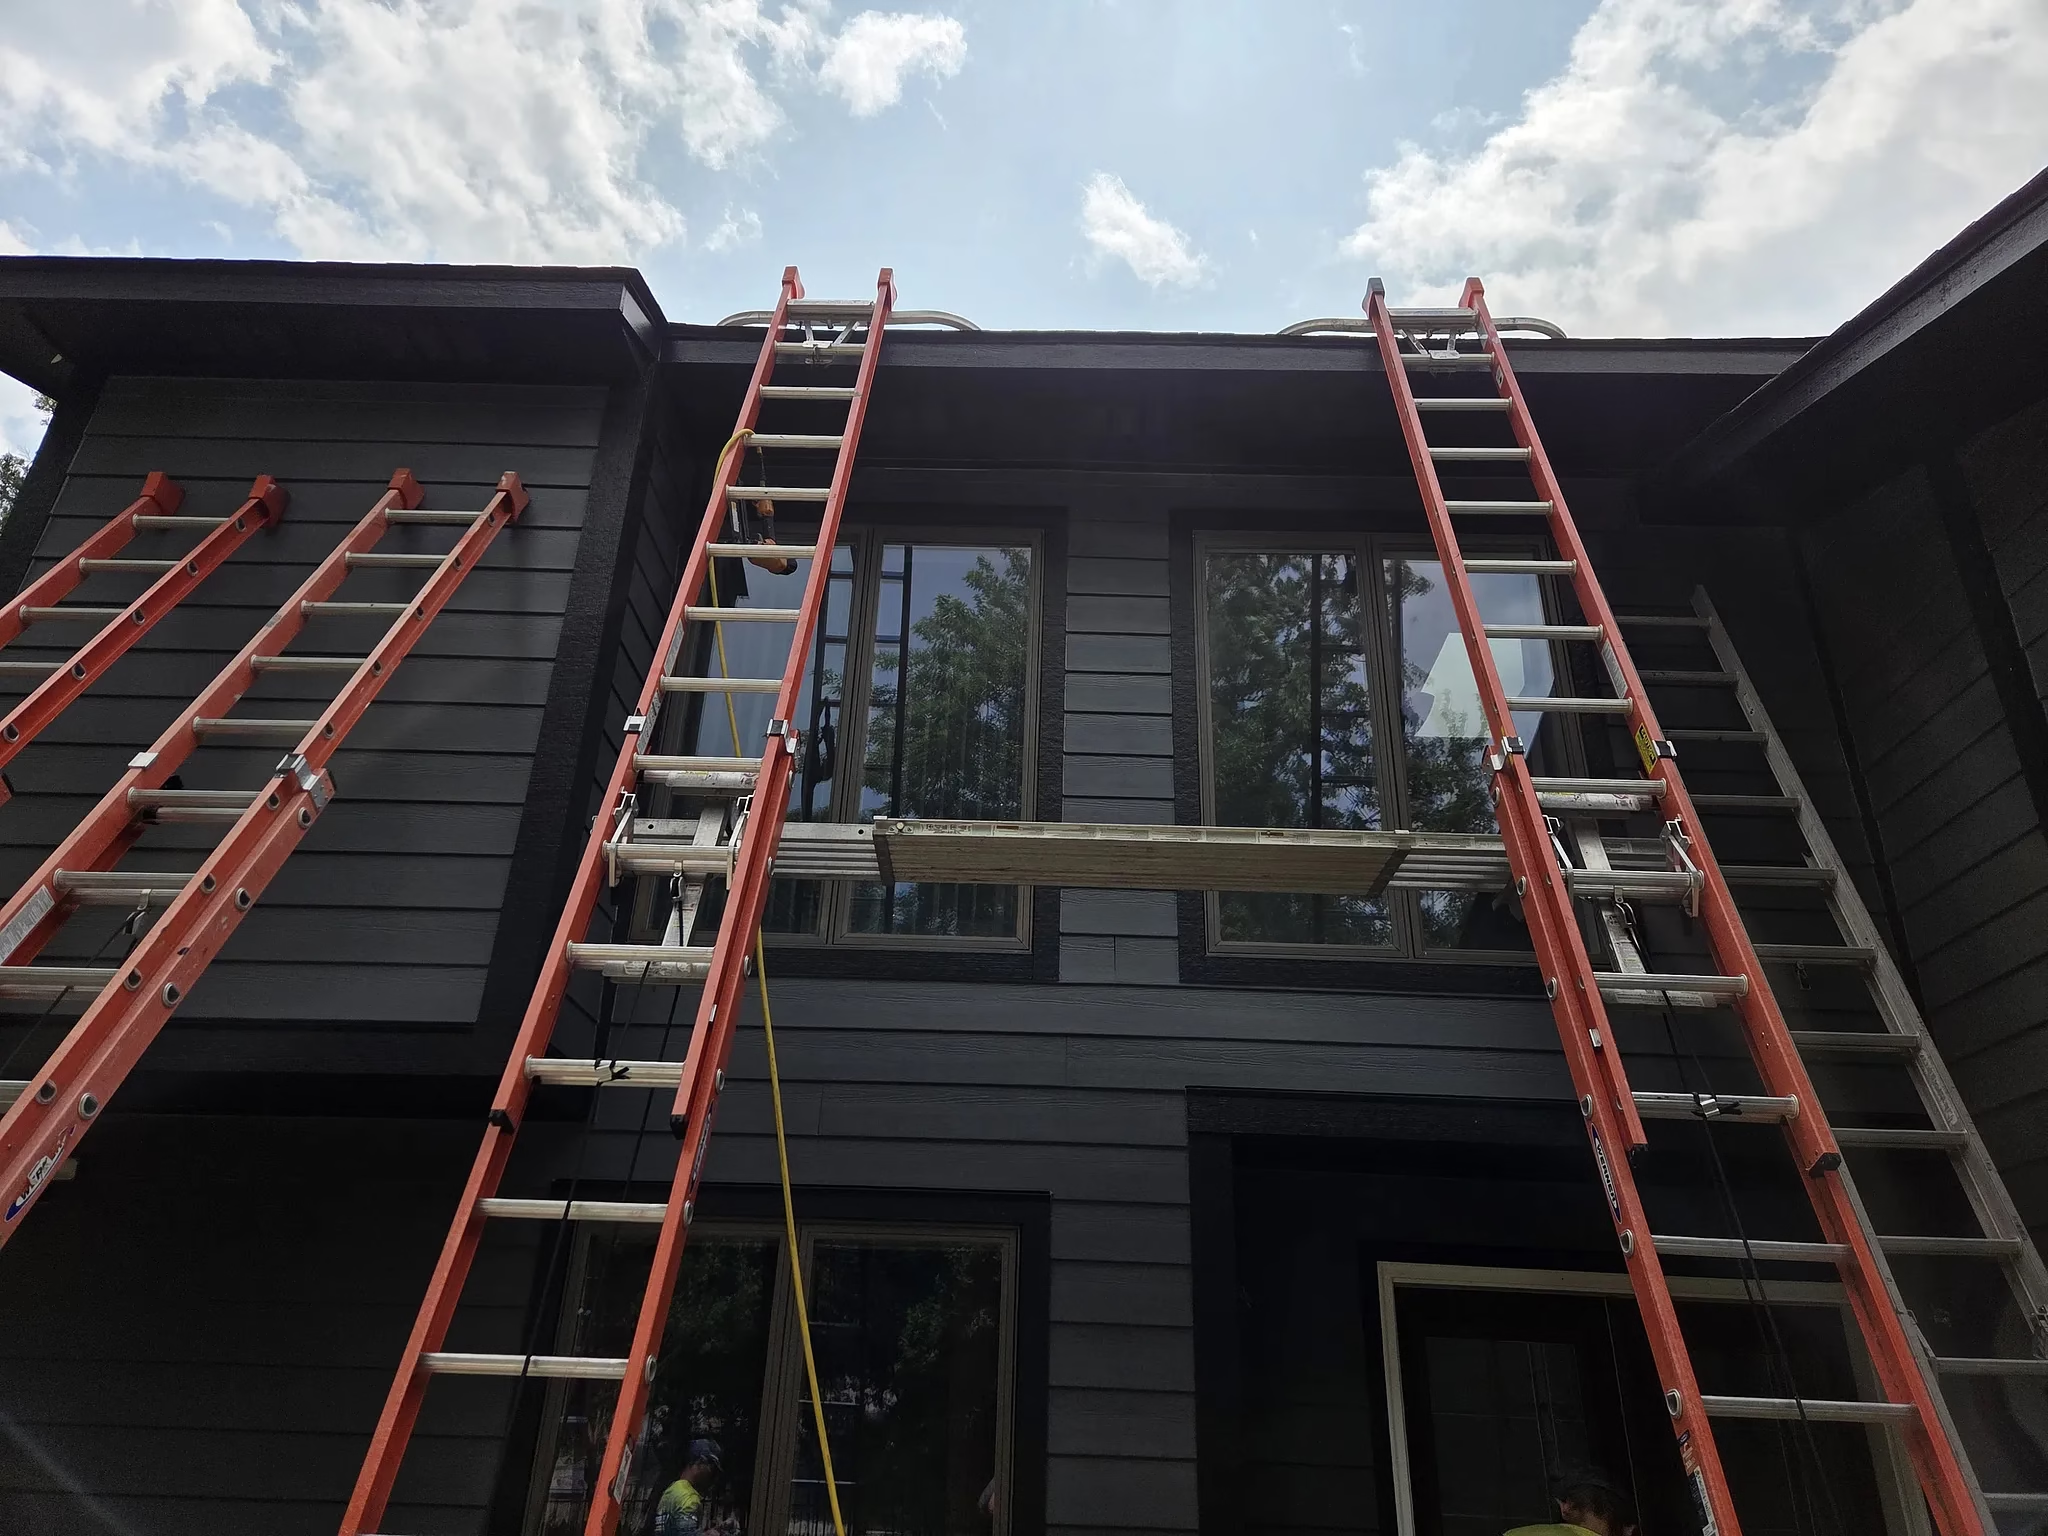
Early in the project, the crew removed the existing gutters, cleaned the exterior, and began replacing rotted fascia.
Field records document significant fascia replacement during the first phase, including approximately 115 linear feet replaced in a single day. Additional fascia replacement was required as the project continued.
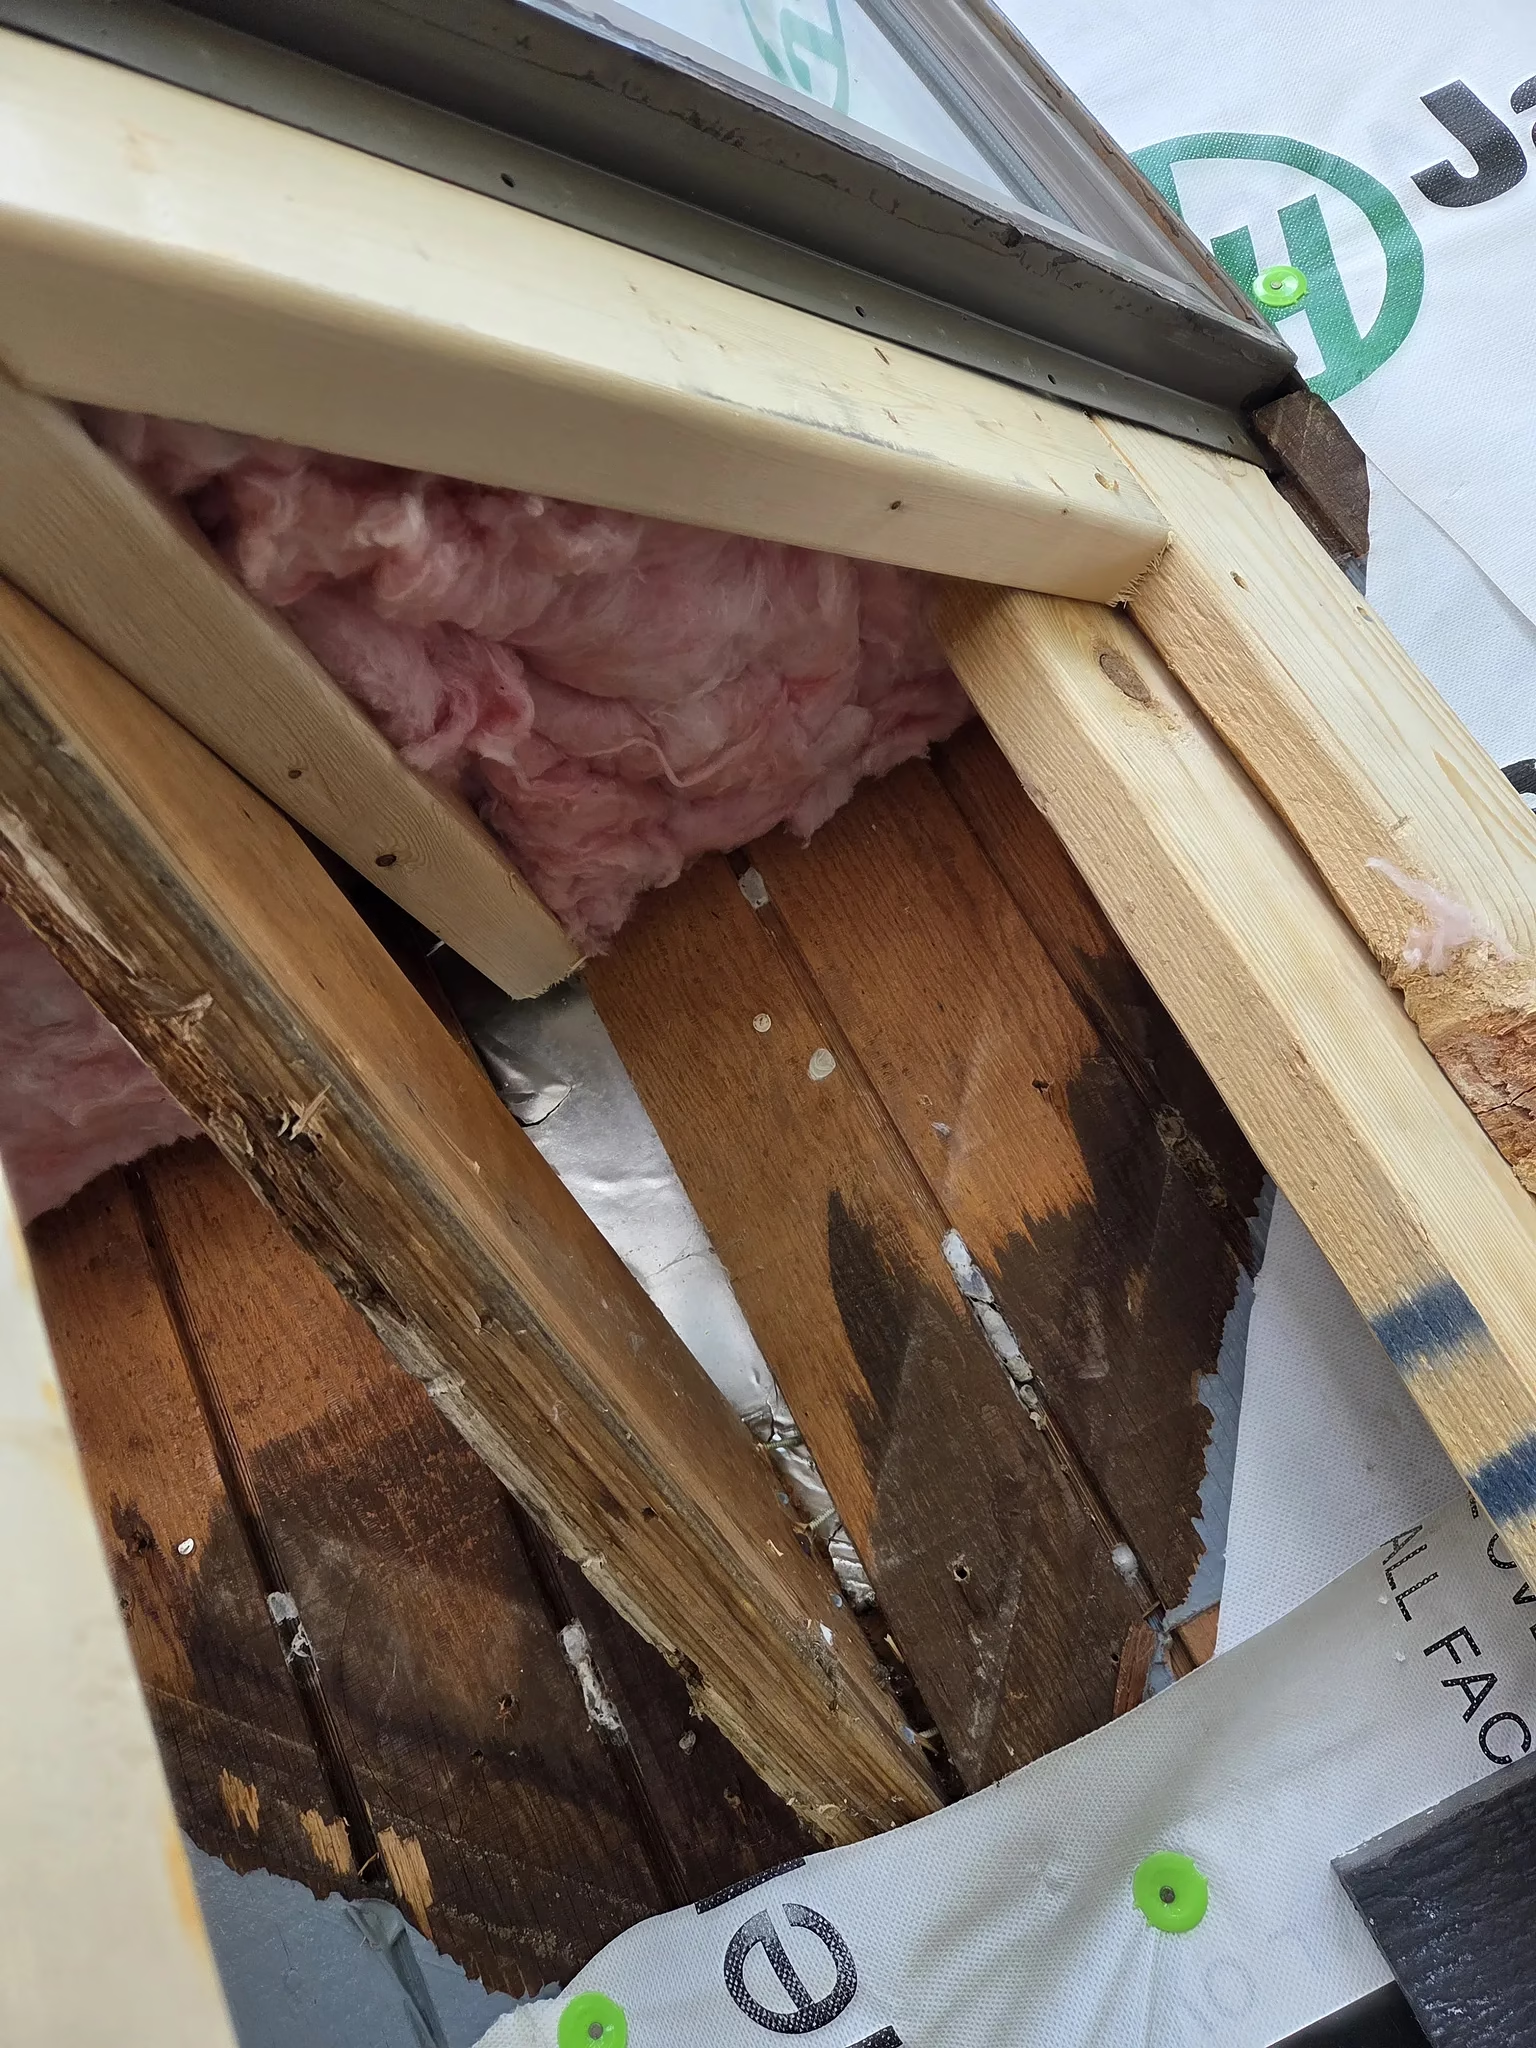
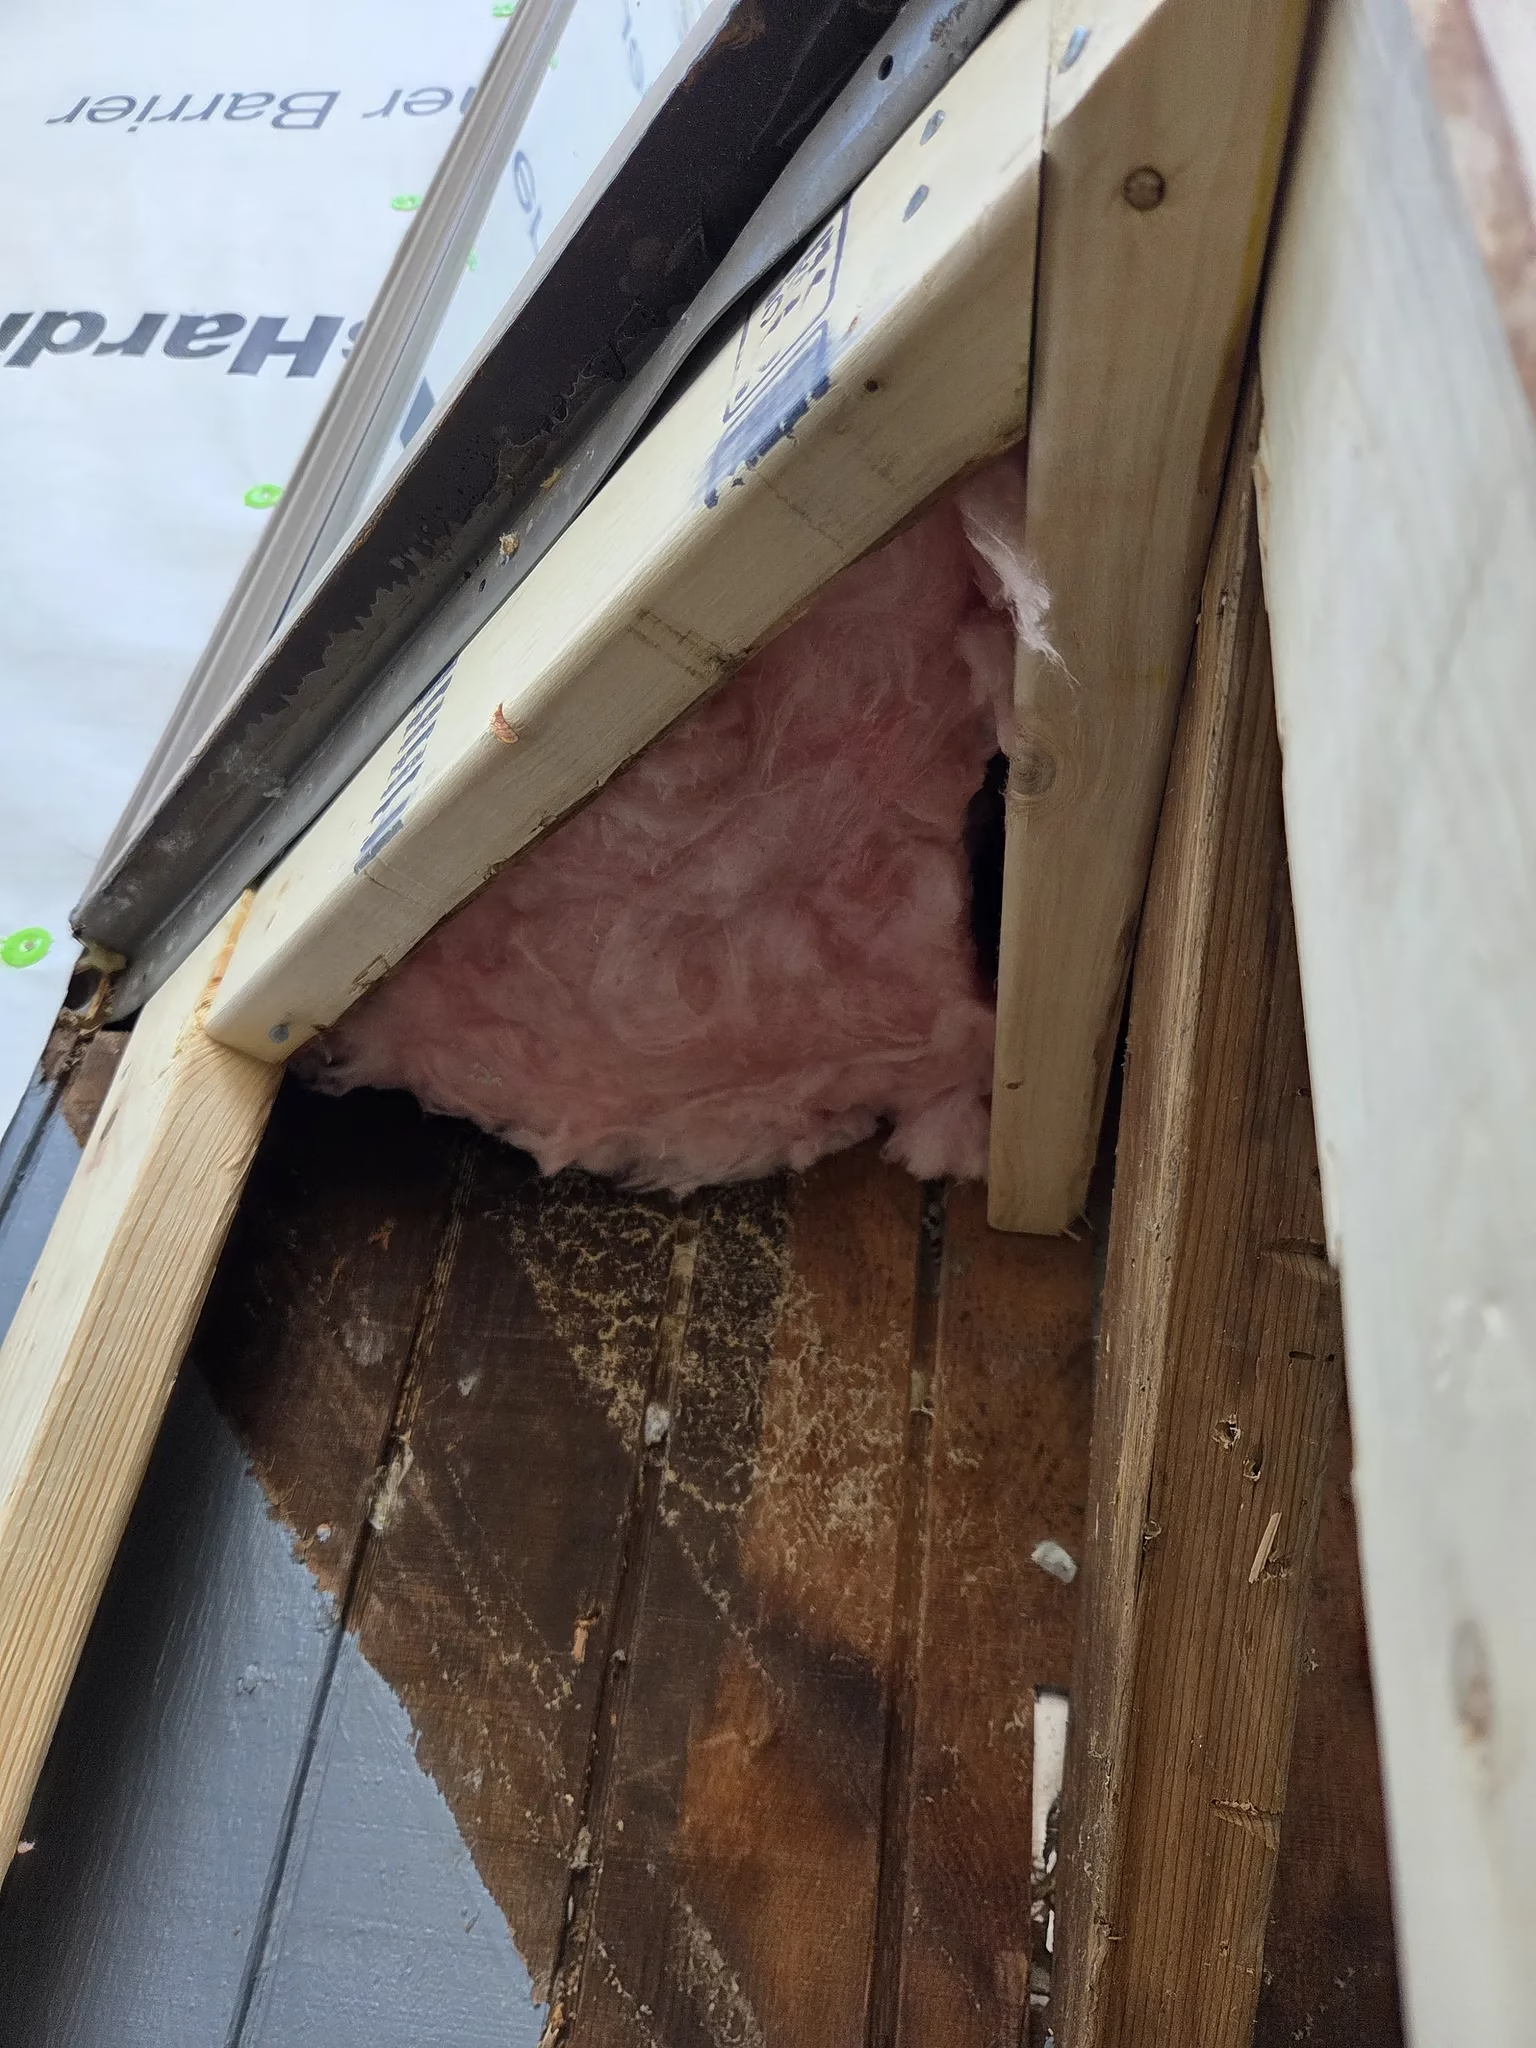
Other conditions were discovered as work progressed.
These included areas where:
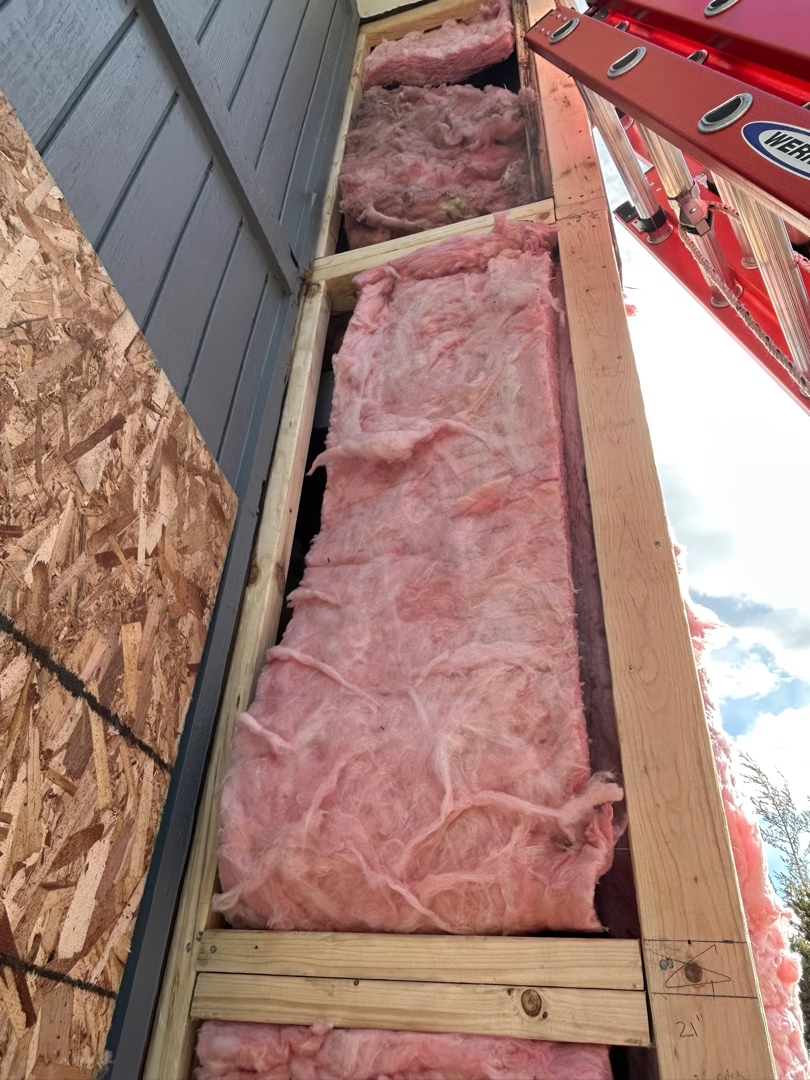
- Existing wall materials needed to be resecured
- Damaged sheathing required replacement
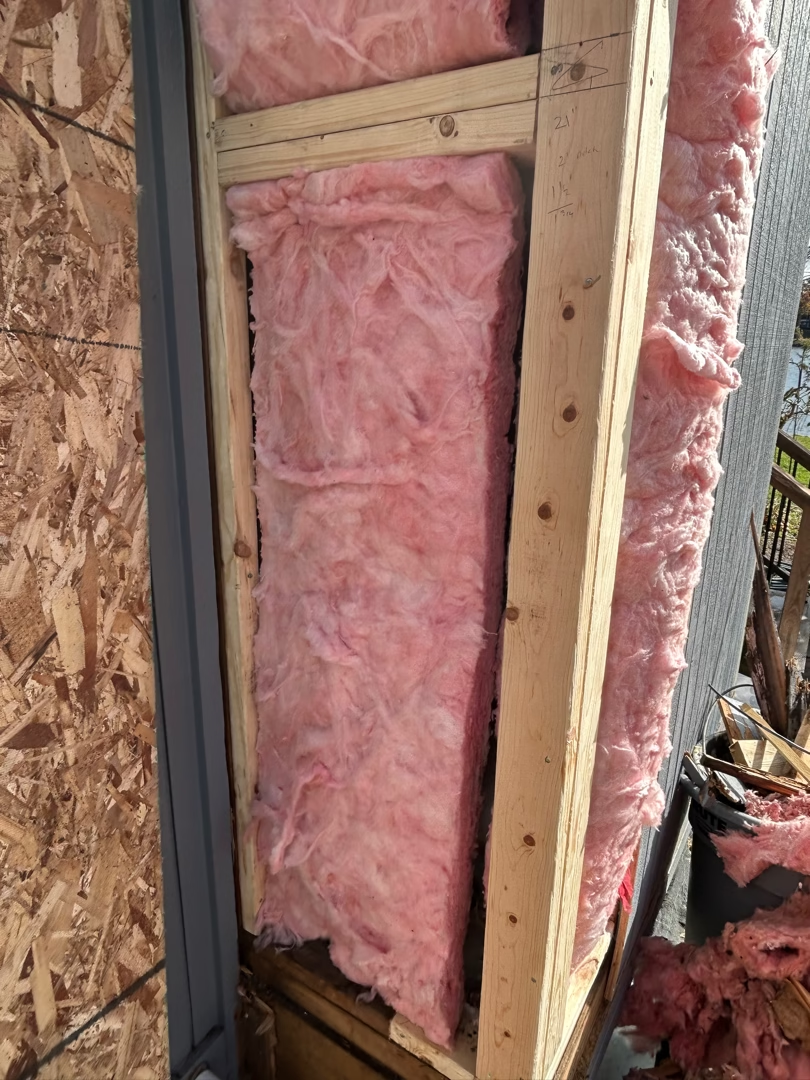
- Bump-outs required additional framing and preparation
- Insulation conditions needed to be checked
- Soffit panels had to be removed and reconstructed
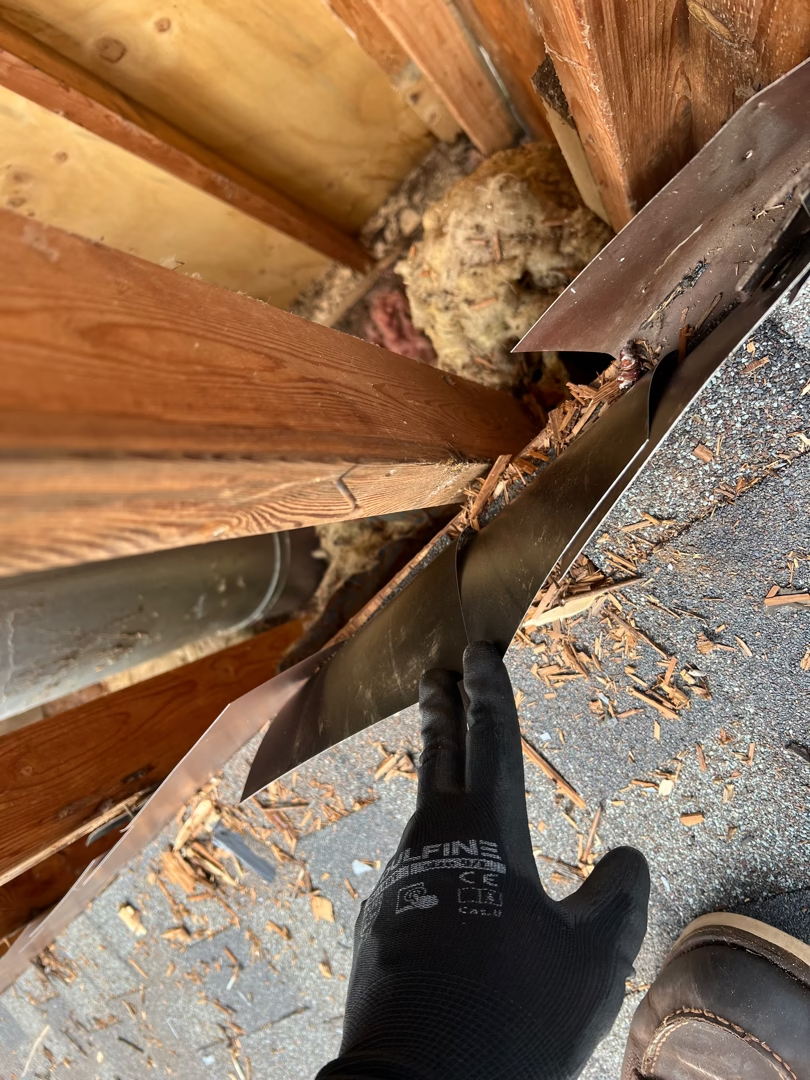
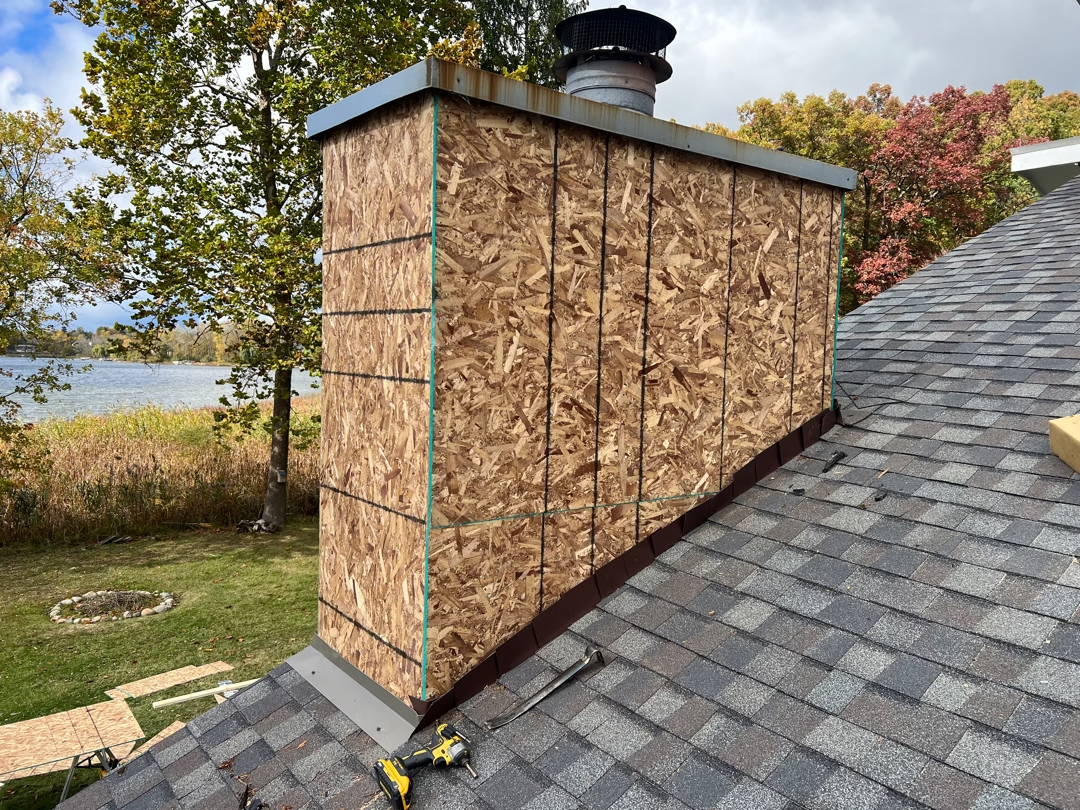
- Roof and wall transitions needed additional flashing
The project was intentionally allowed to adapt to these discoveries rather than covering deteriorated material and moving on.
Preparing the Wall System
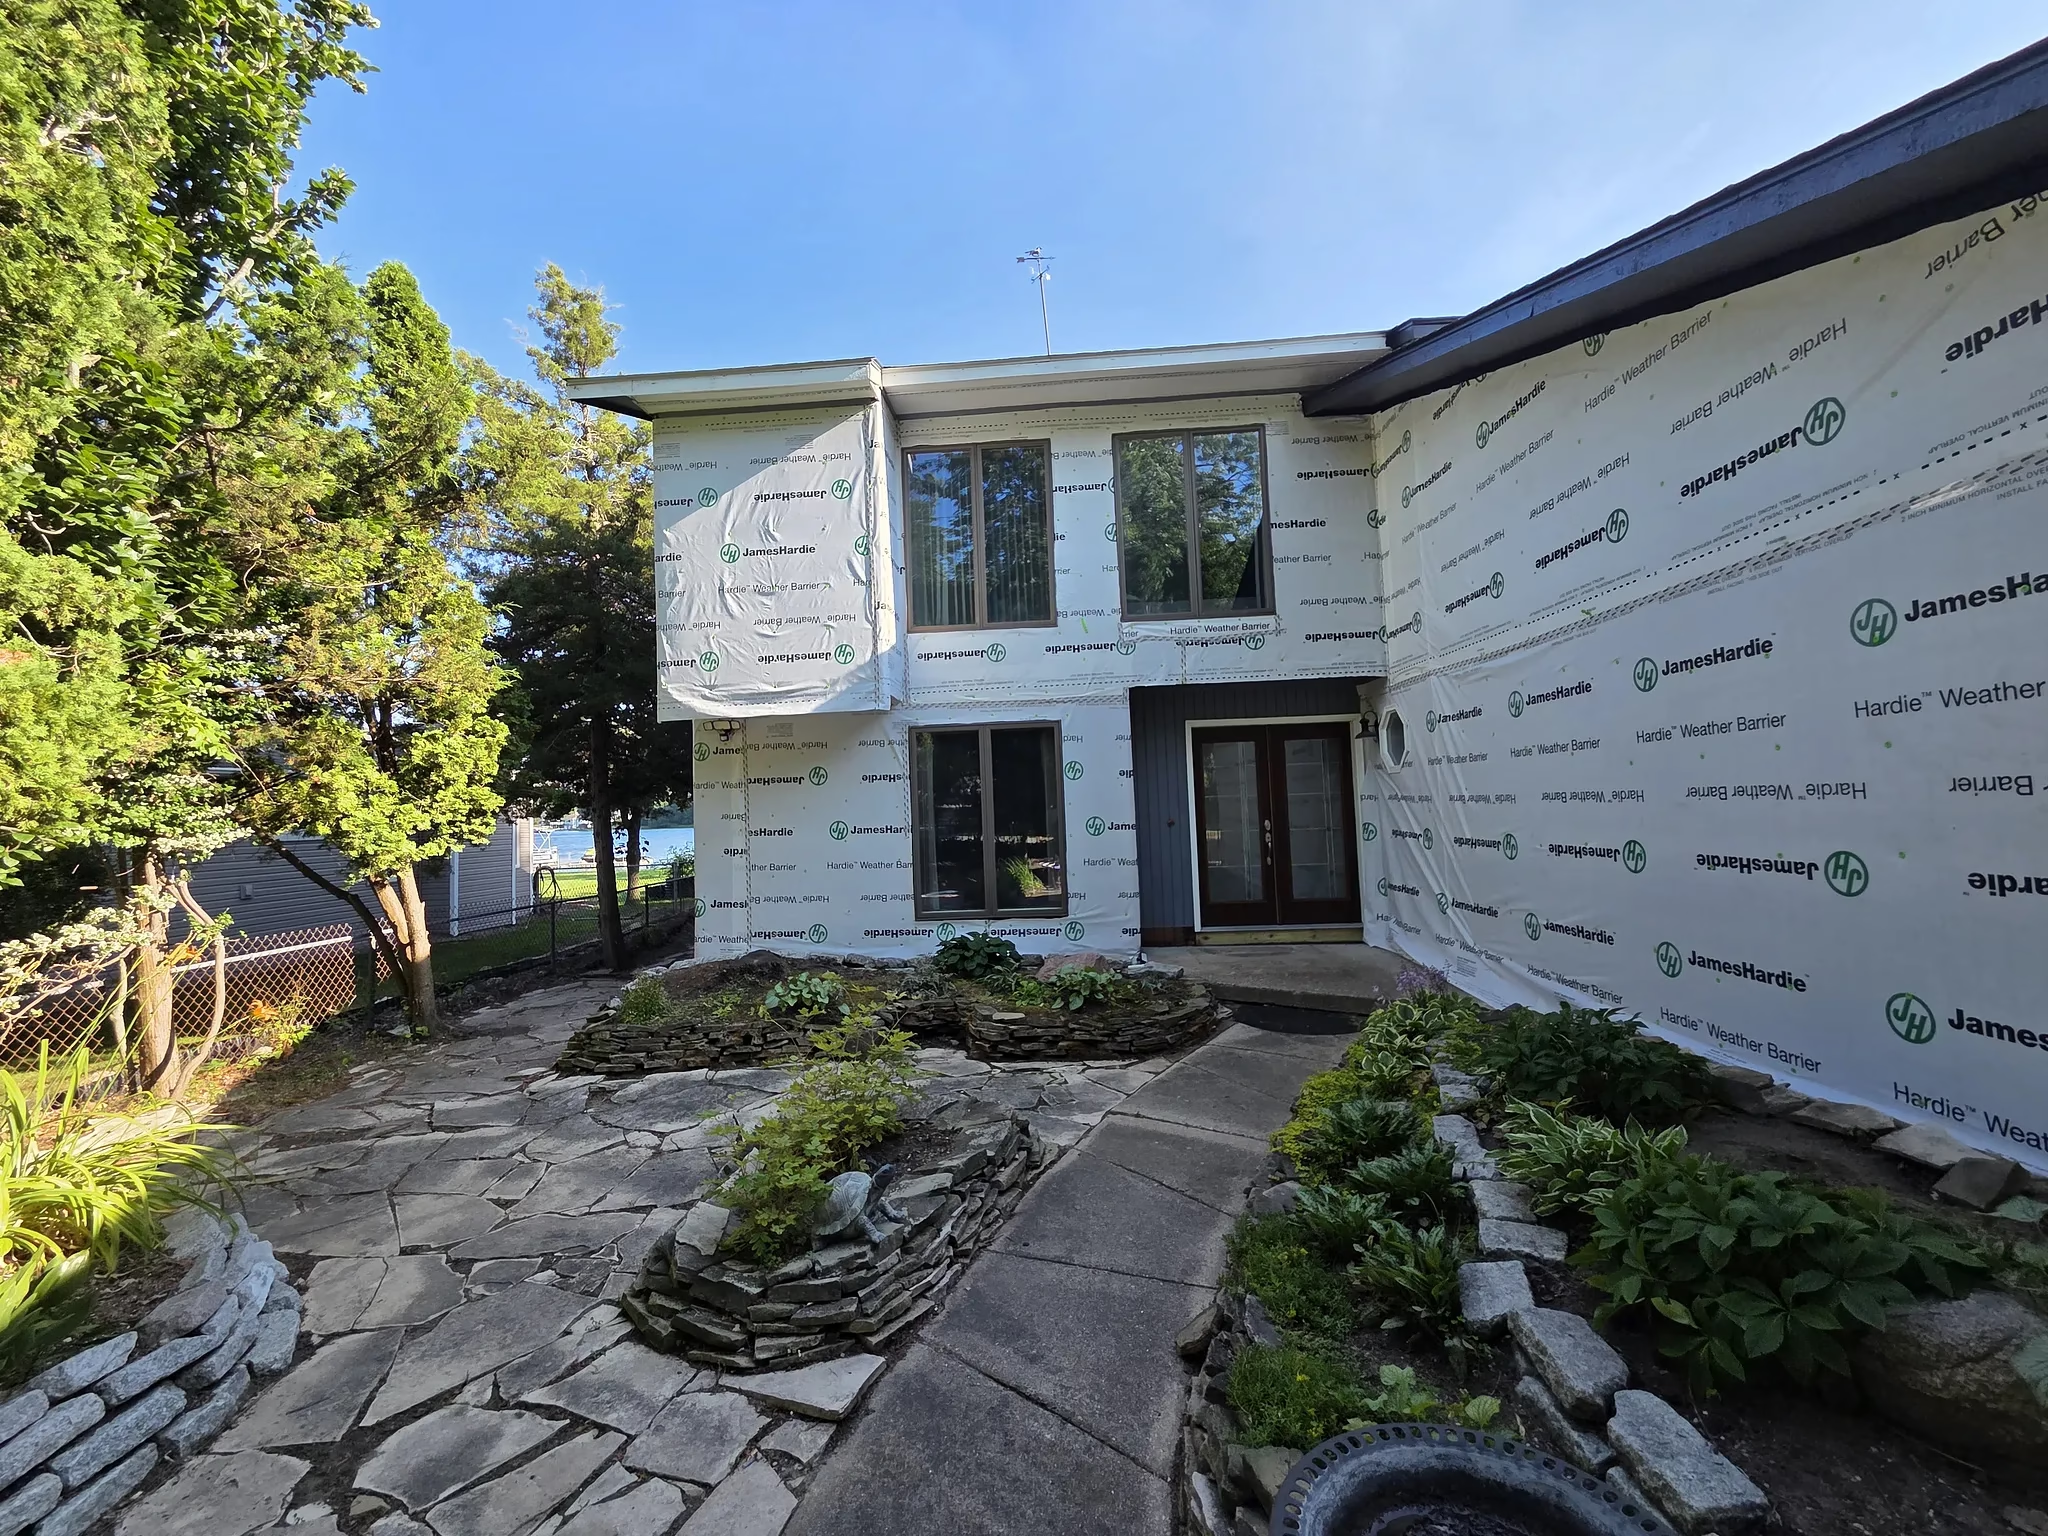
The existing T1-11 siding remained beneath the new siding system where appropriate, but it was not simply covered.
The wall preparation included:
- Removing existing exterior trim
- Renailing existing T1-11 panels
- Replacing damaged sheathing where necessary
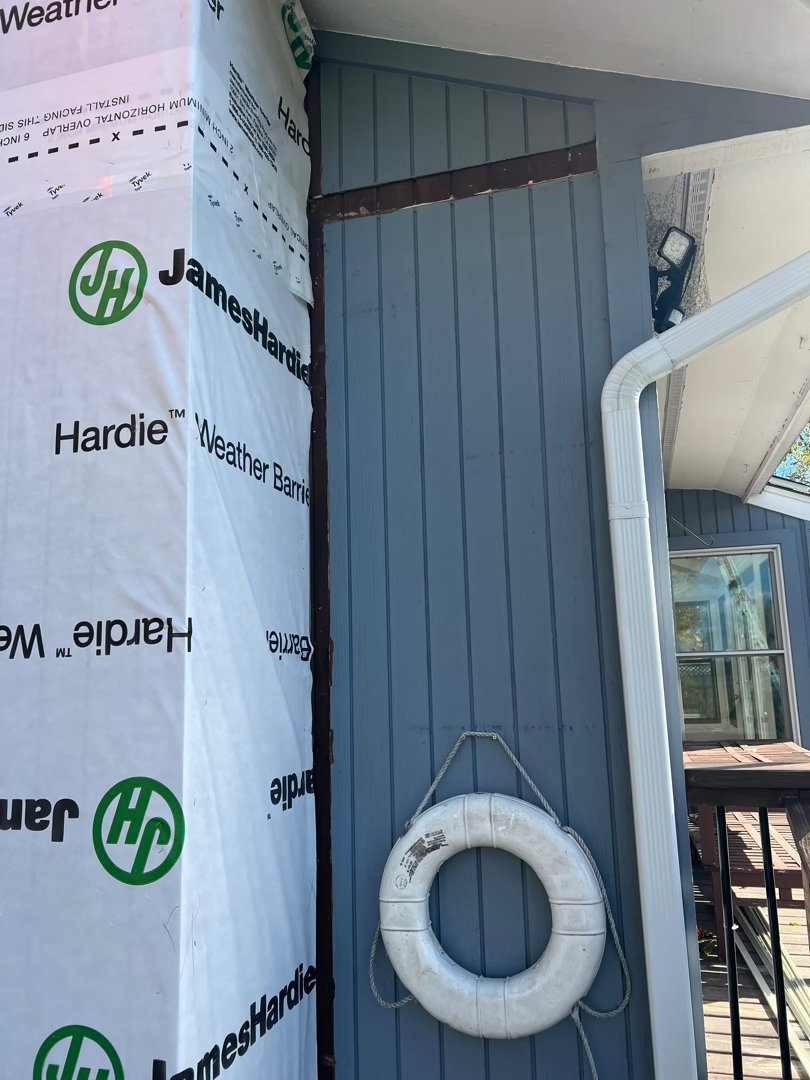
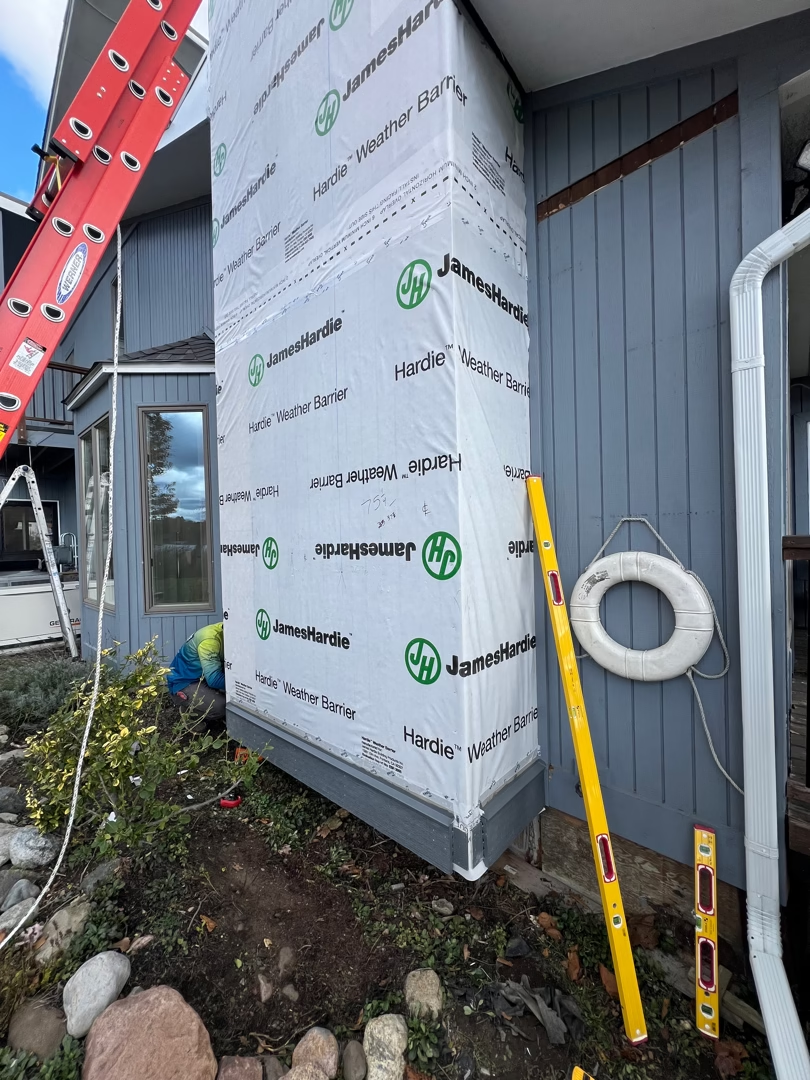
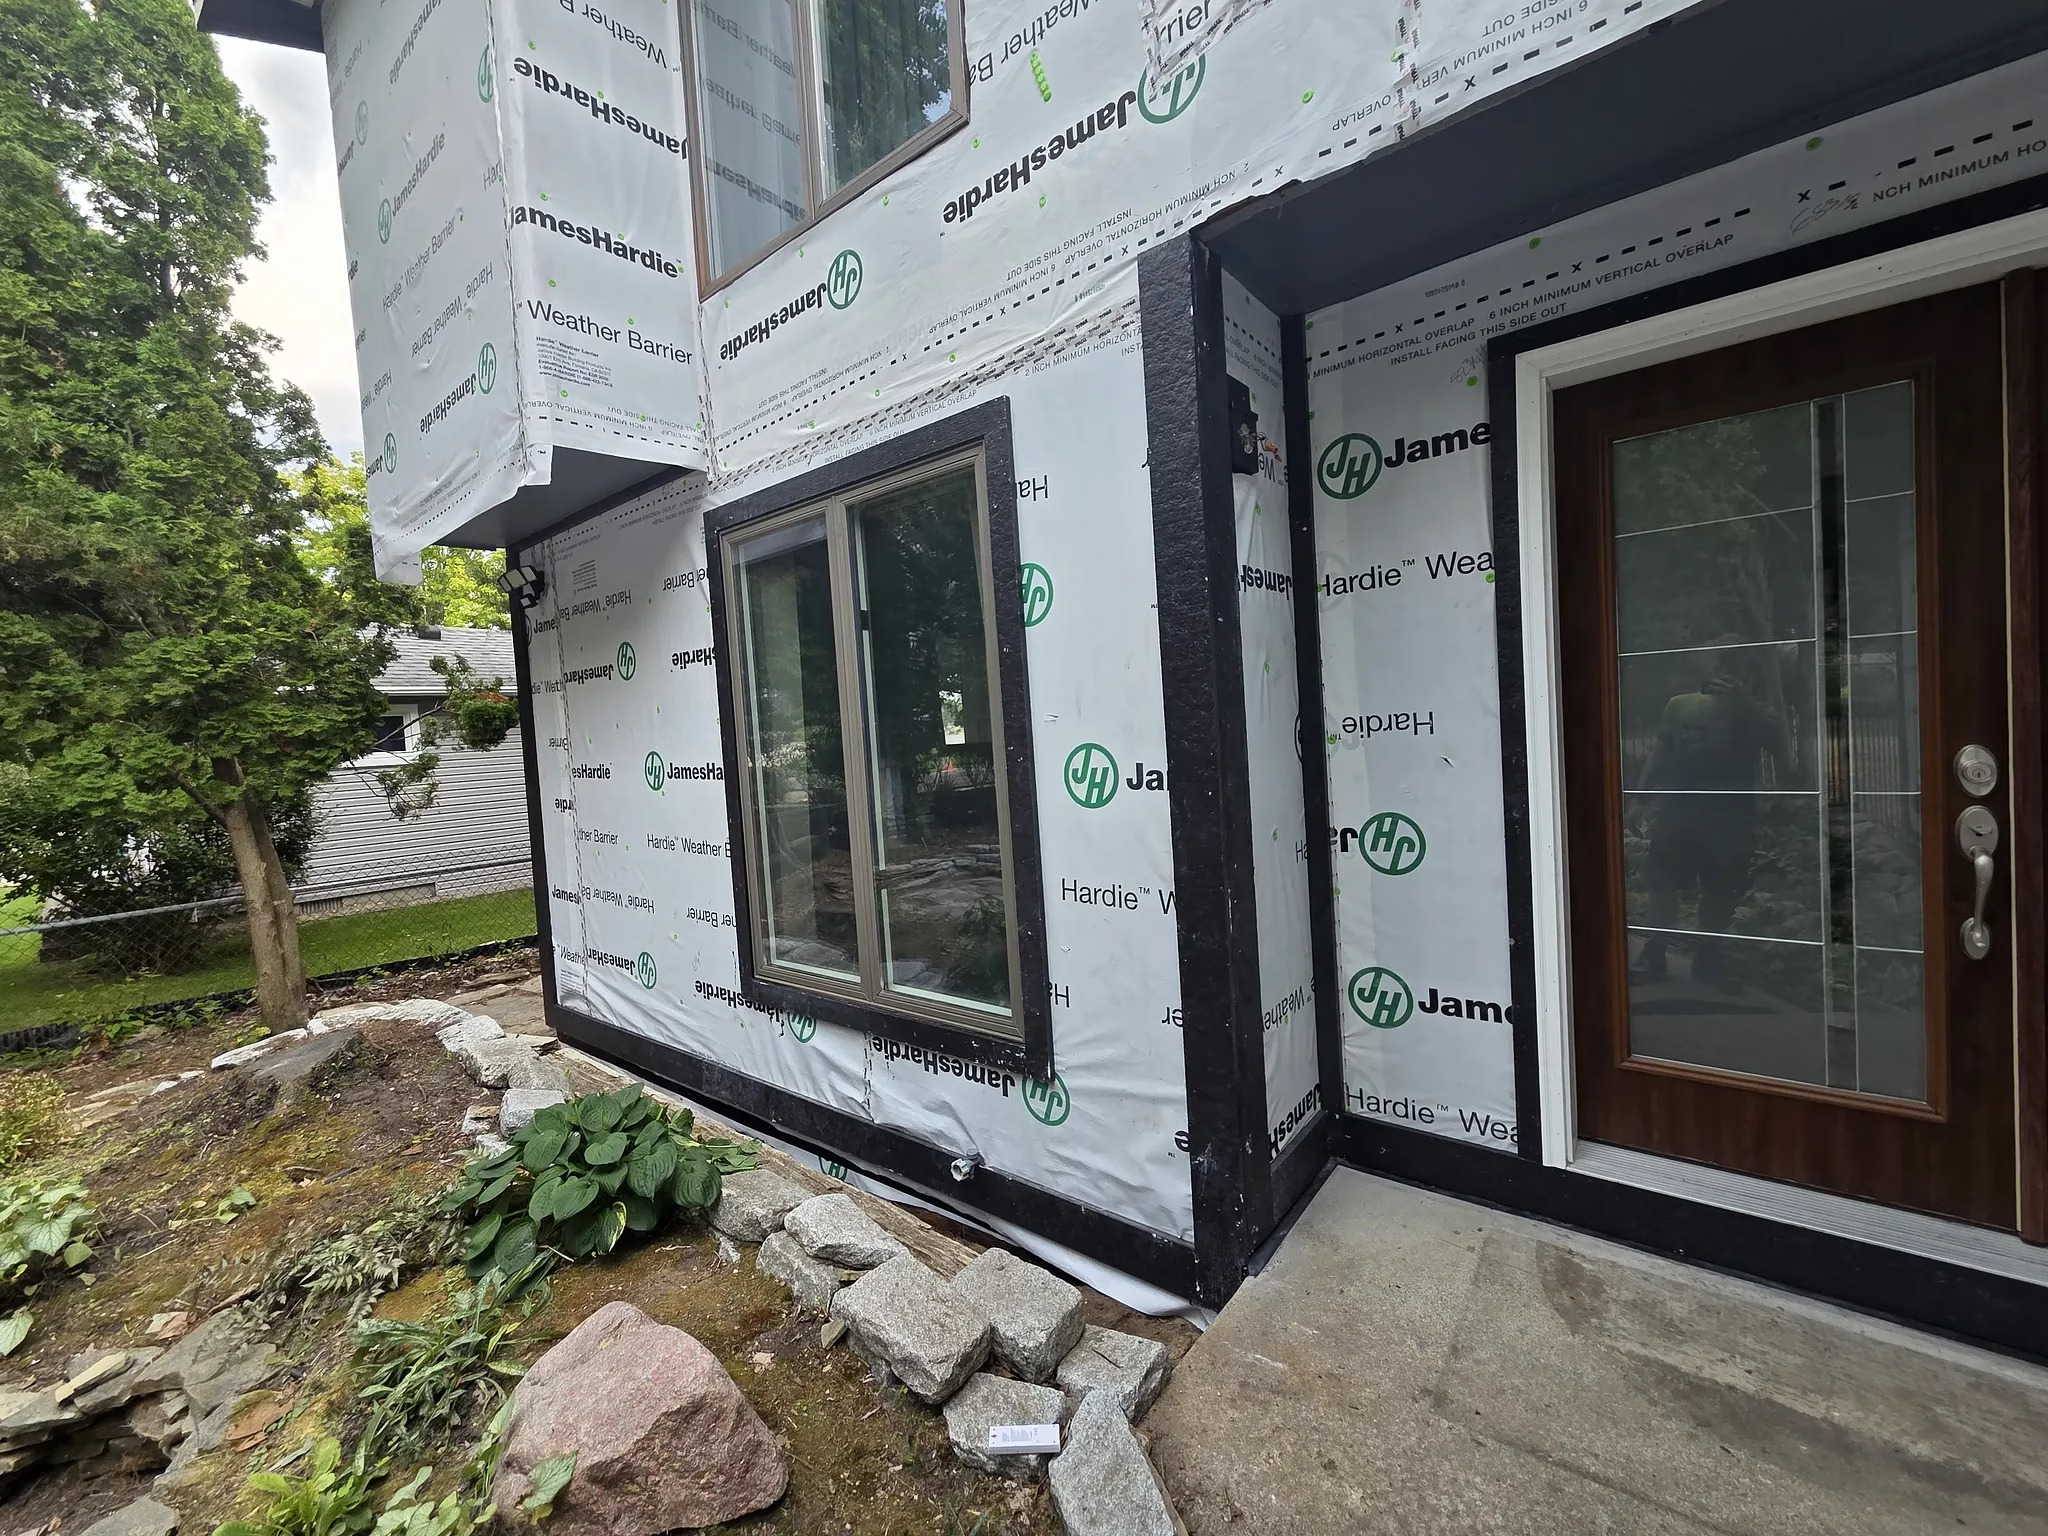
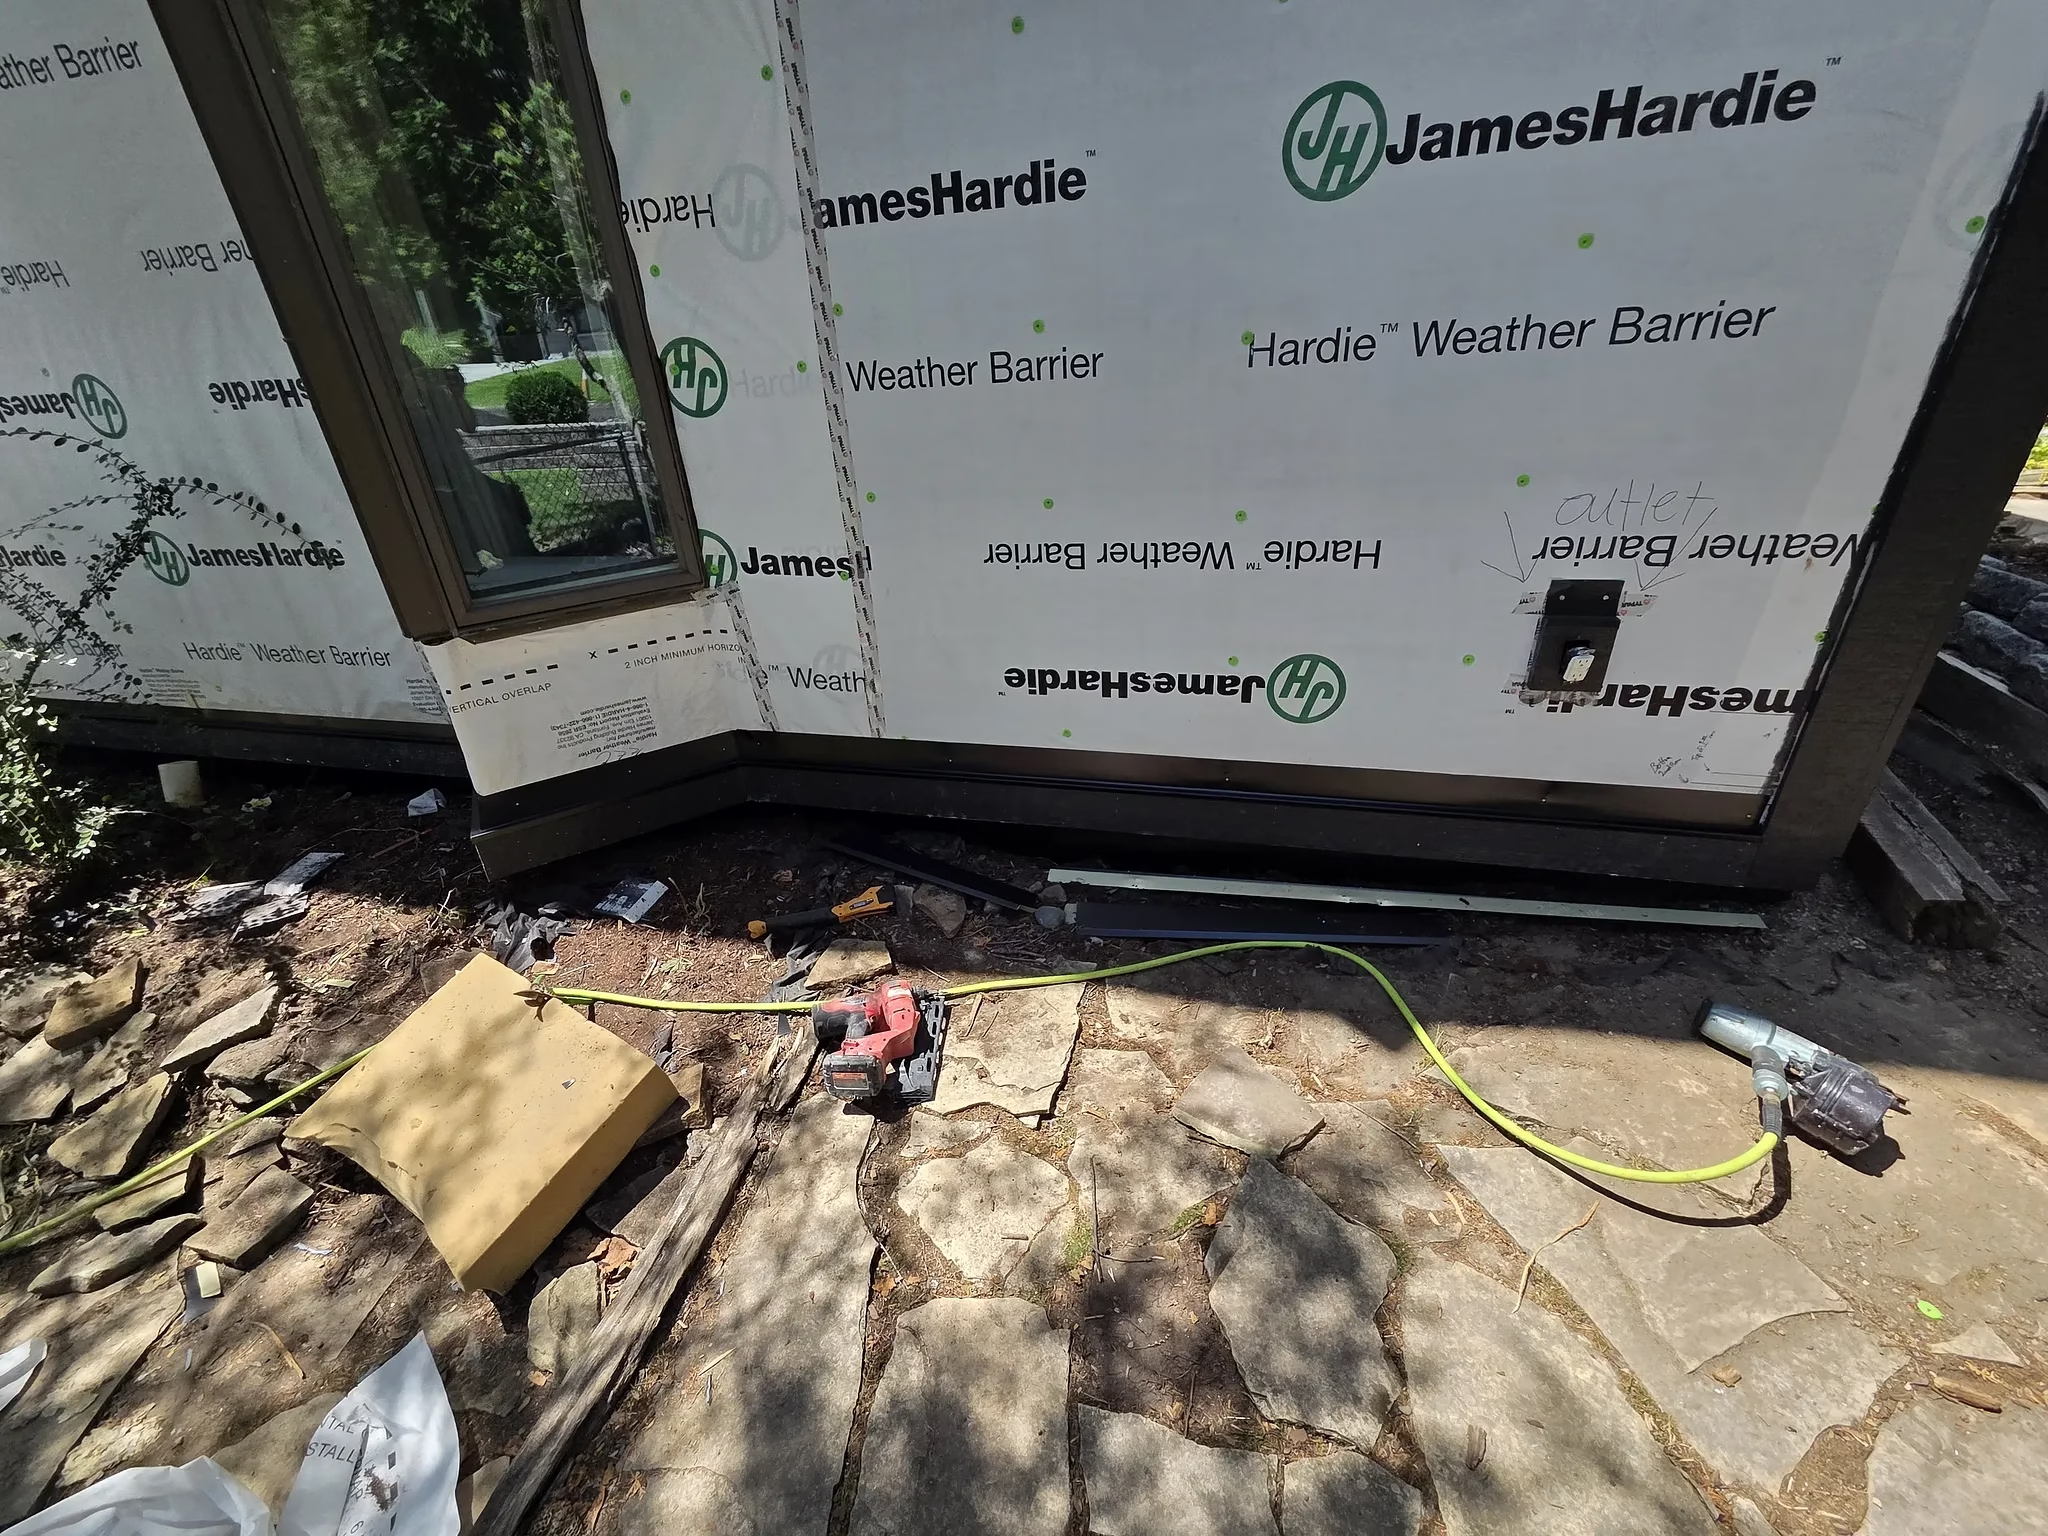
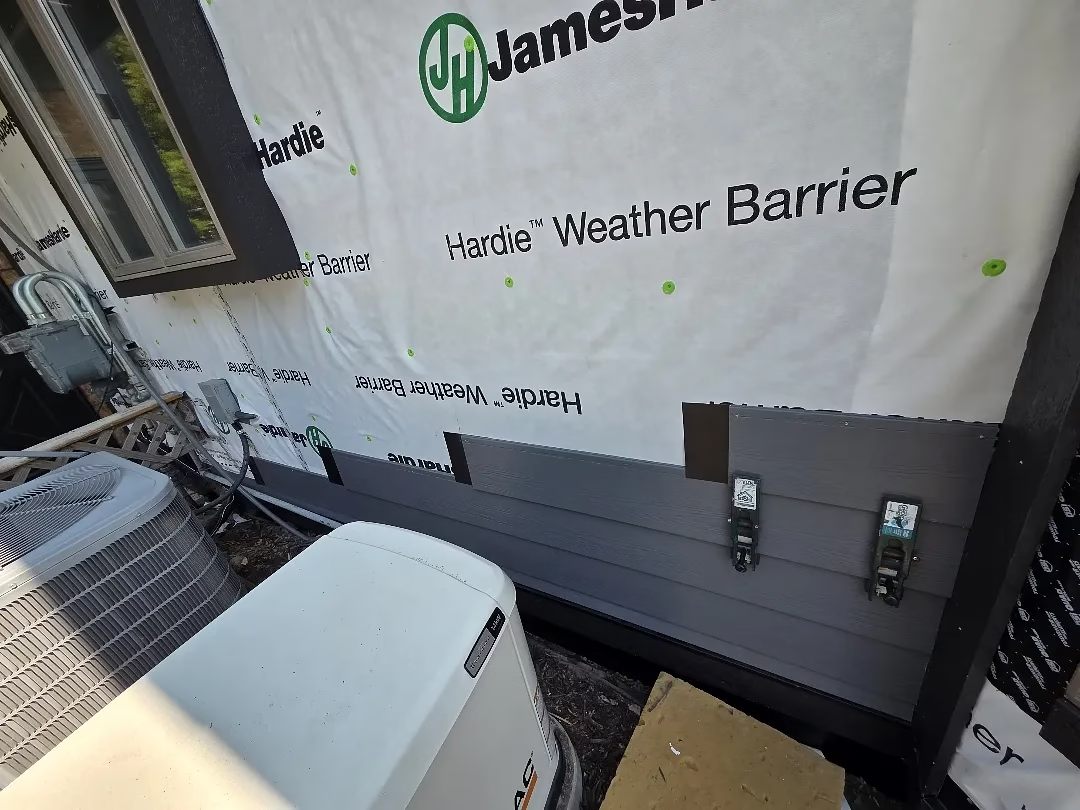
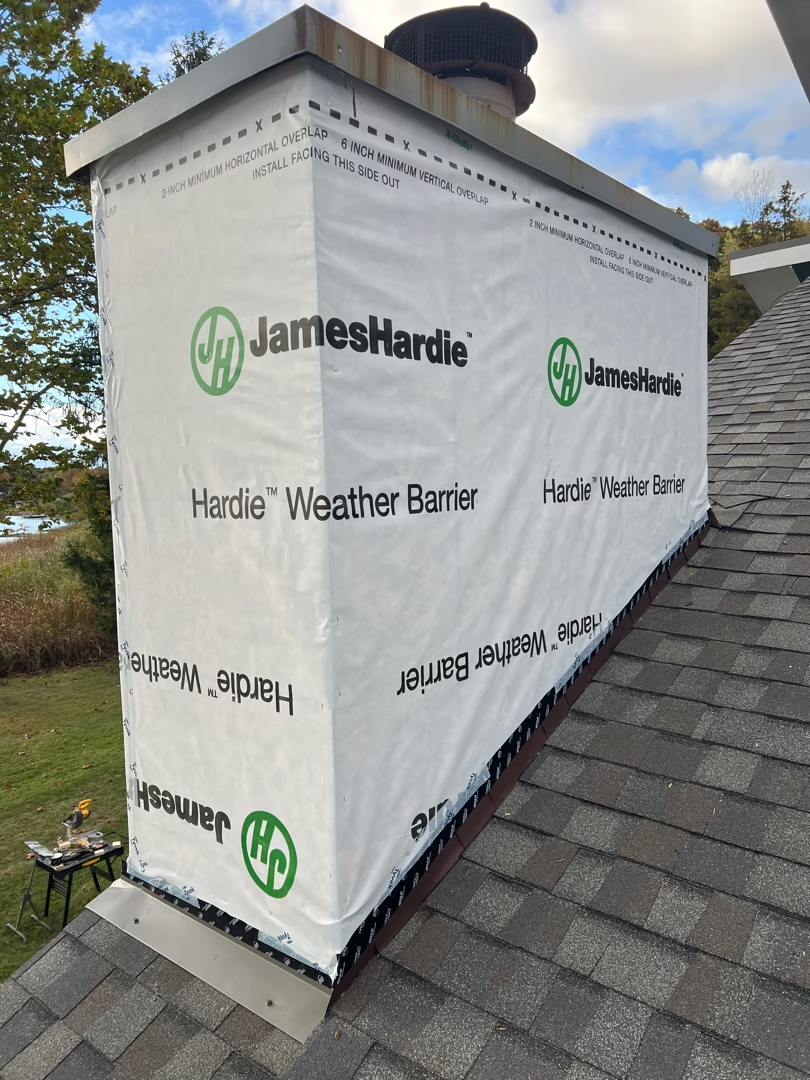
- Installing James Hardie weather-resistant barrier
- Taping seams, exposed corners, and penetrations
- Installing split blocks around utilities
- Creating dedicated mounting blocks for exterior lights
- Installing flashing around windows and doors
- Installing window sill flashing
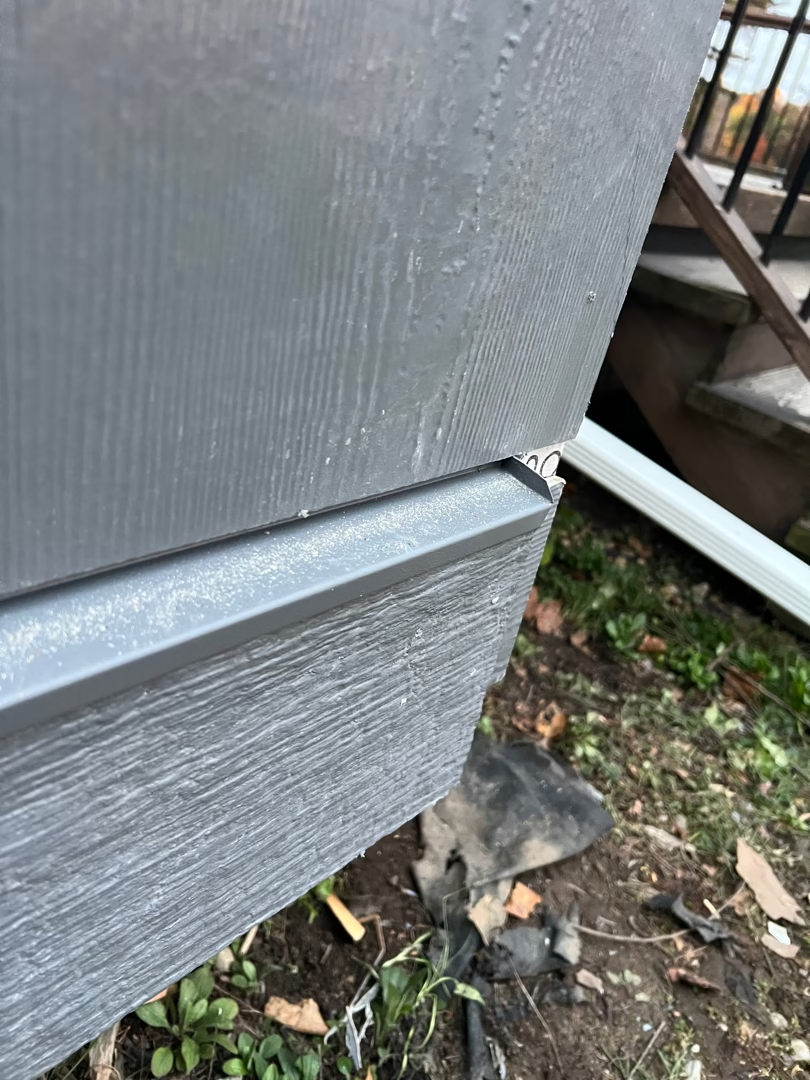
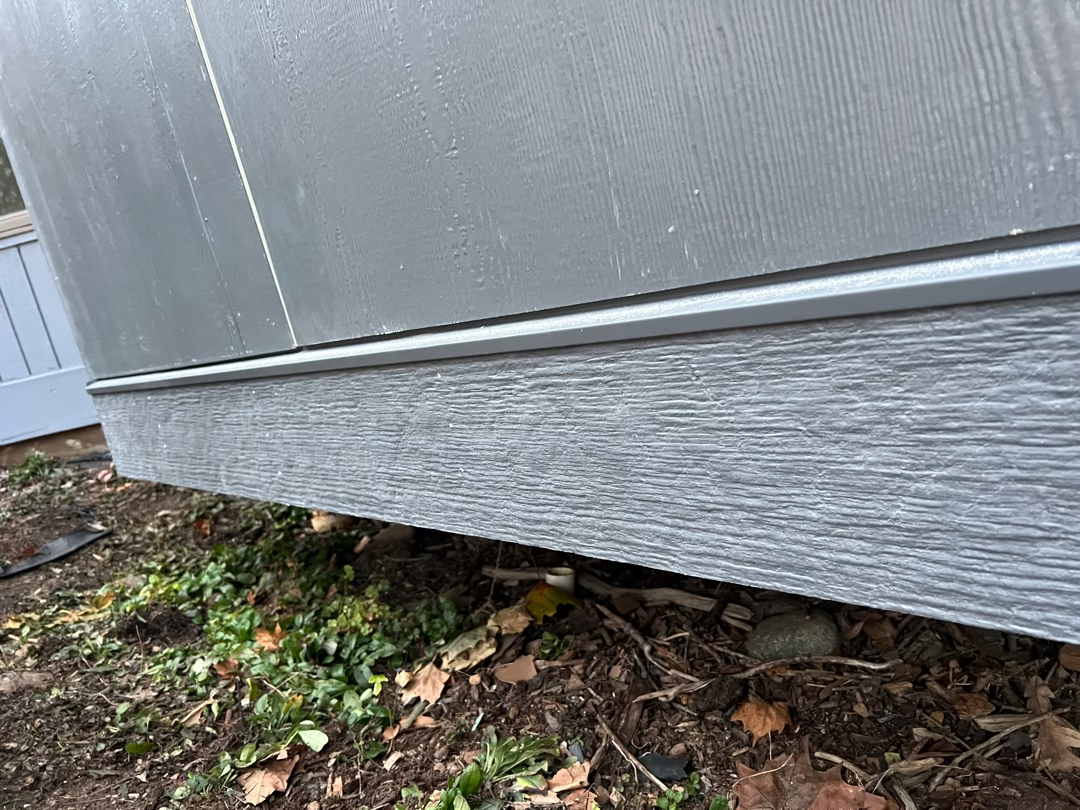
- Adding horizontal Z-flashing above trim and transitions
- Installing apron flashing at decks and porch areas
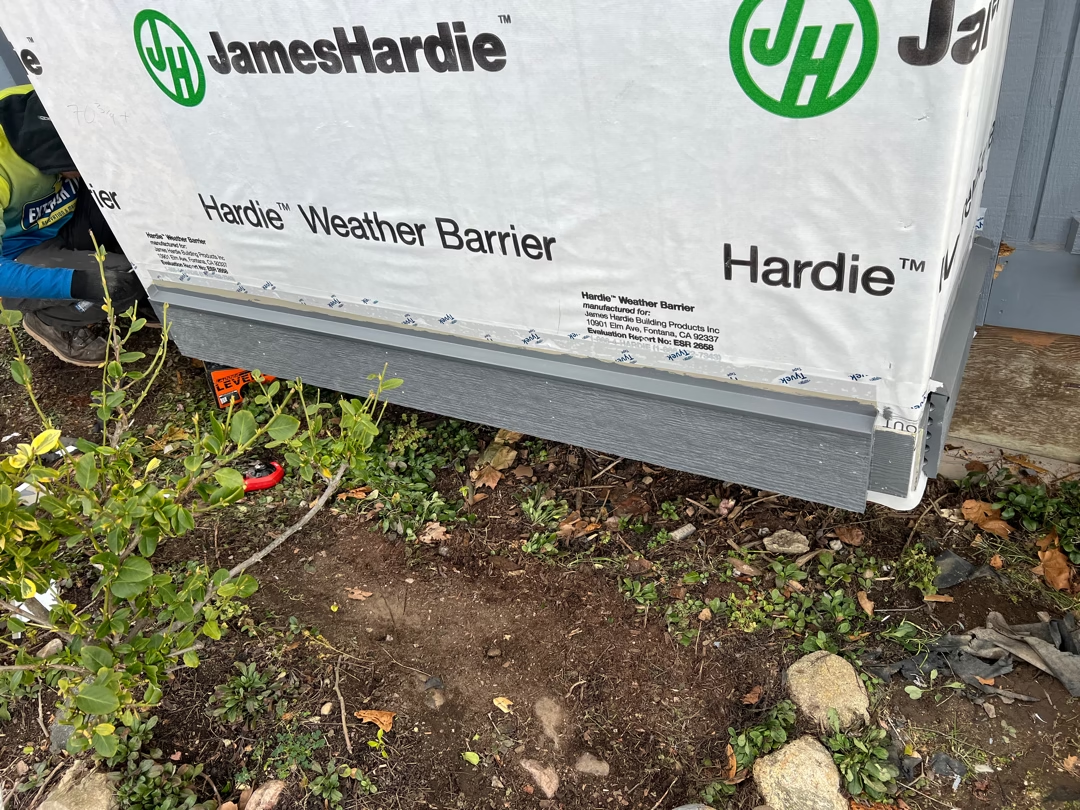
- Extending house wrap and protective flashing down over exposed wood-foundation areas
At the base of the walls, custom bug-guard flashing was installed where accessible.
In some areas, trenches were excavated so the flashing could extend below grade. The weather-resistant barrier was intentionally extended beyond the metal to help separate the flashing from conditions that could contribute to corrosion.
These are the kinds of details that disappear once siding is installed, but they play an important role in how water moves through and away from the exterior.
Improving Soffit and Attic Ventilation
The existing soffit system also became part of the renovation.
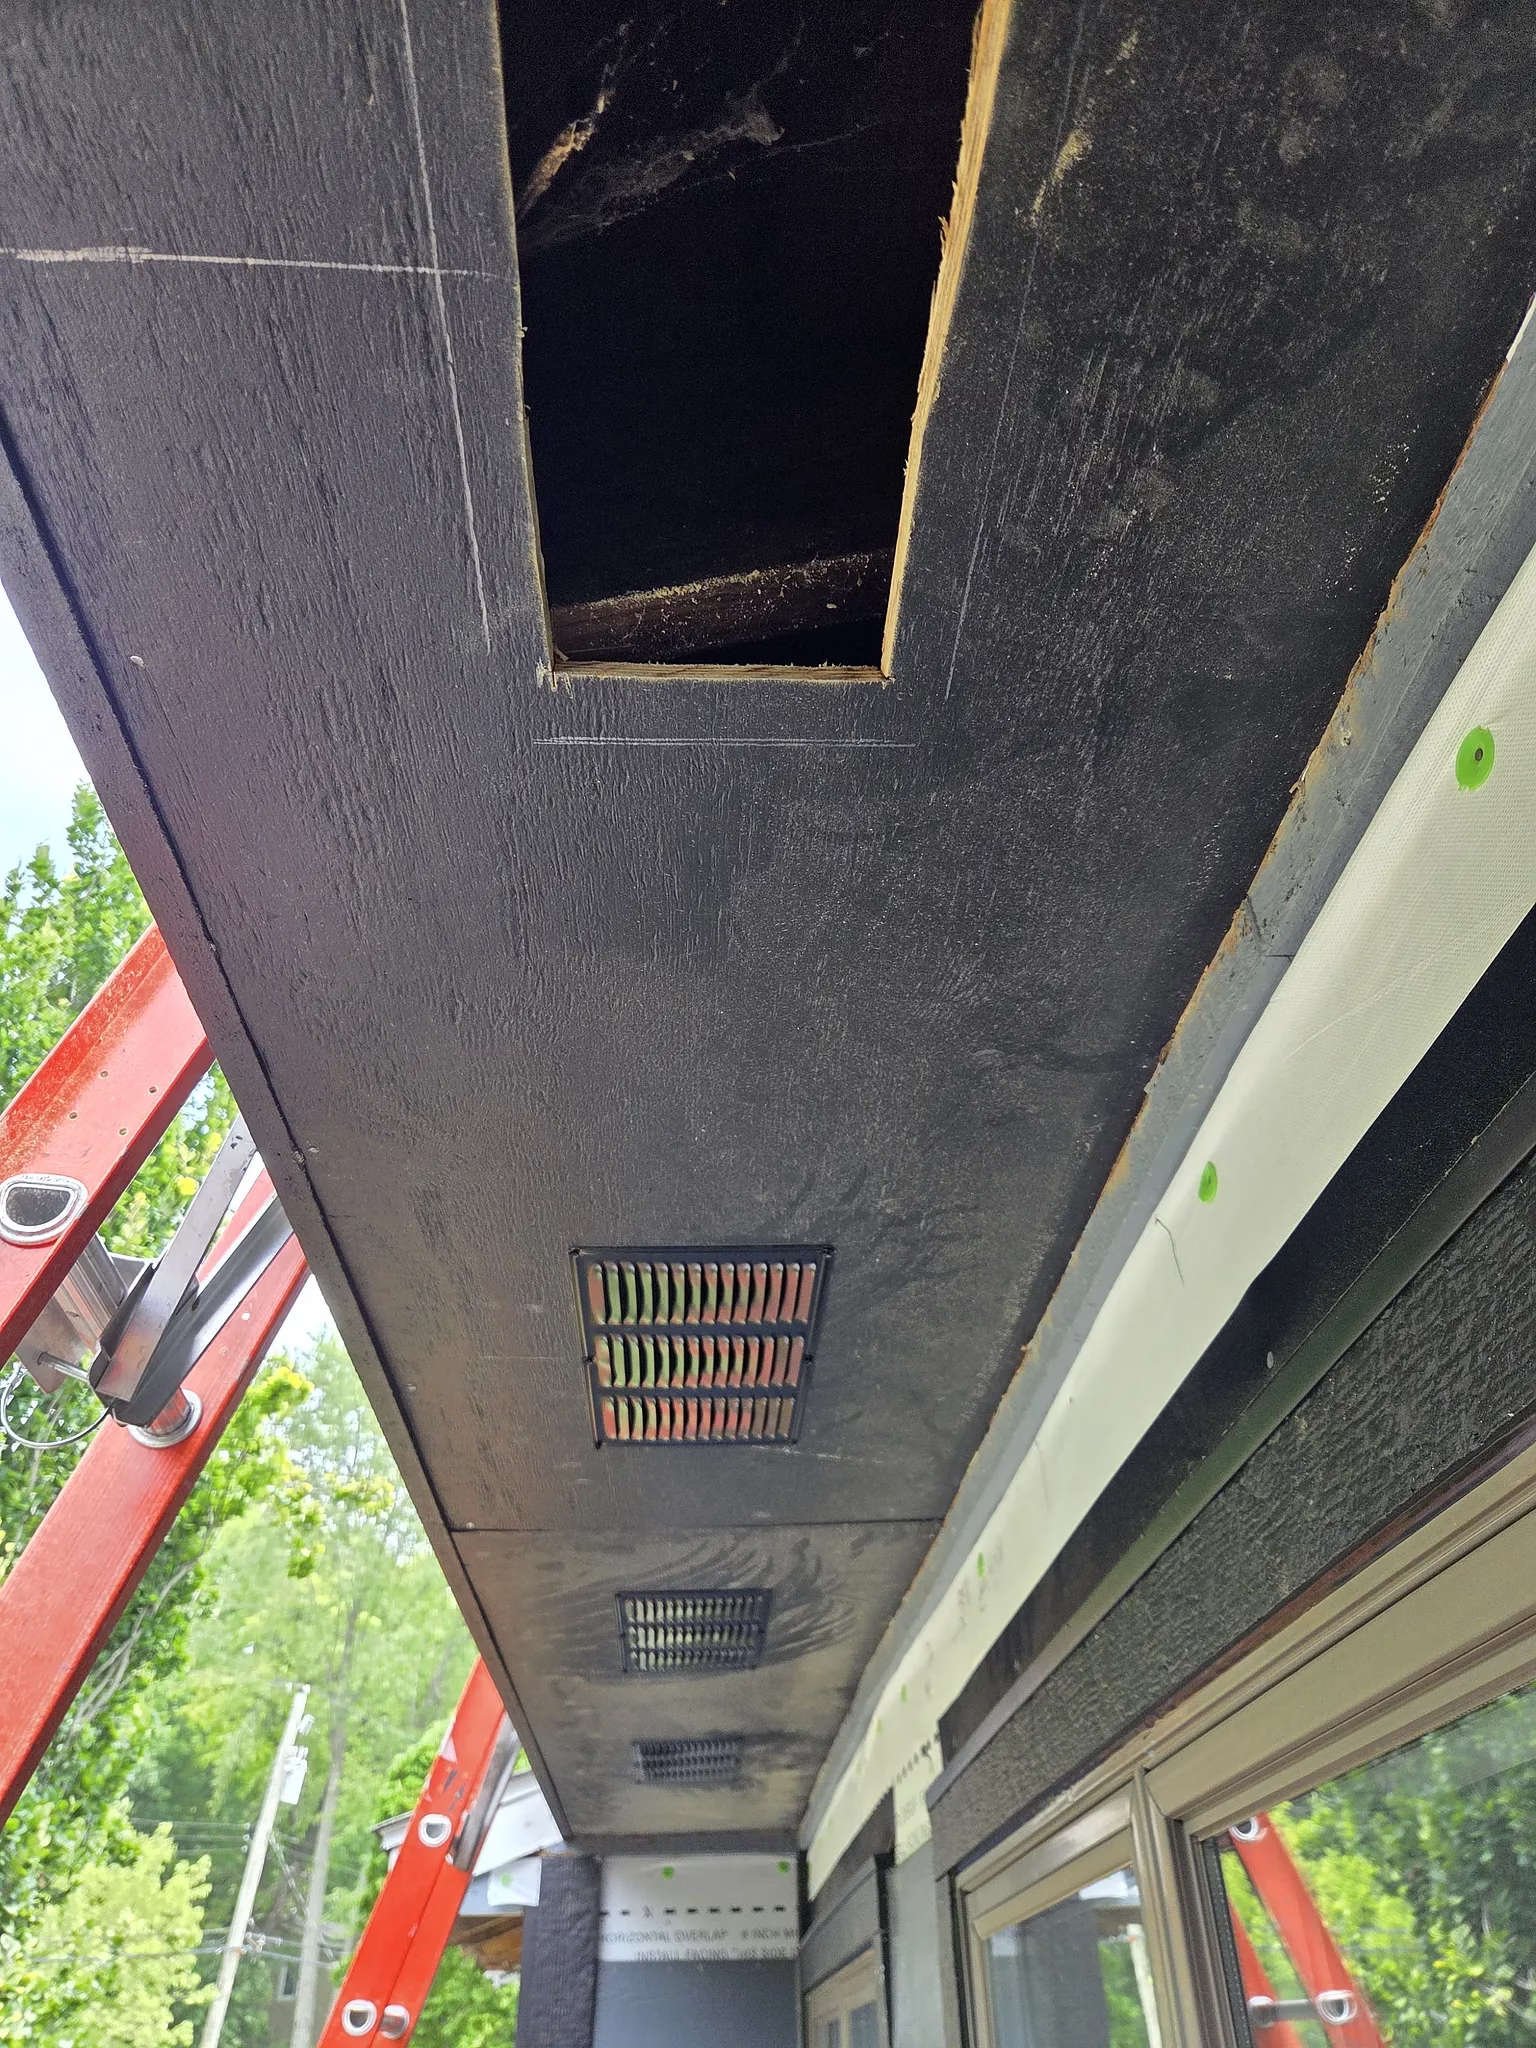
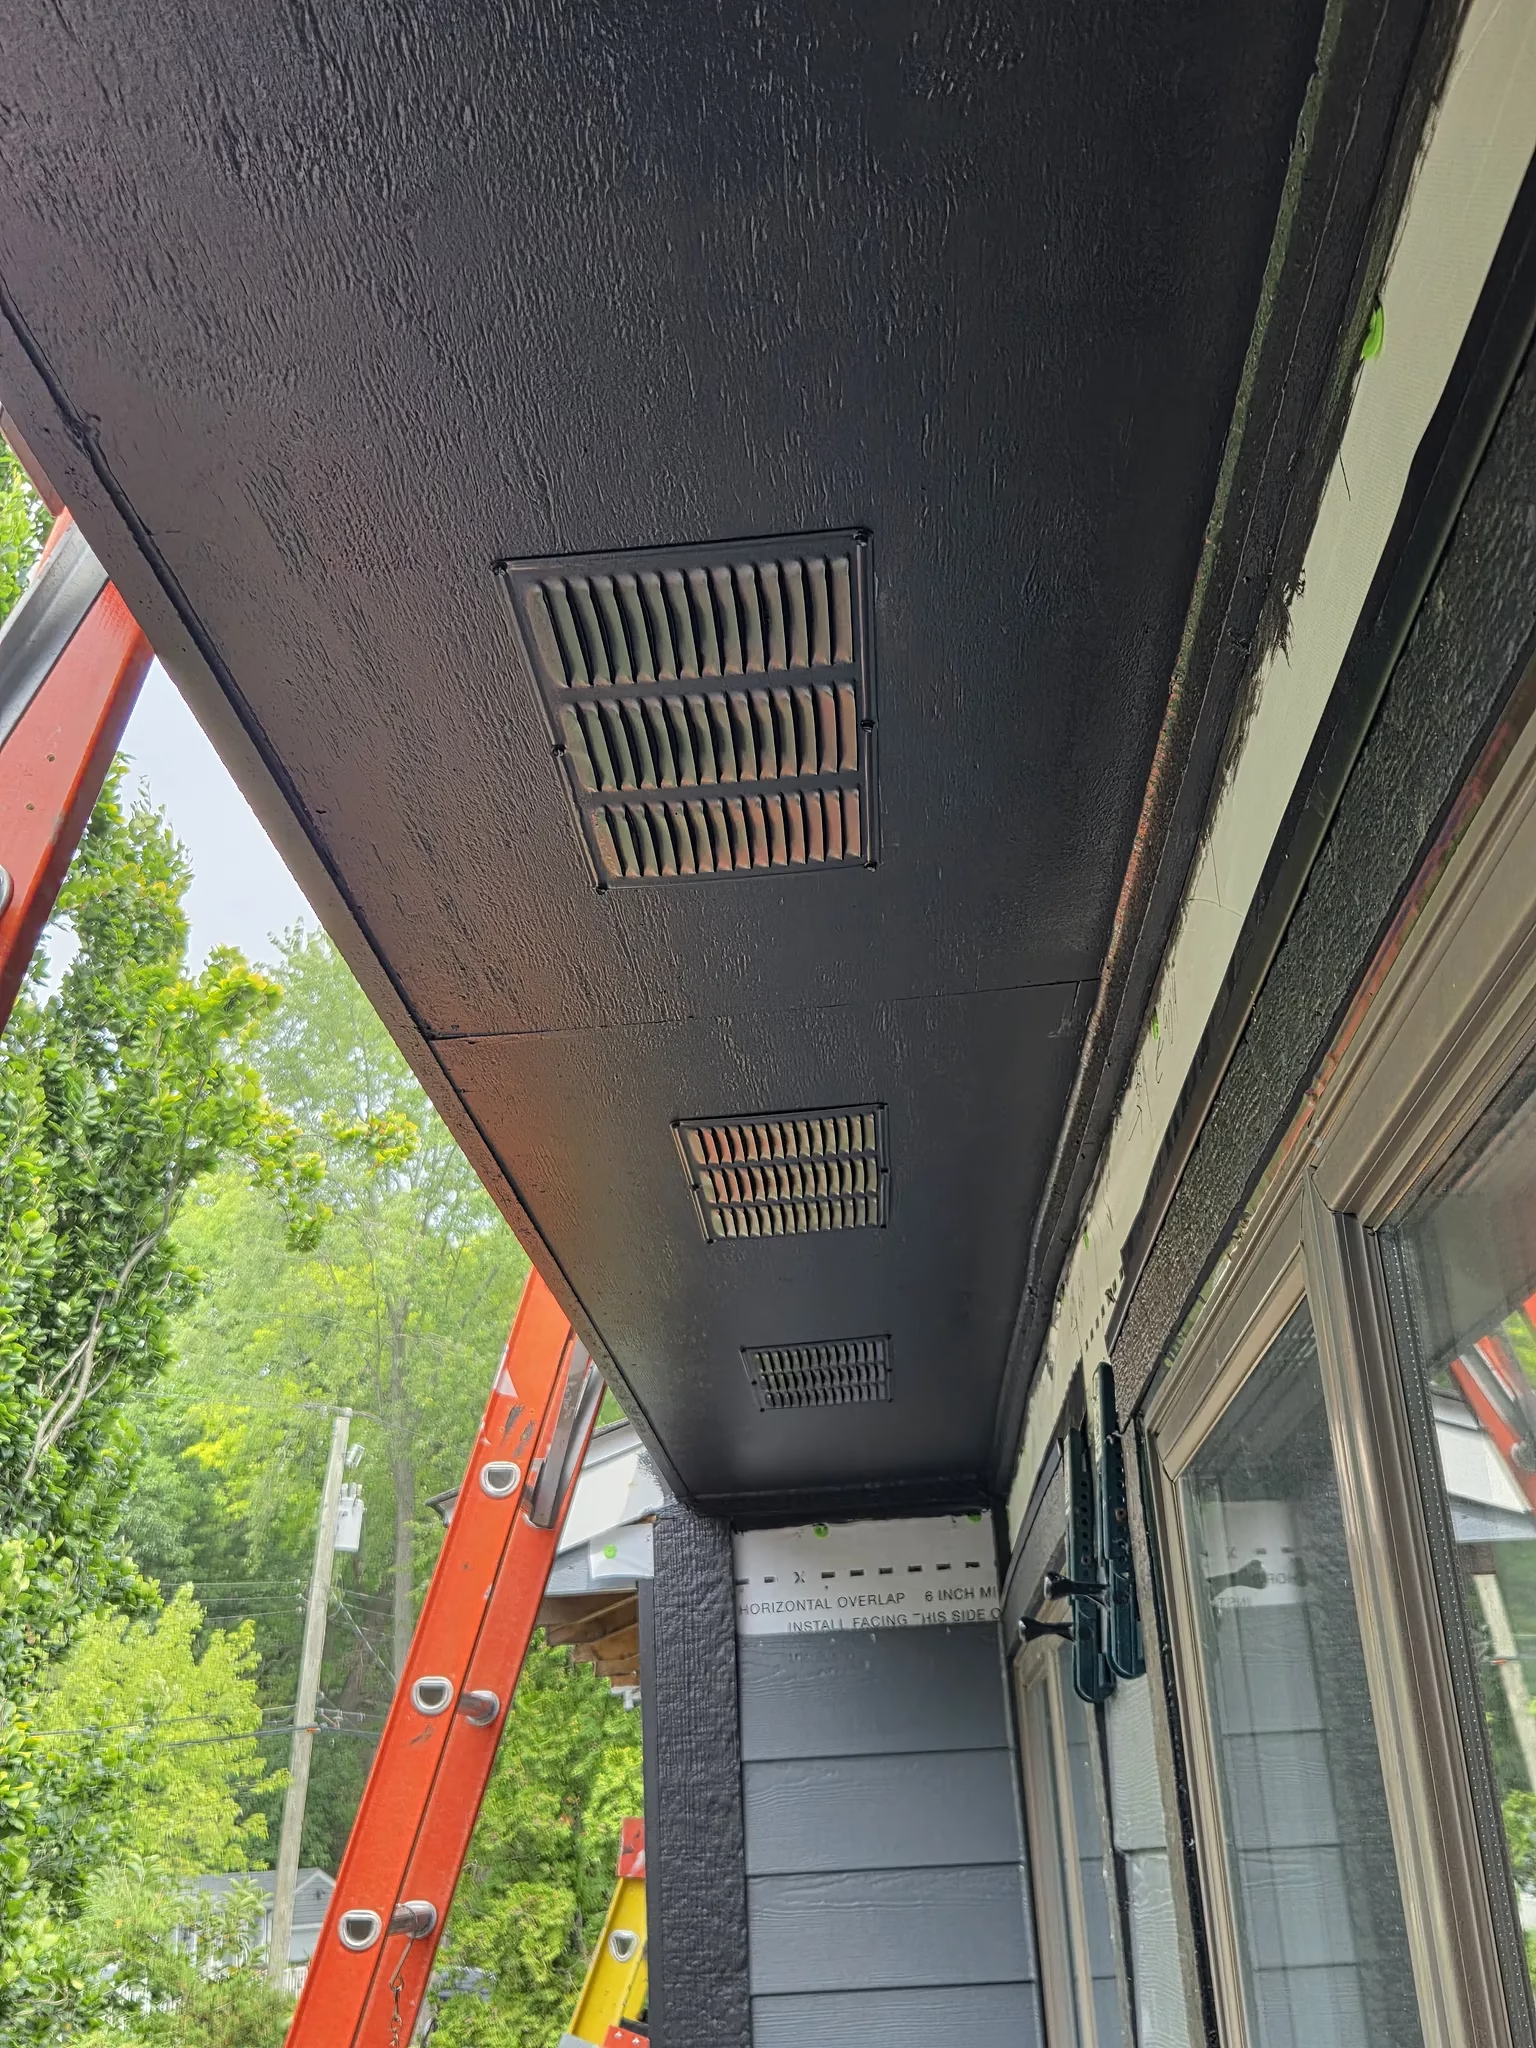
Sections of old louvered strip ventilation were removed and replaced with new soffit panels and dedicated vent openings.
The project included:
- Removal of selected existing soffit vents
- Installation of new 3/8-inch soffit plywood
- Installation of new 8×16-inch louvered soffit vents
- Inspection of airflow behind the soffits
- Installation of additional baffles where field conditions required them
- Painting and finishing of repaired soffit and fascia areas
Field conditions ultimately required additional baffles beyond the original scope.
The upper south-facing shed roof also needed an exhaust solution.
Lomanco Omni Wall ventilation was installed at the roof edge. The roof deck was opened to create the exhaust path, followed by new cleat and counter-flashing details to integrate the vent into the roof edge.
This allowed the siding renovation to address not just what the exterior looked like, but how the attic and roof-edge systems managed airflow.
James Hardie Siding Installation
Once each area was repaired, wrapped, flashed, and prepared, the new siding system could be installed.
The home received:
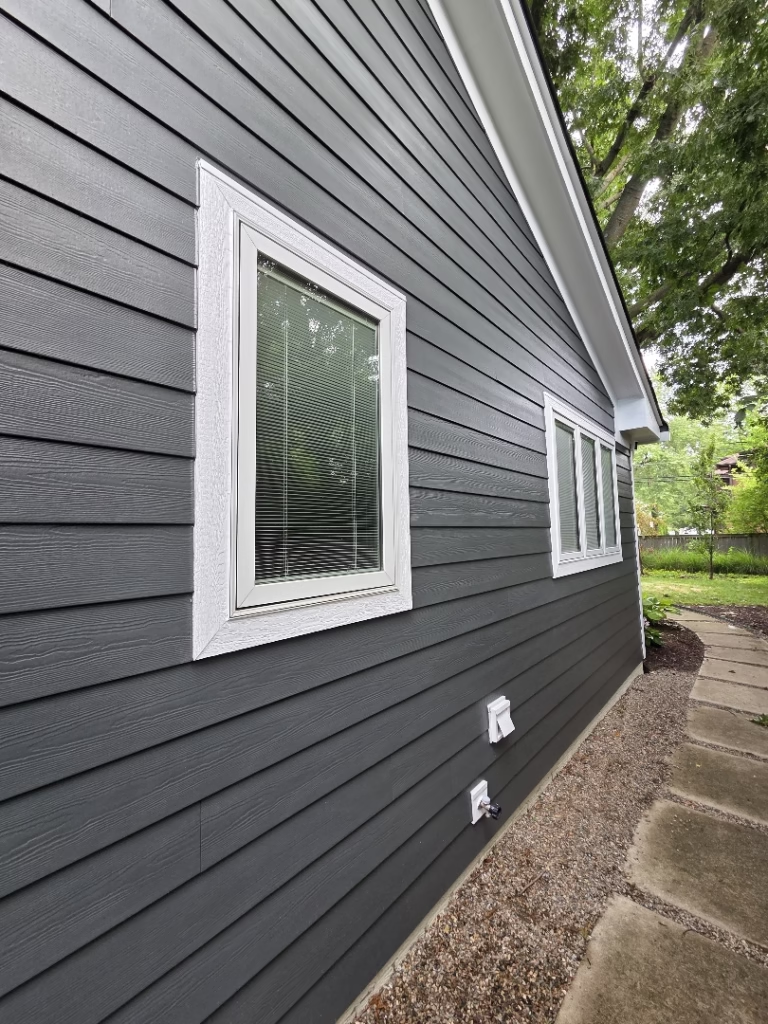
James Hardie HardiePlank Lap Siding
- 8¼-inch plank
- 7-inch exposure
- Cedarmill texture
- Night Gray finish
James Hardie RoughSawn Trim
- Midnight Black finish
- Window and door trim
- Inside and outside corners
- Roofline transitions
- Garage door trim
- Deck and grade skirt boards
- Bay and architectural trim details
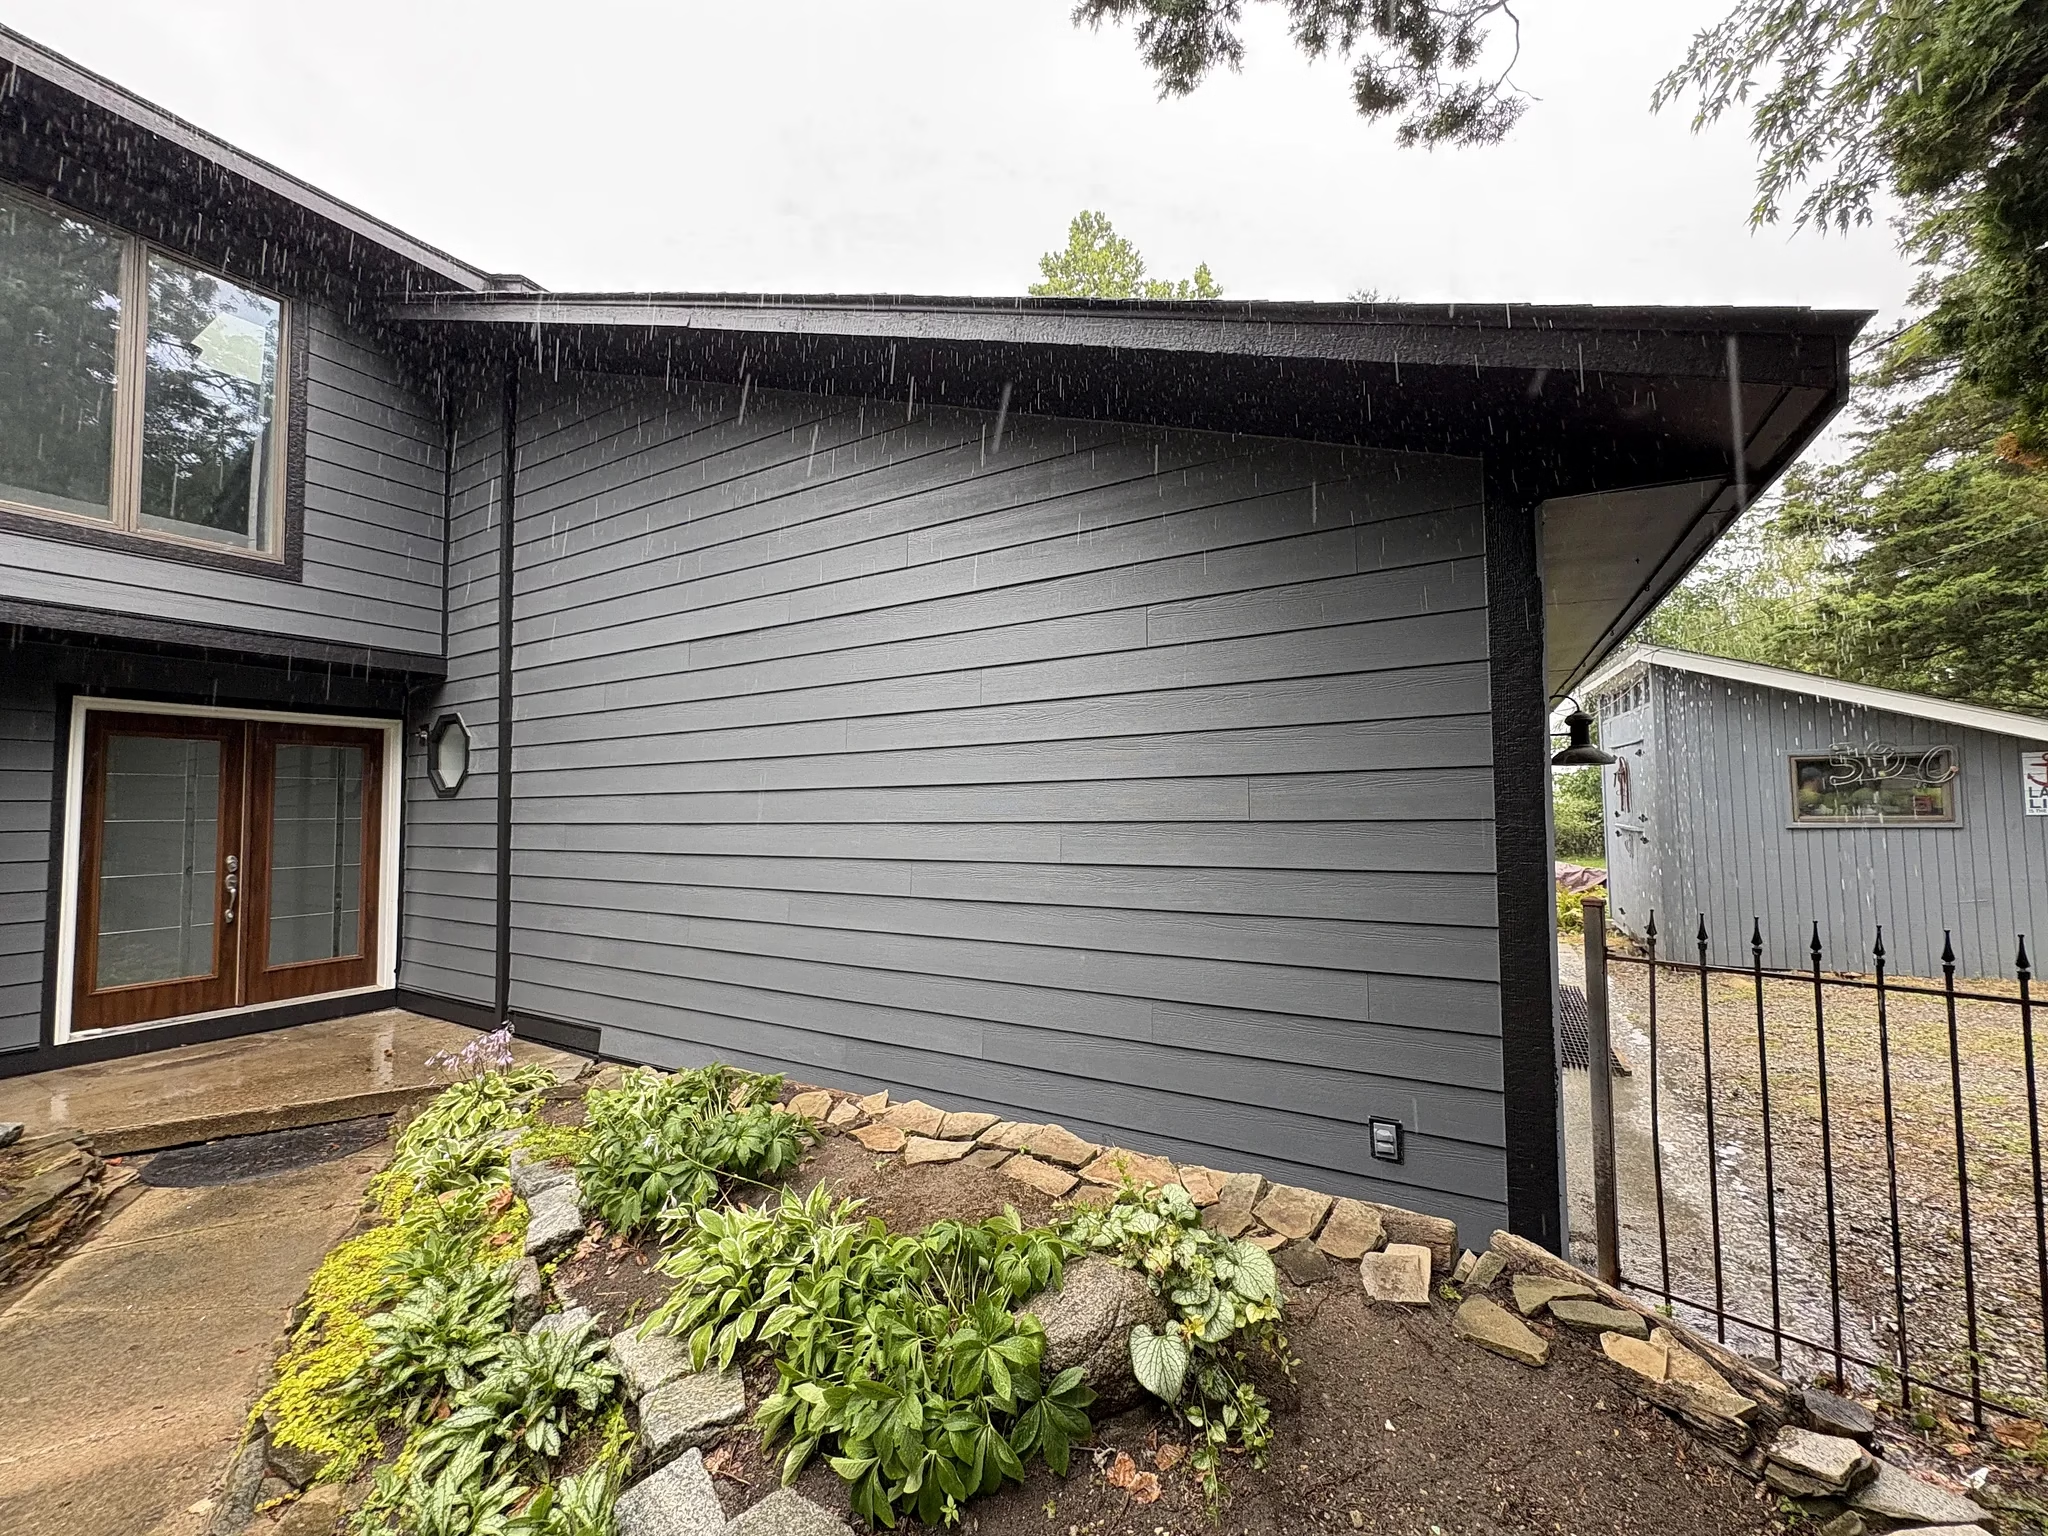
The dark Midnight Black trim created strong architectural definition against the Night Gray siding while also tying into the black flashing, soffit vents, gutters, and other exterior accents.
Each area followed a controlled process of preparation, flashing, trim installation, siding installation, sealing, cleaning, and touch-up.
Correcting Exterior Transitions Along the Way
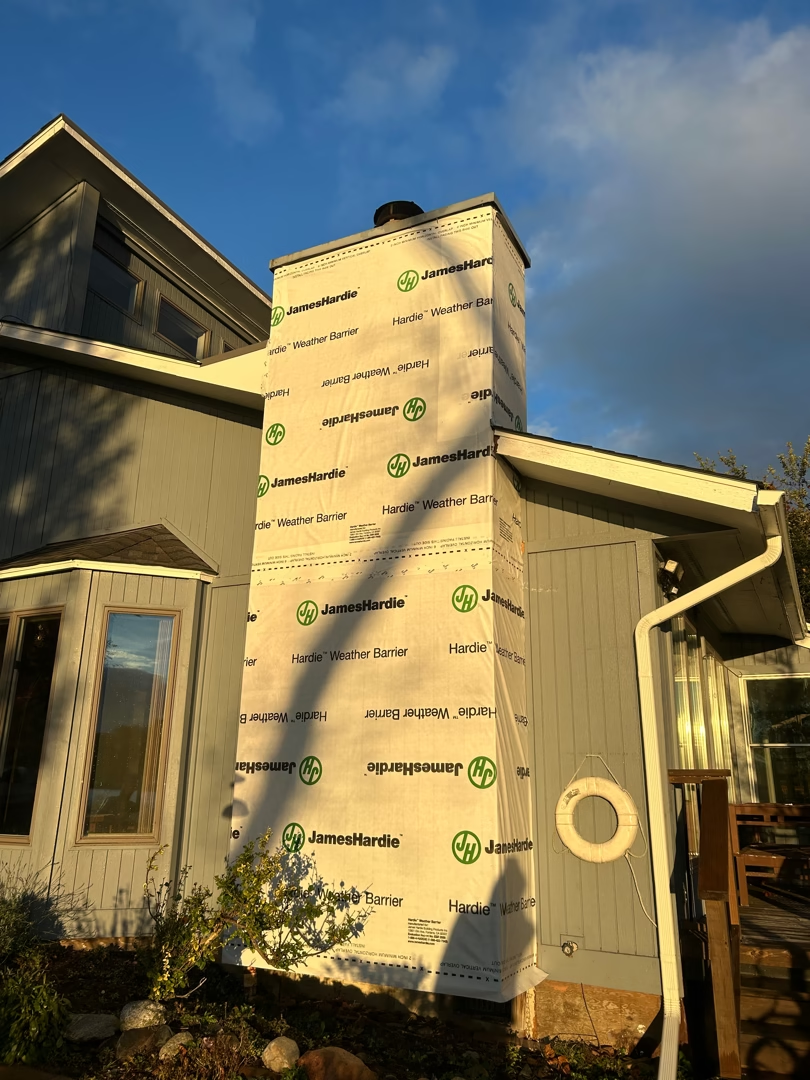
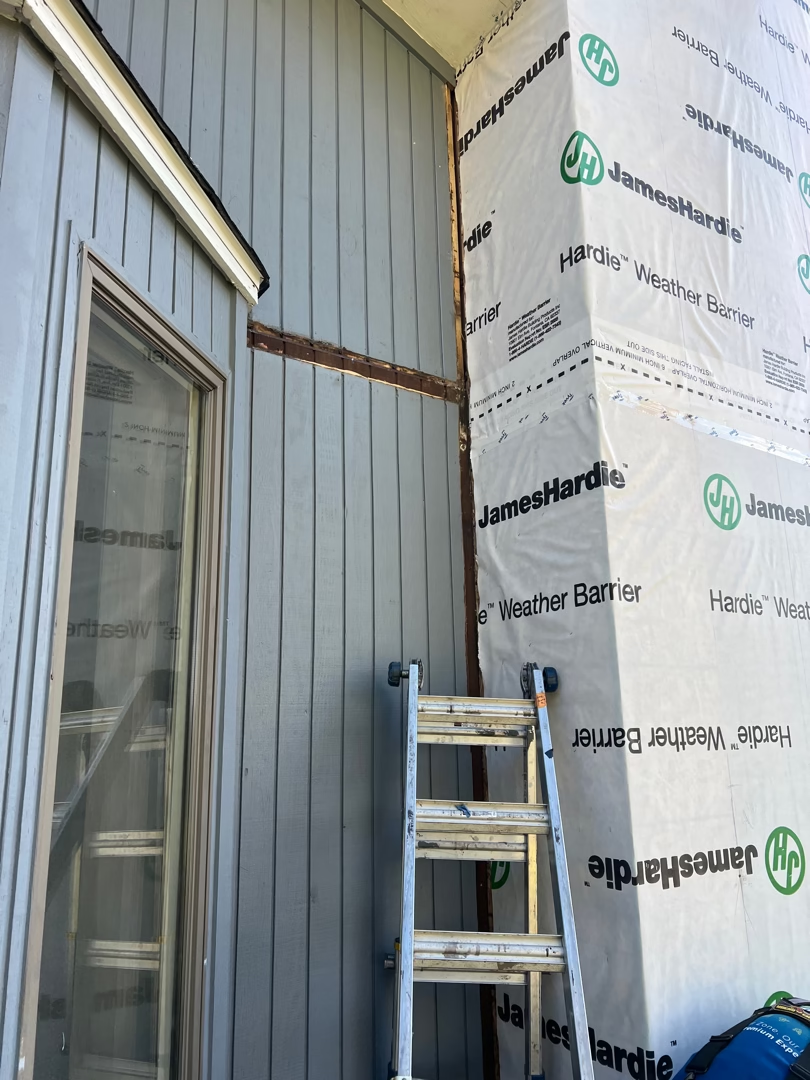
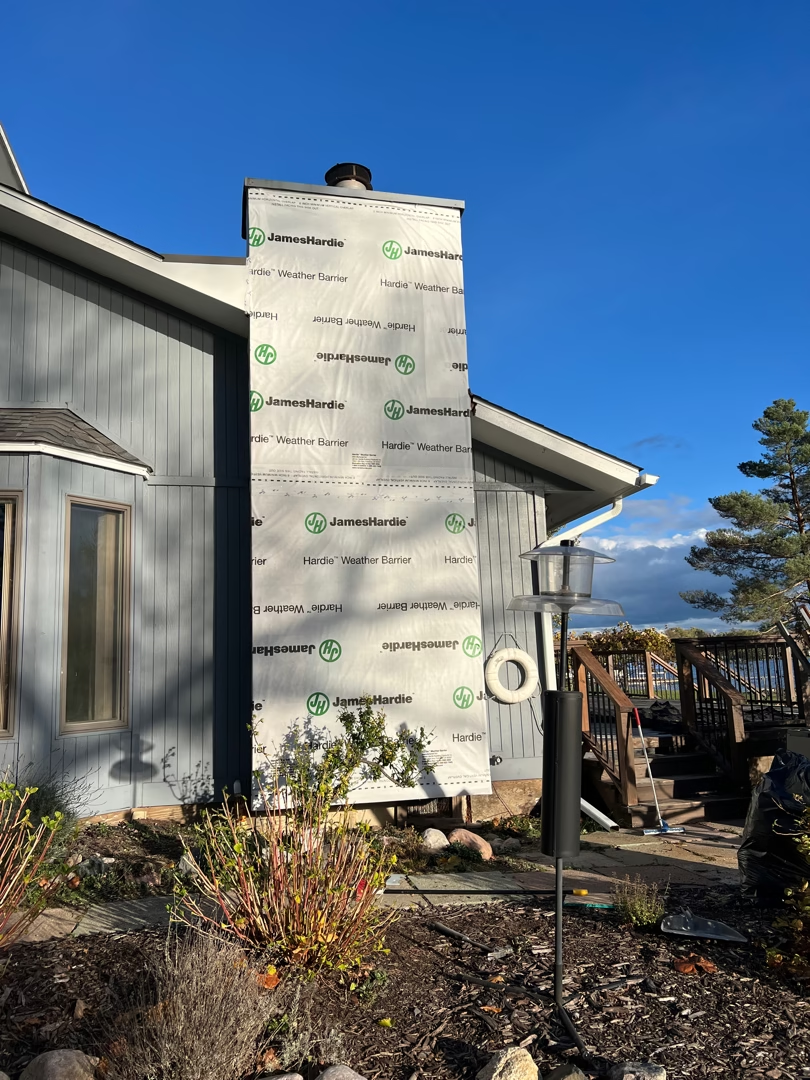
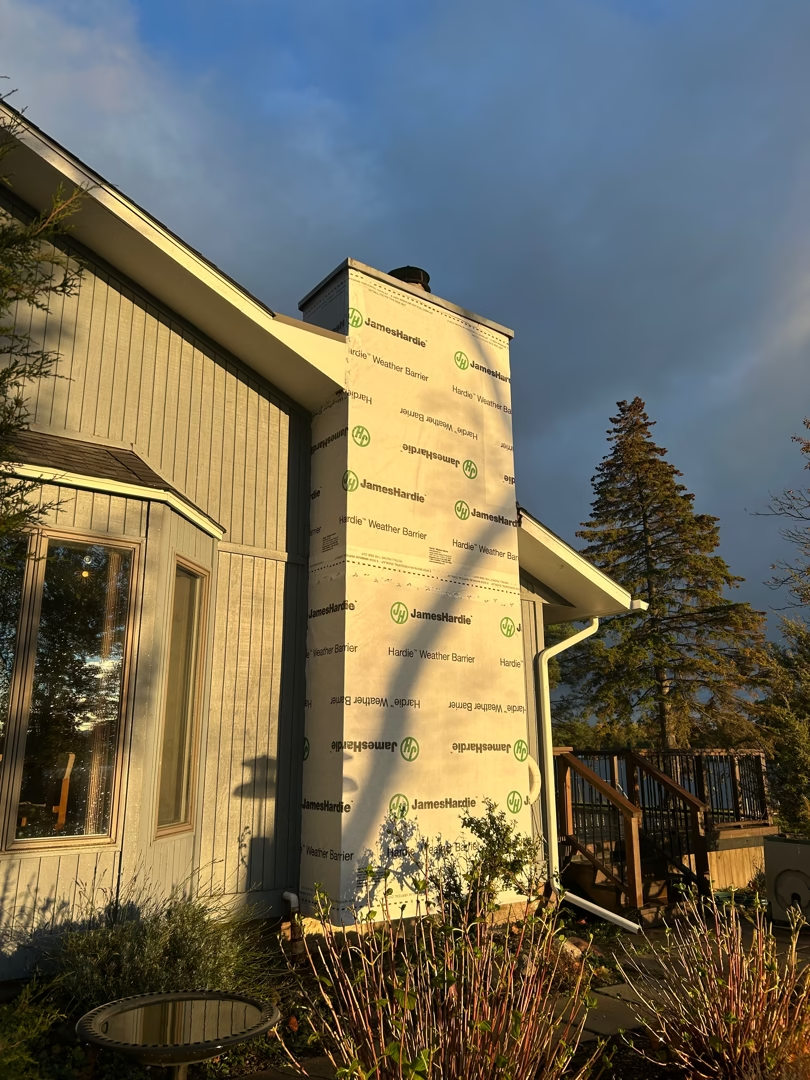
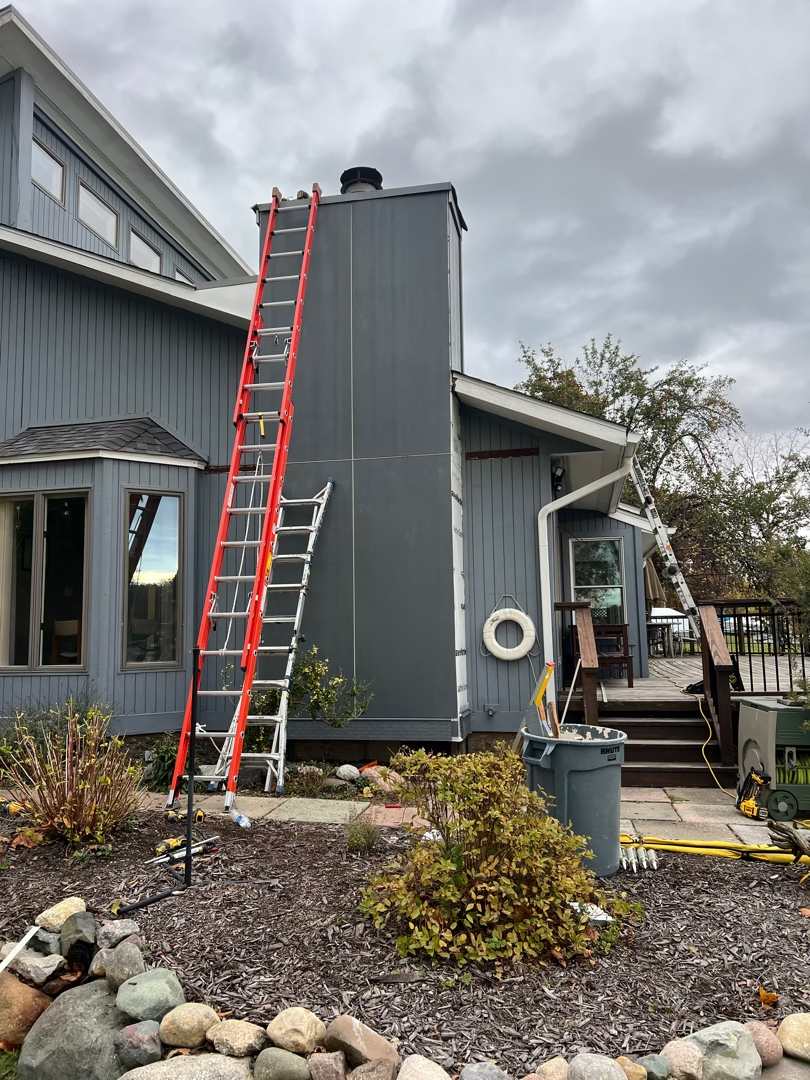
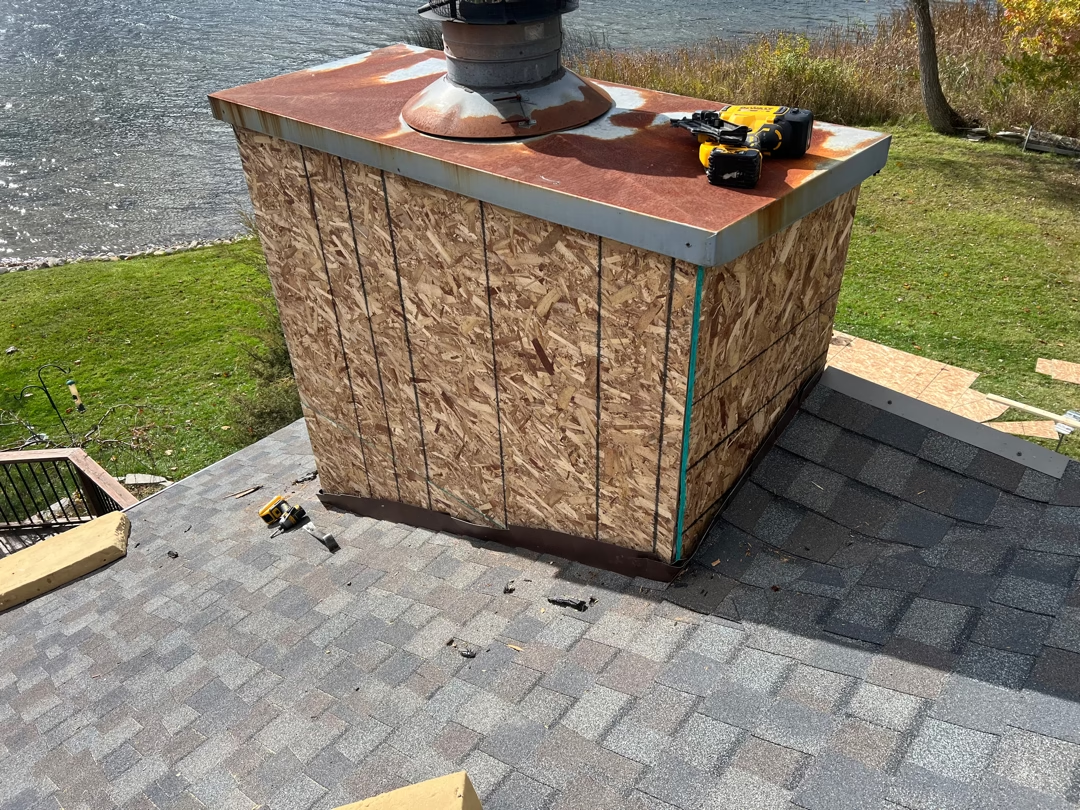
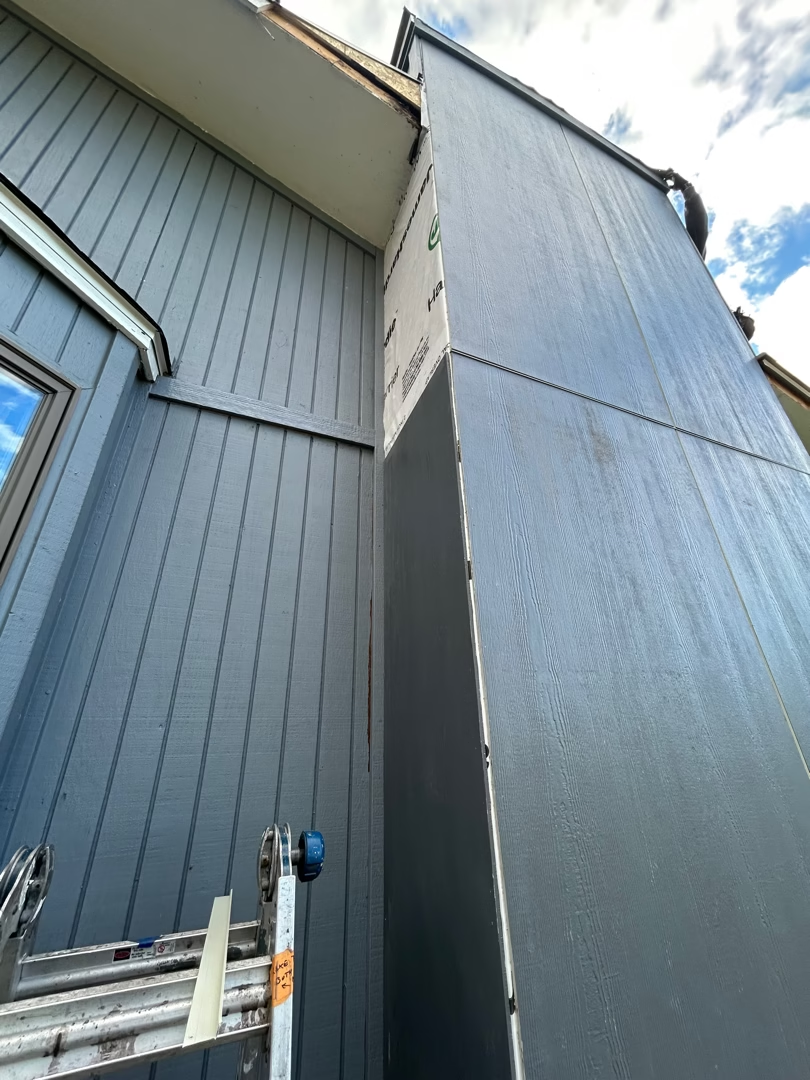
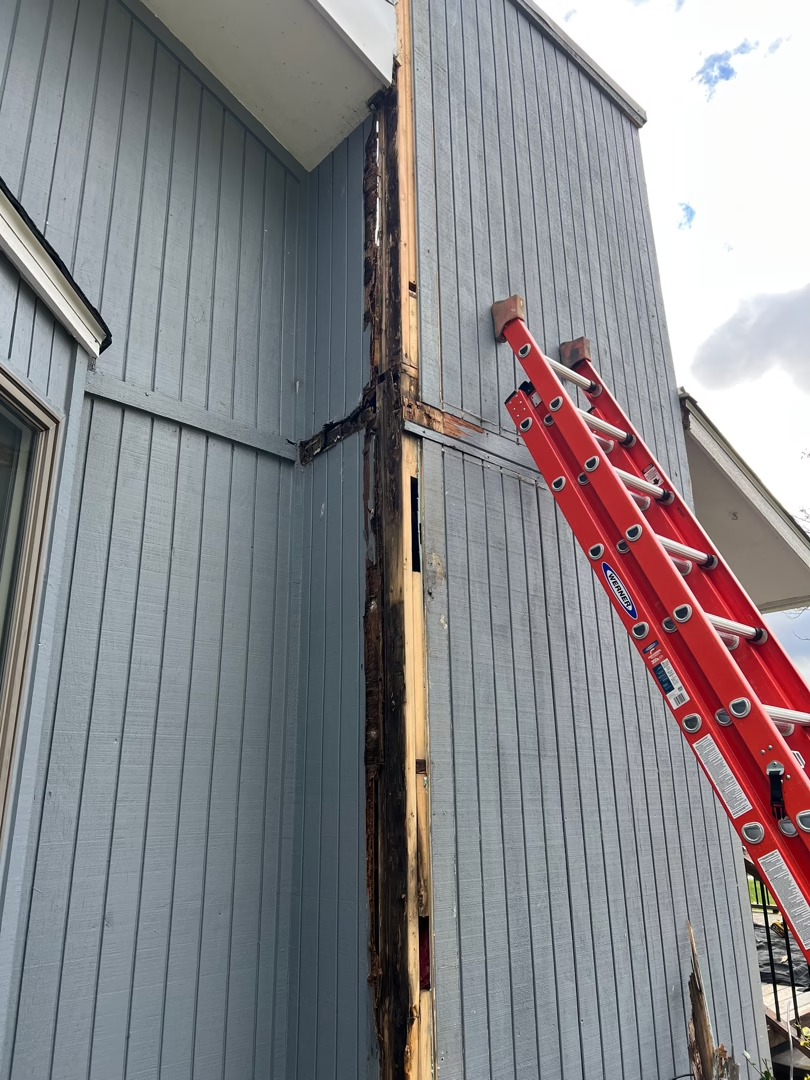
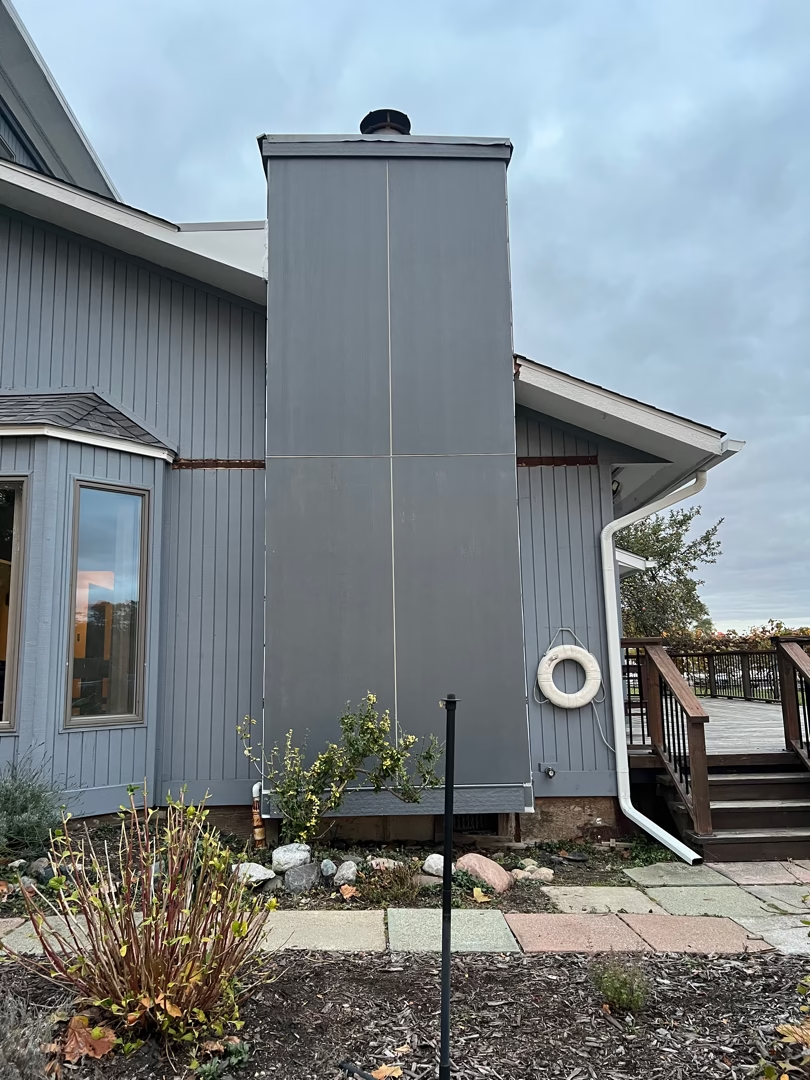
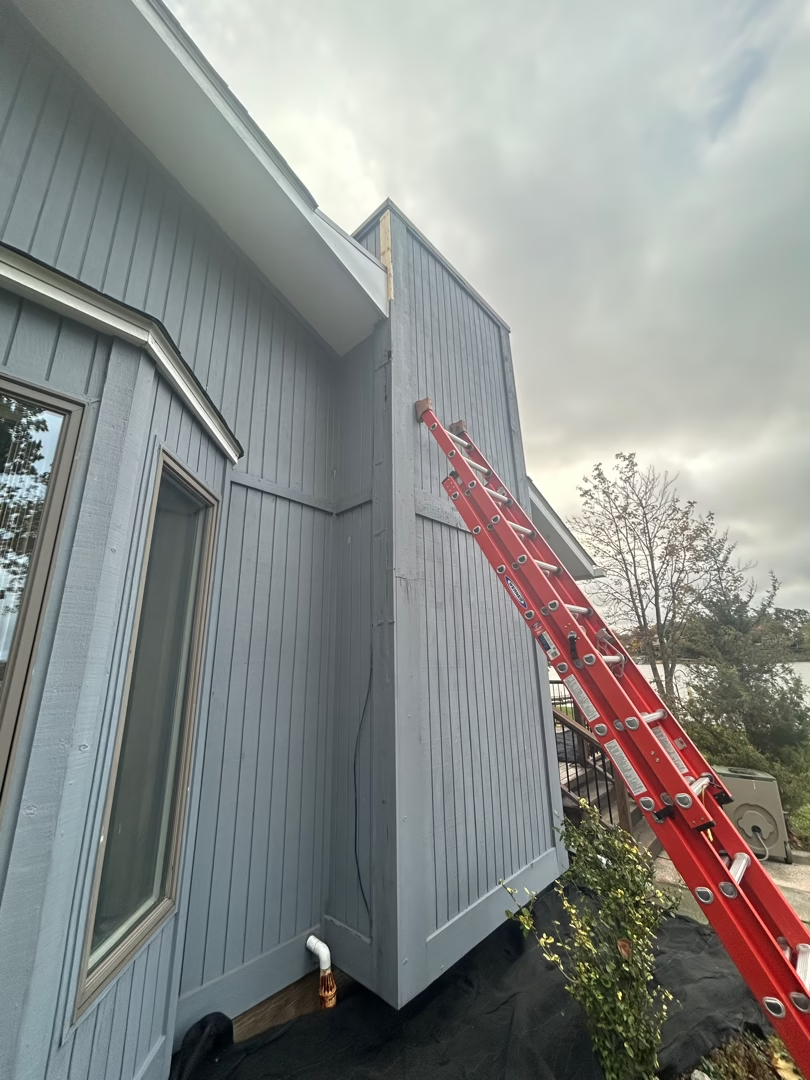
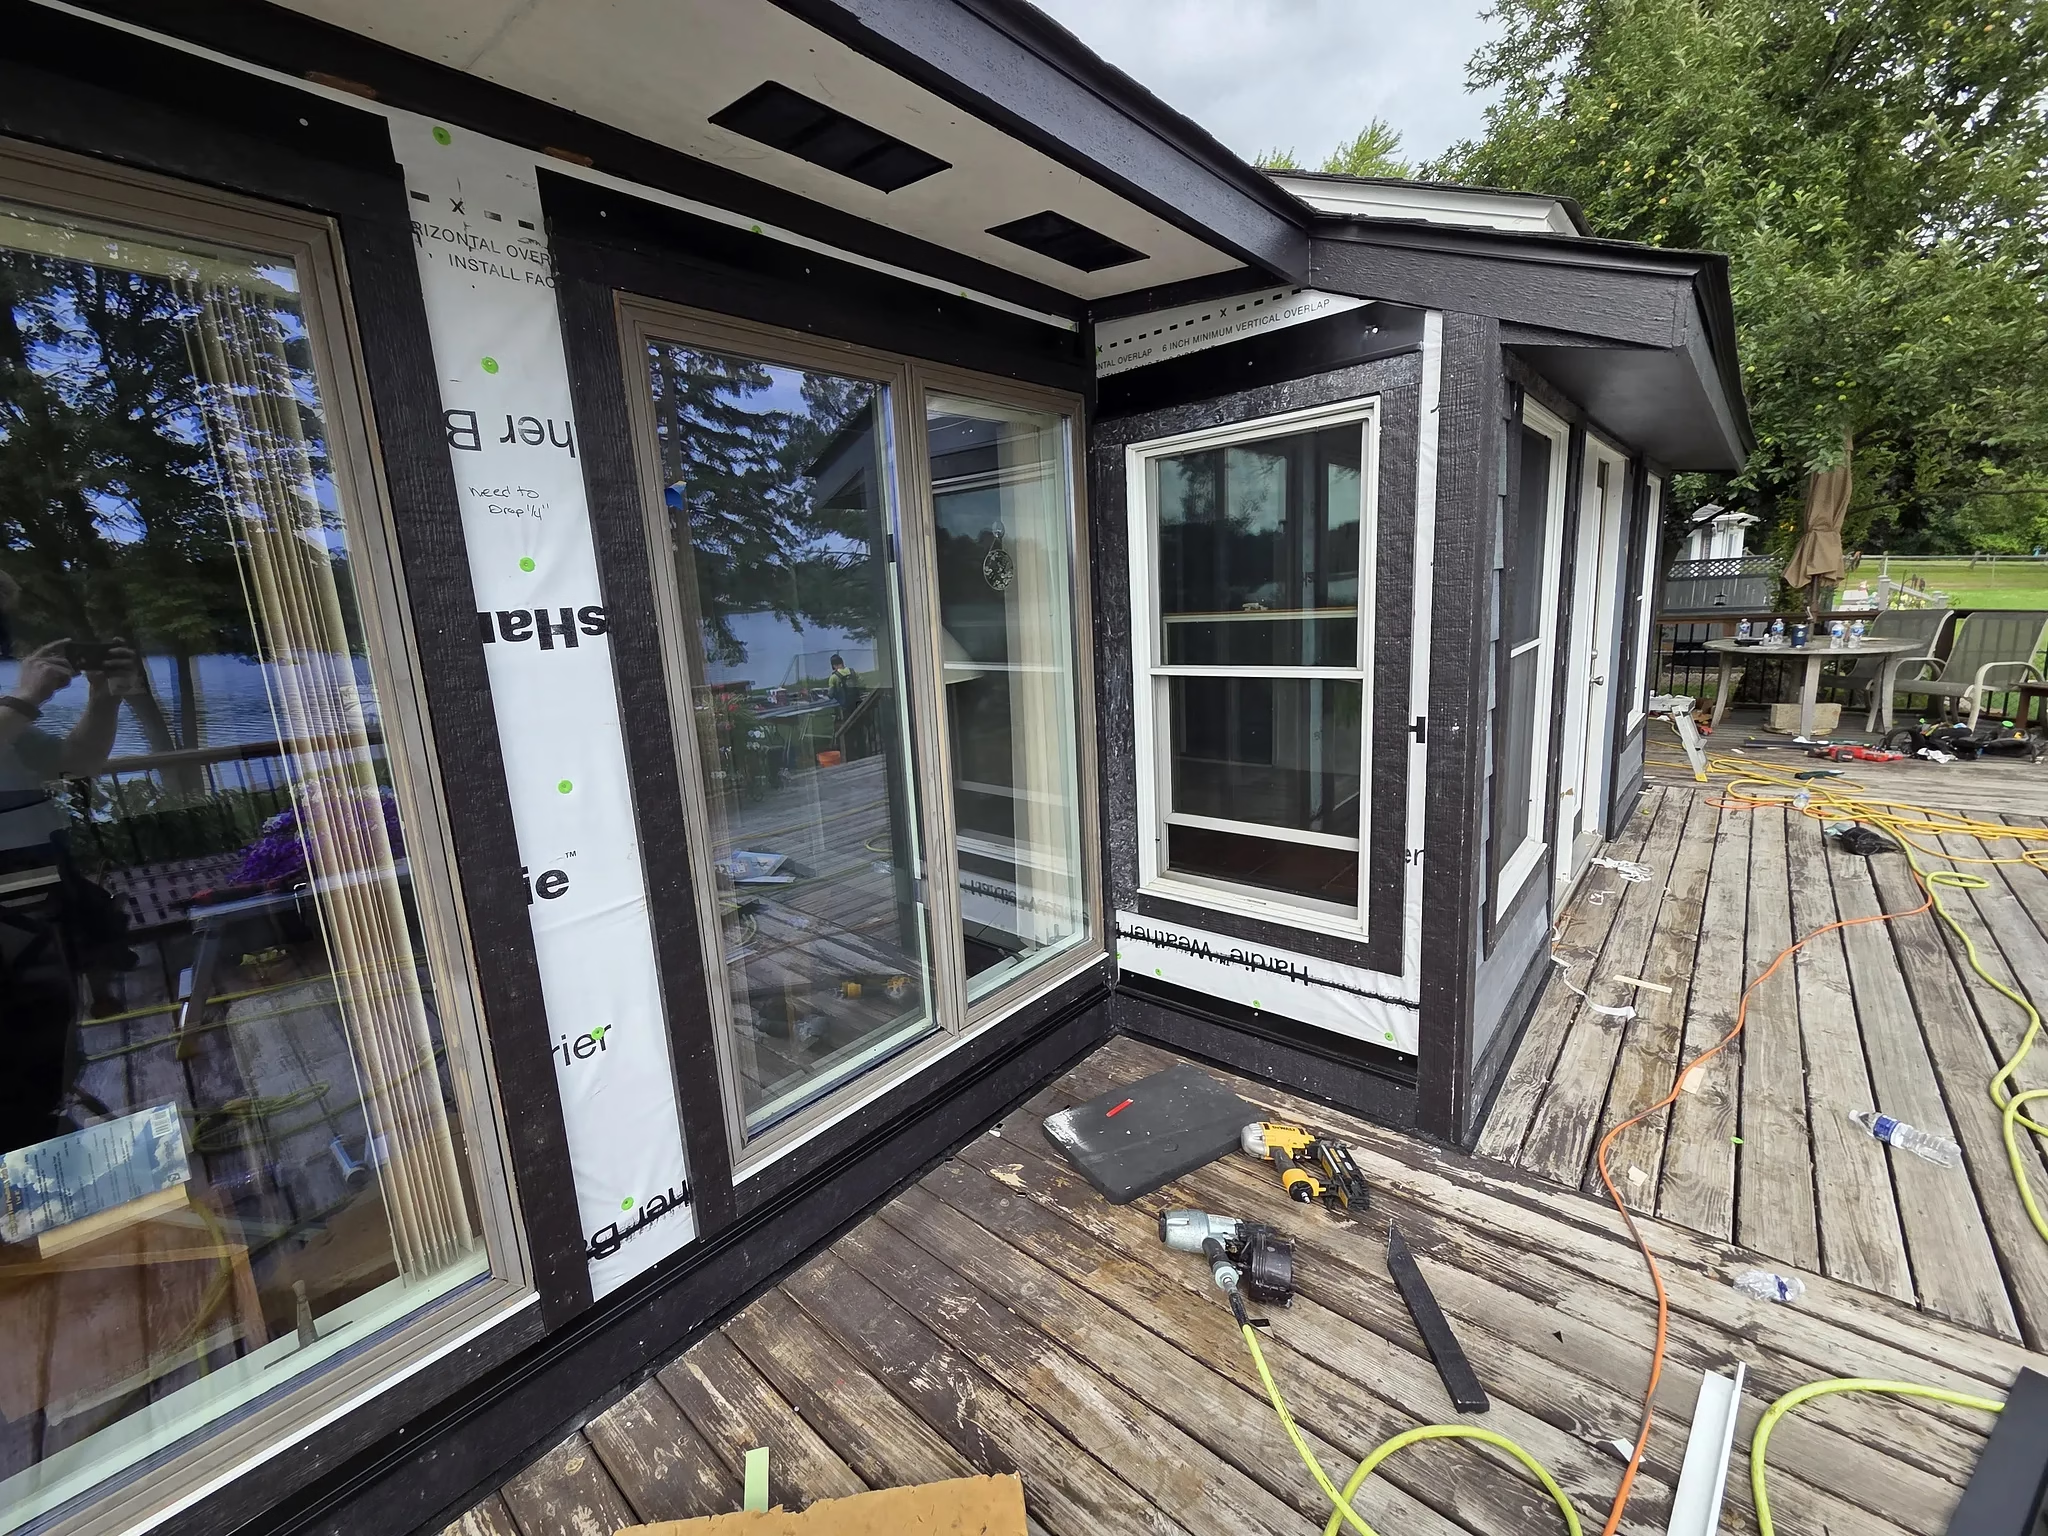
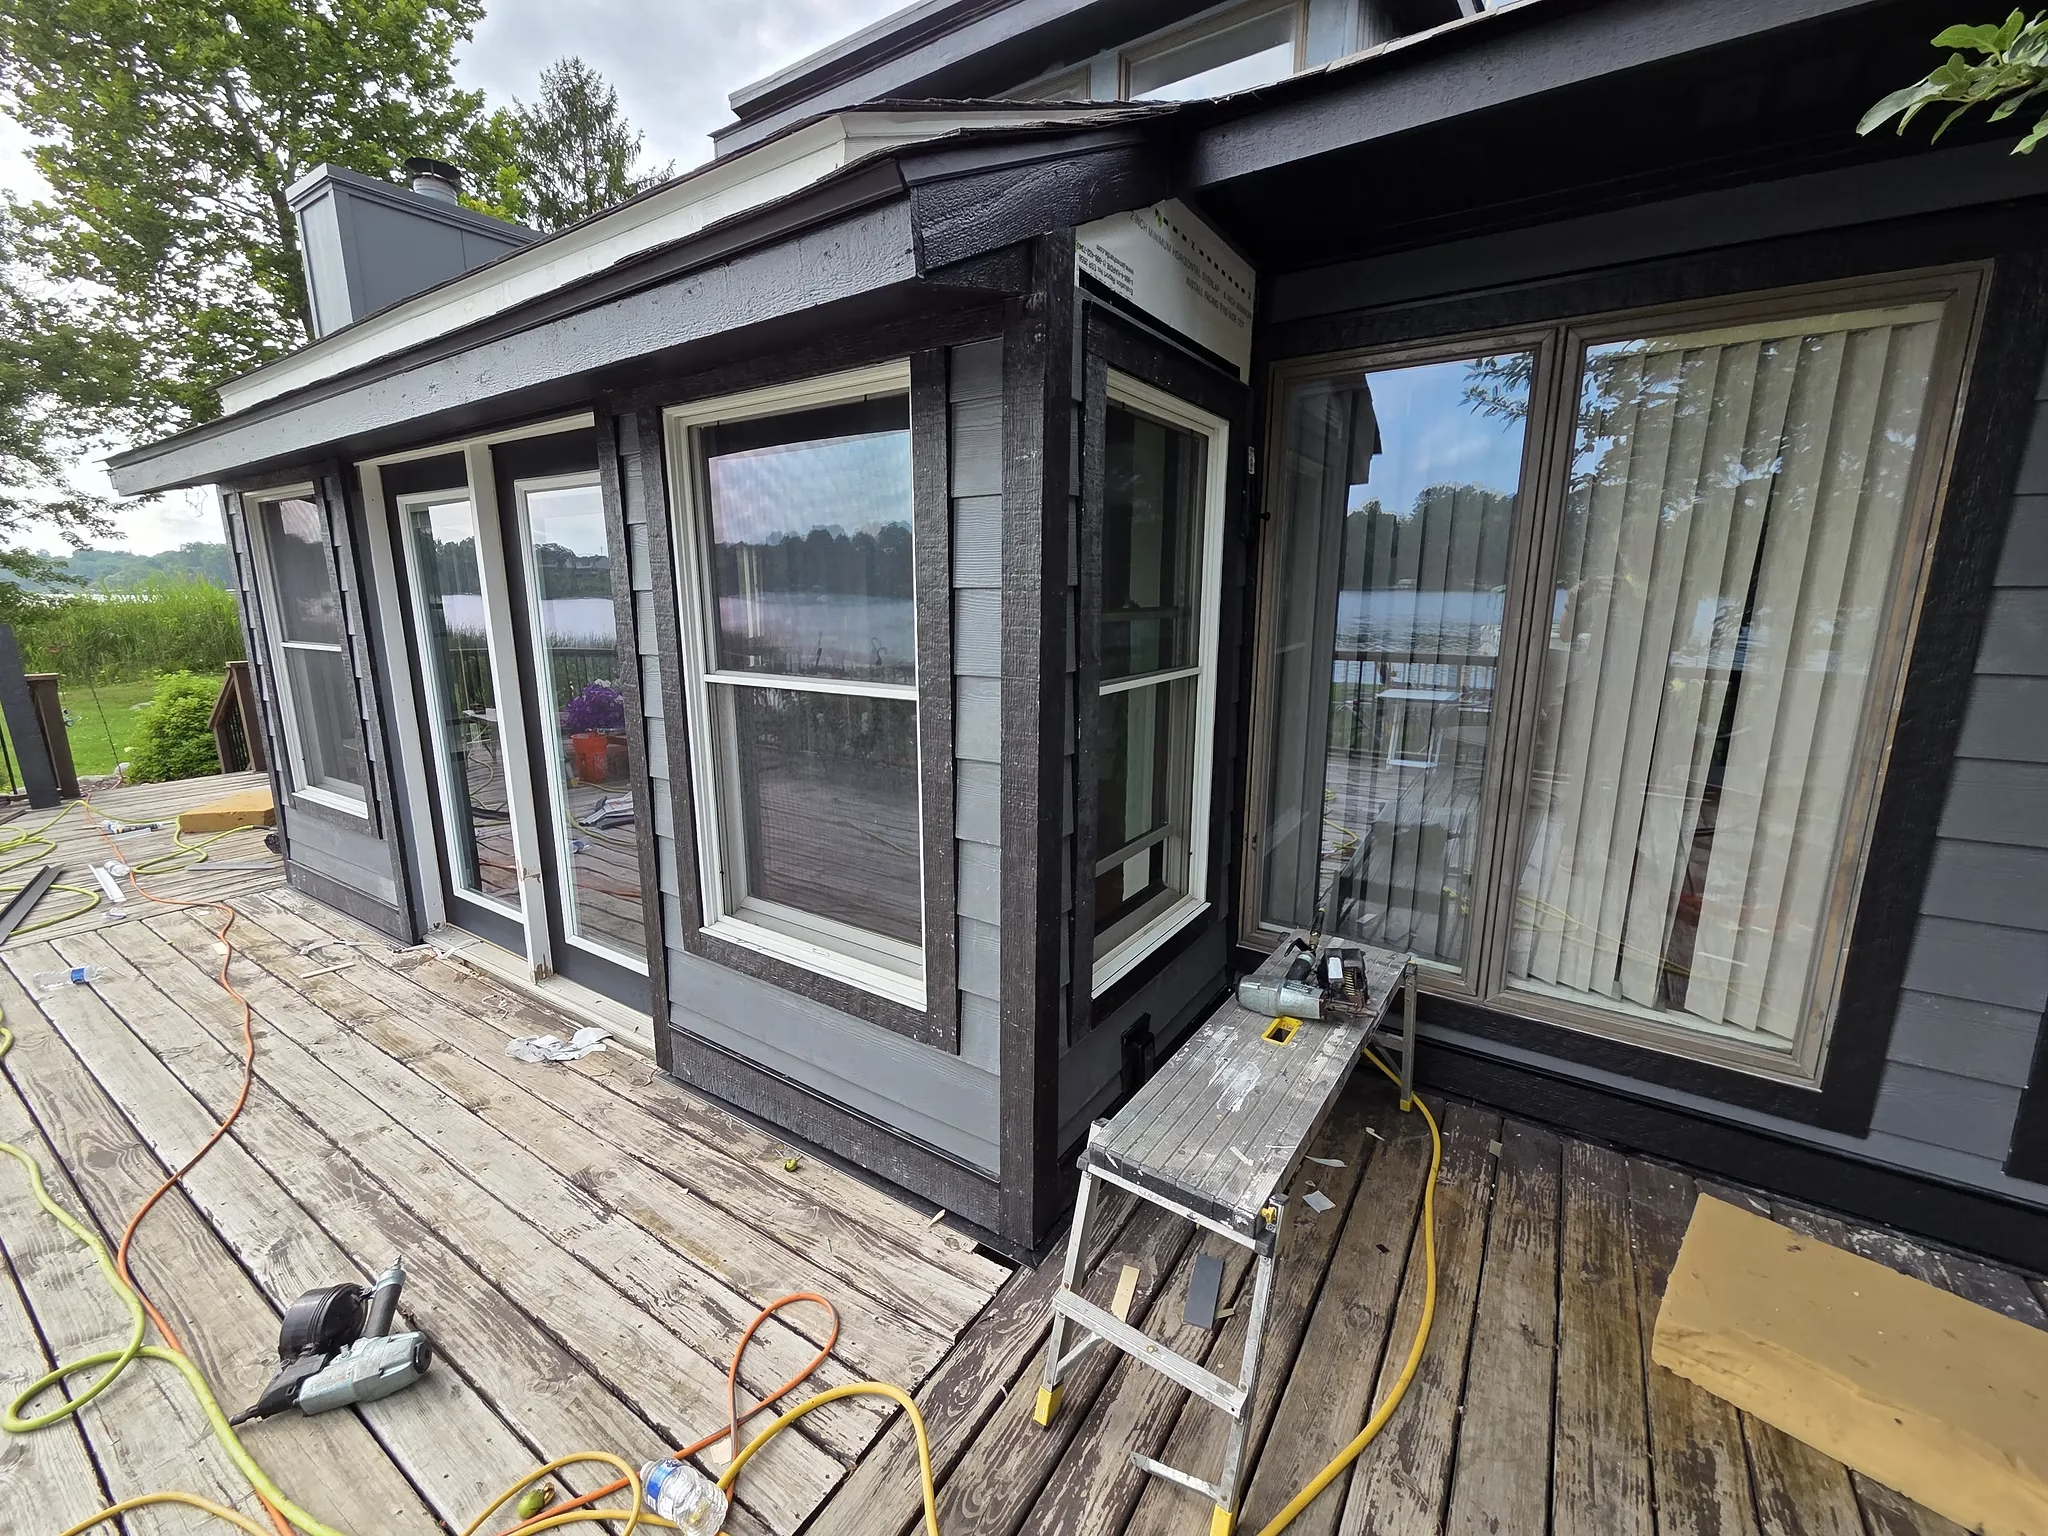
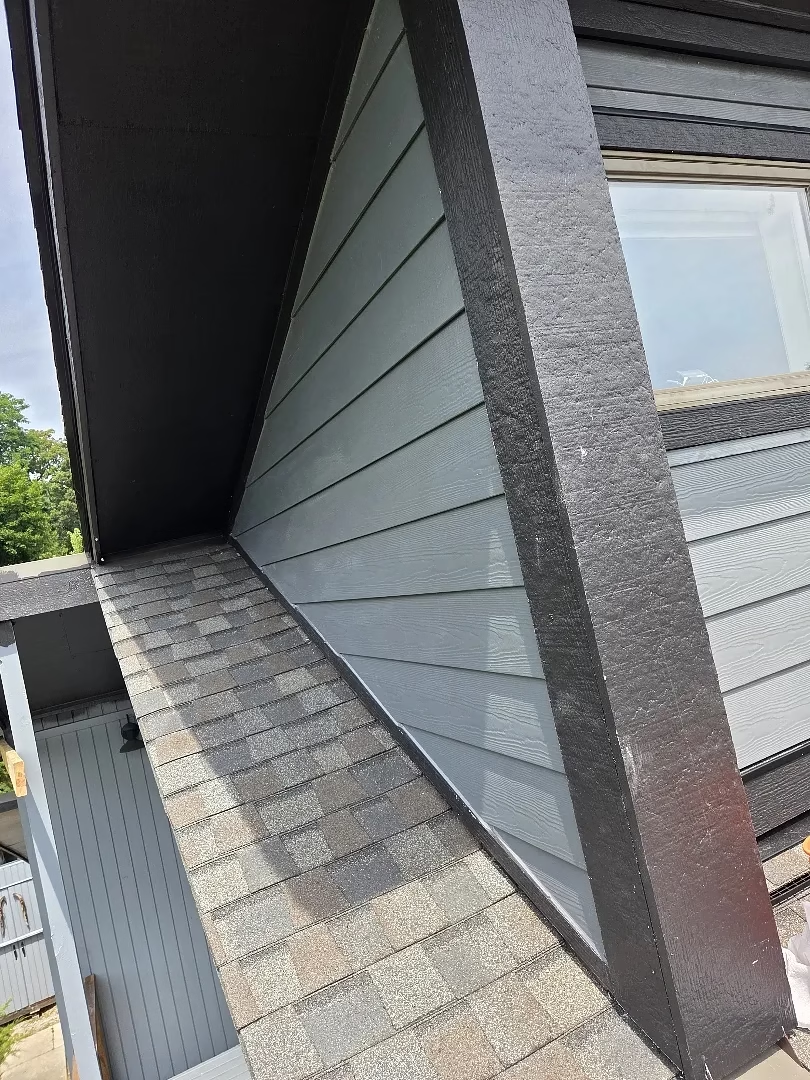
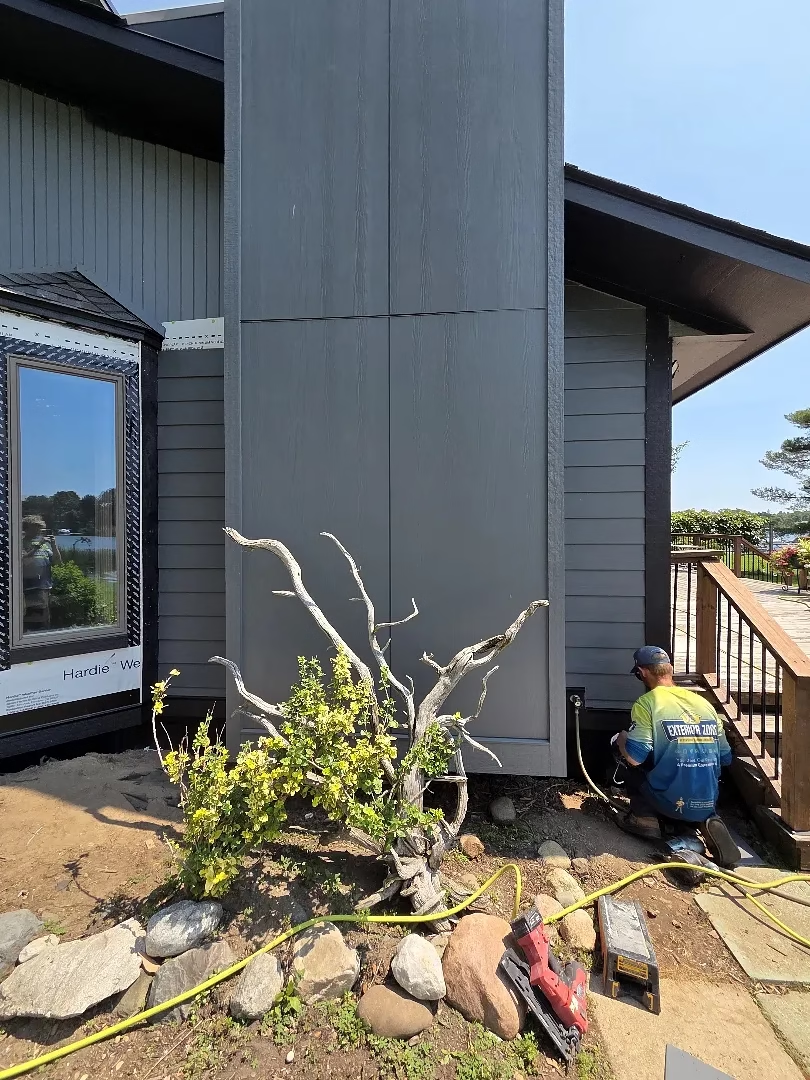
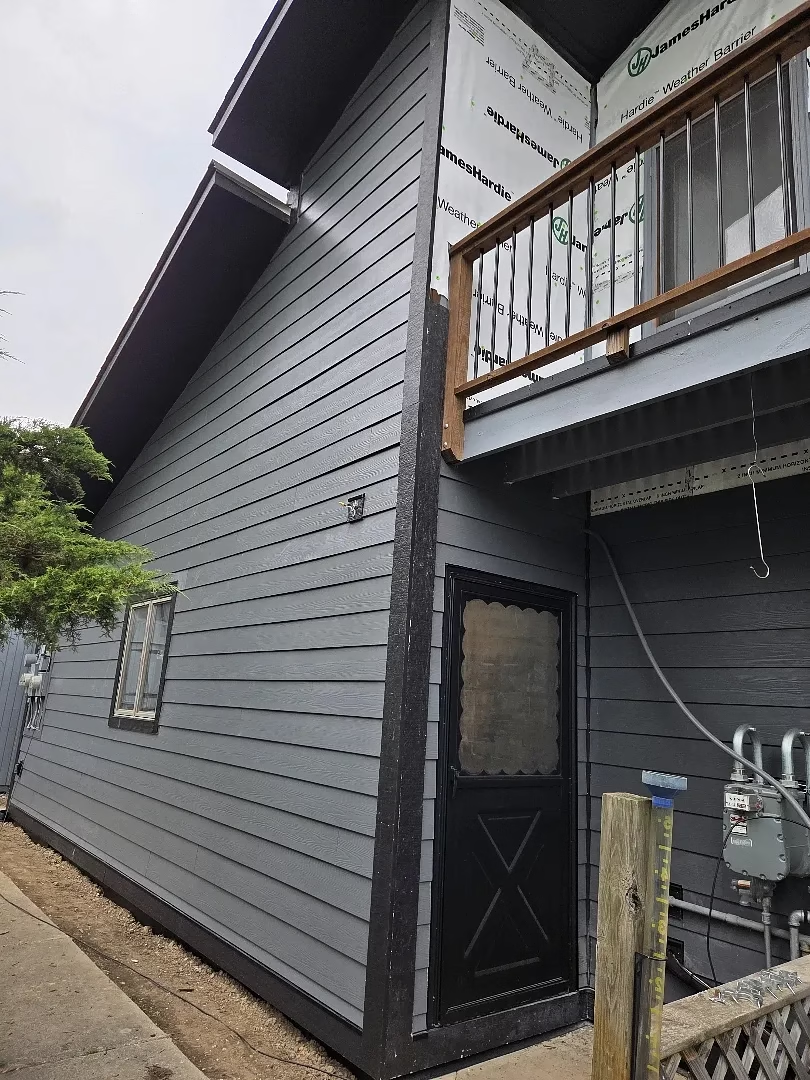
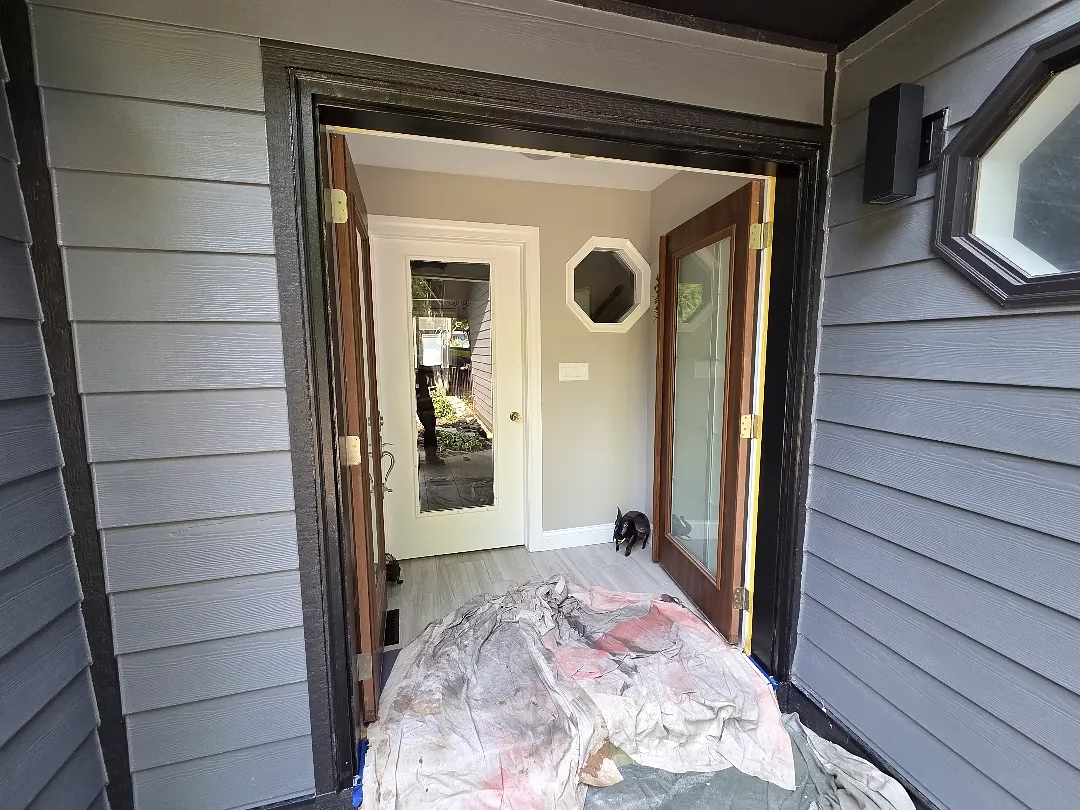
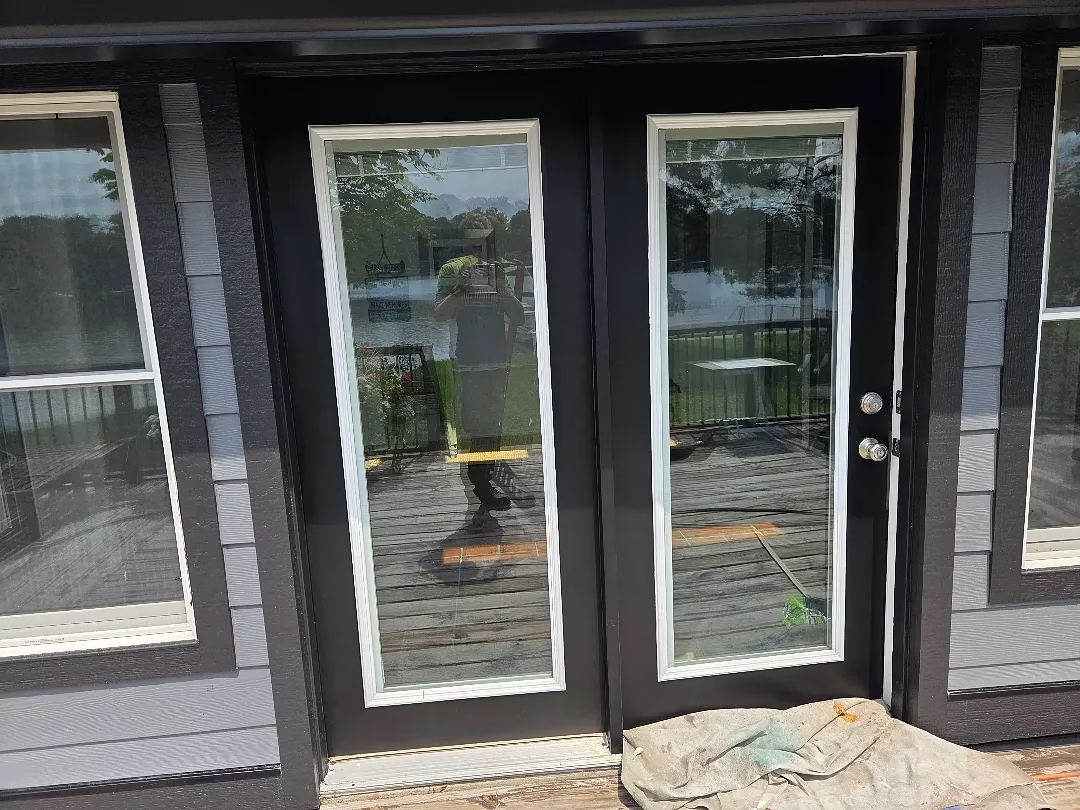
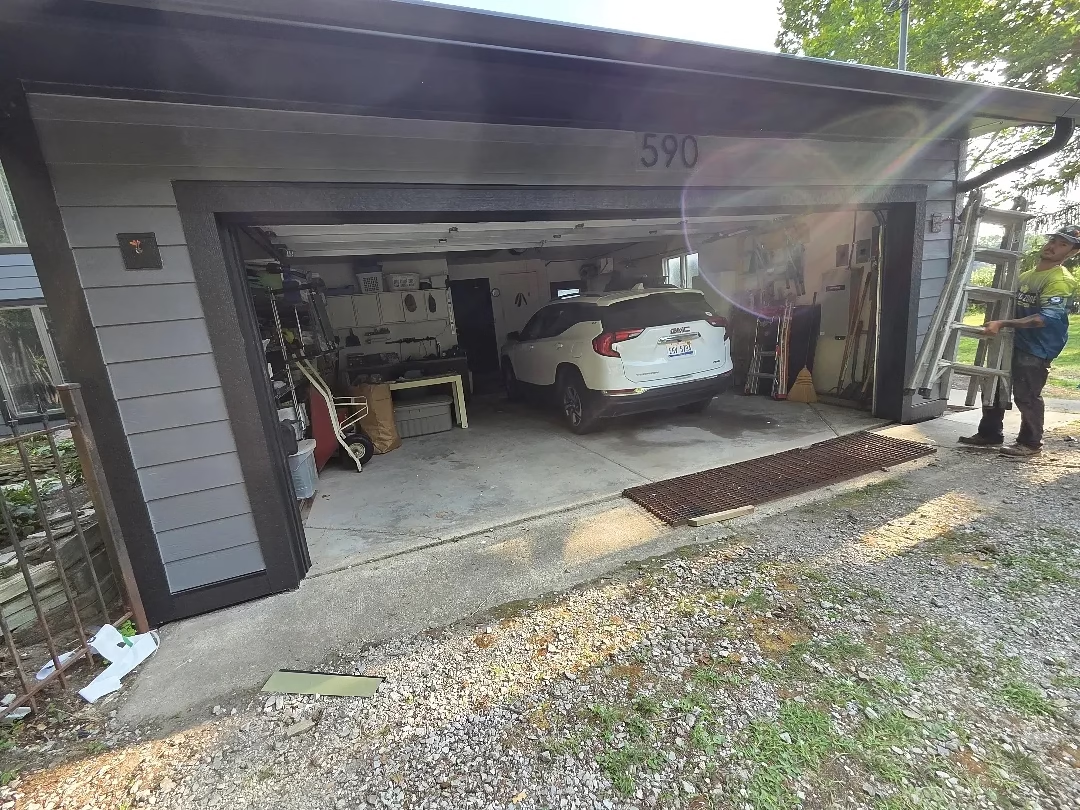
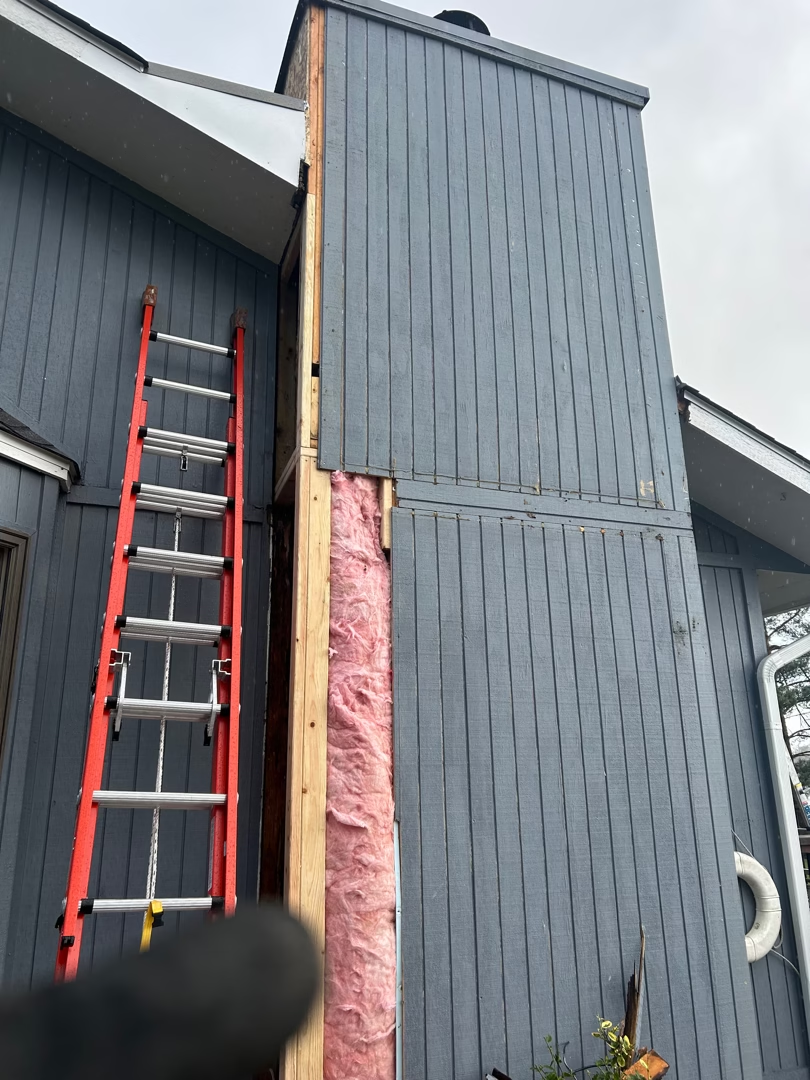
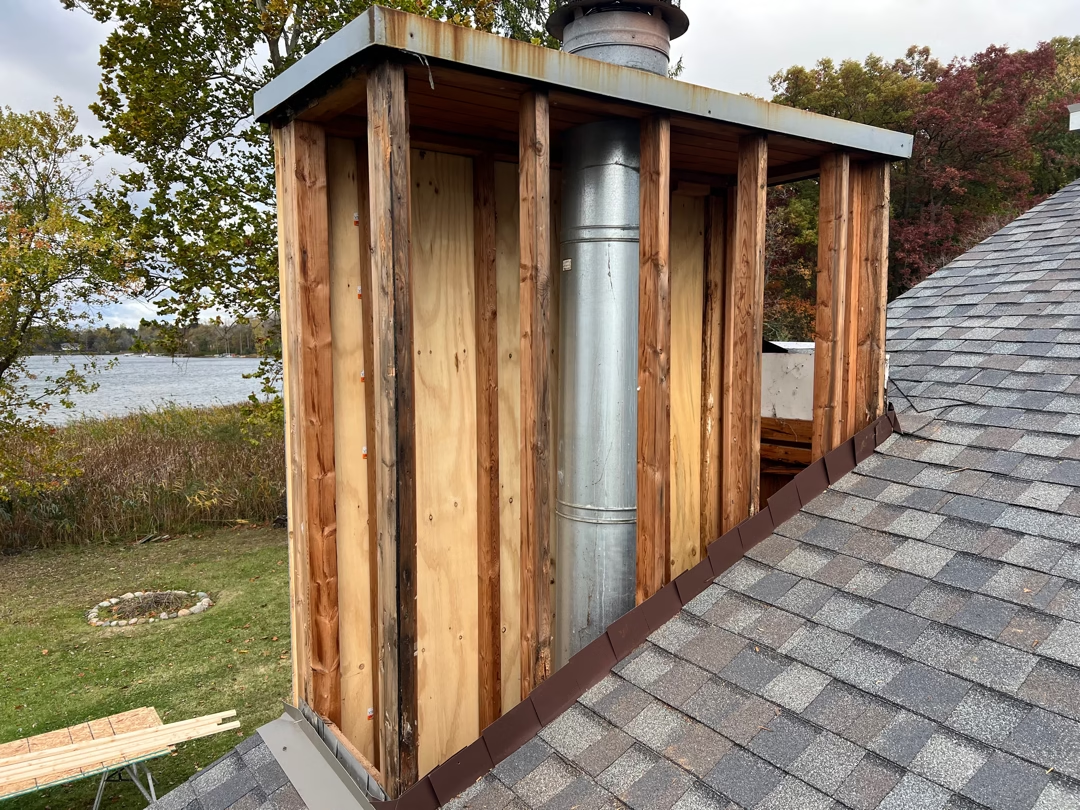
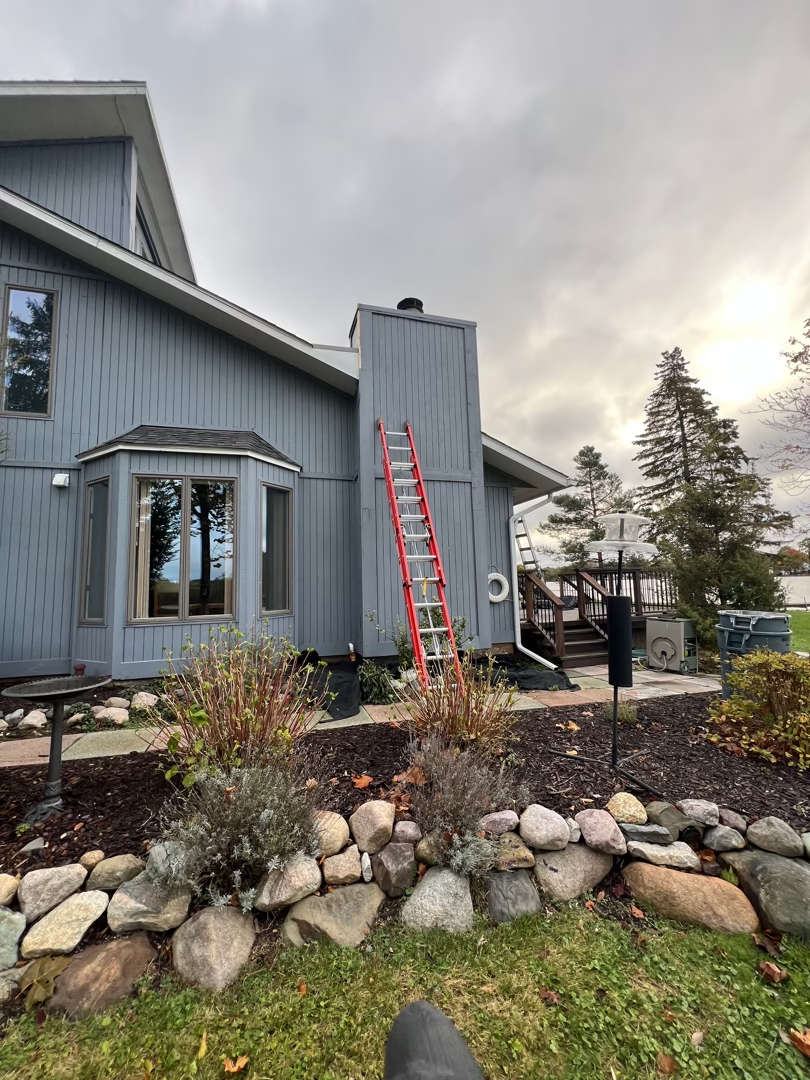
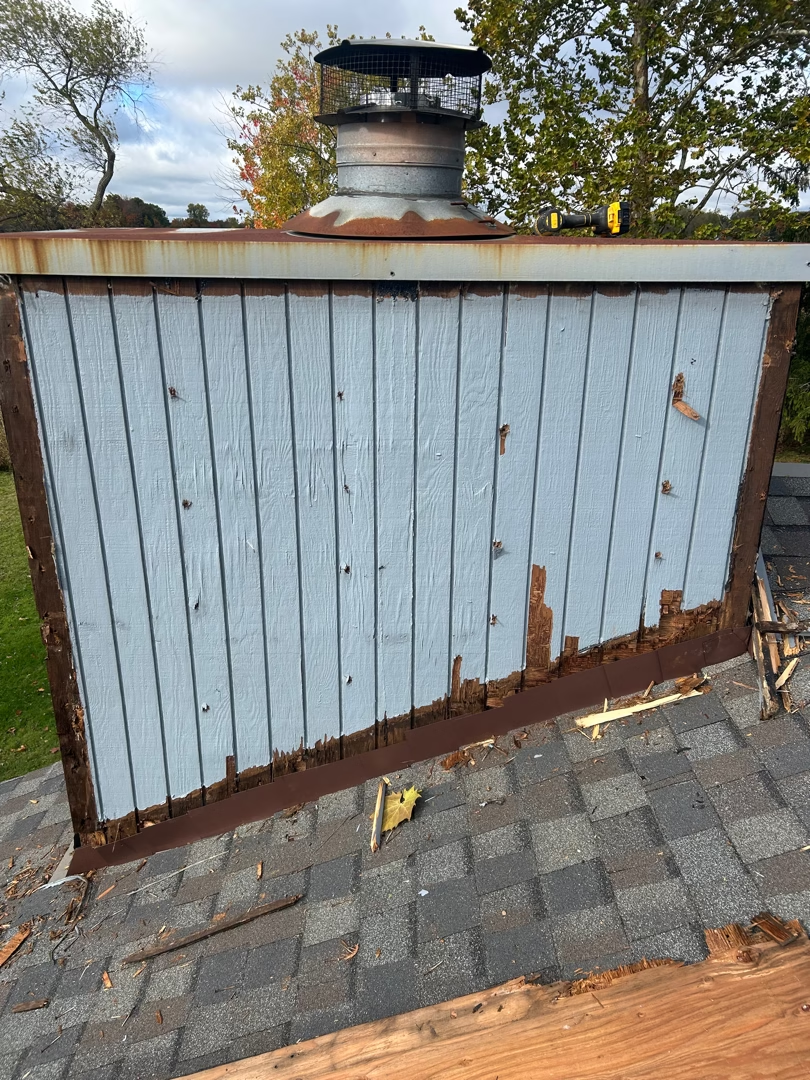
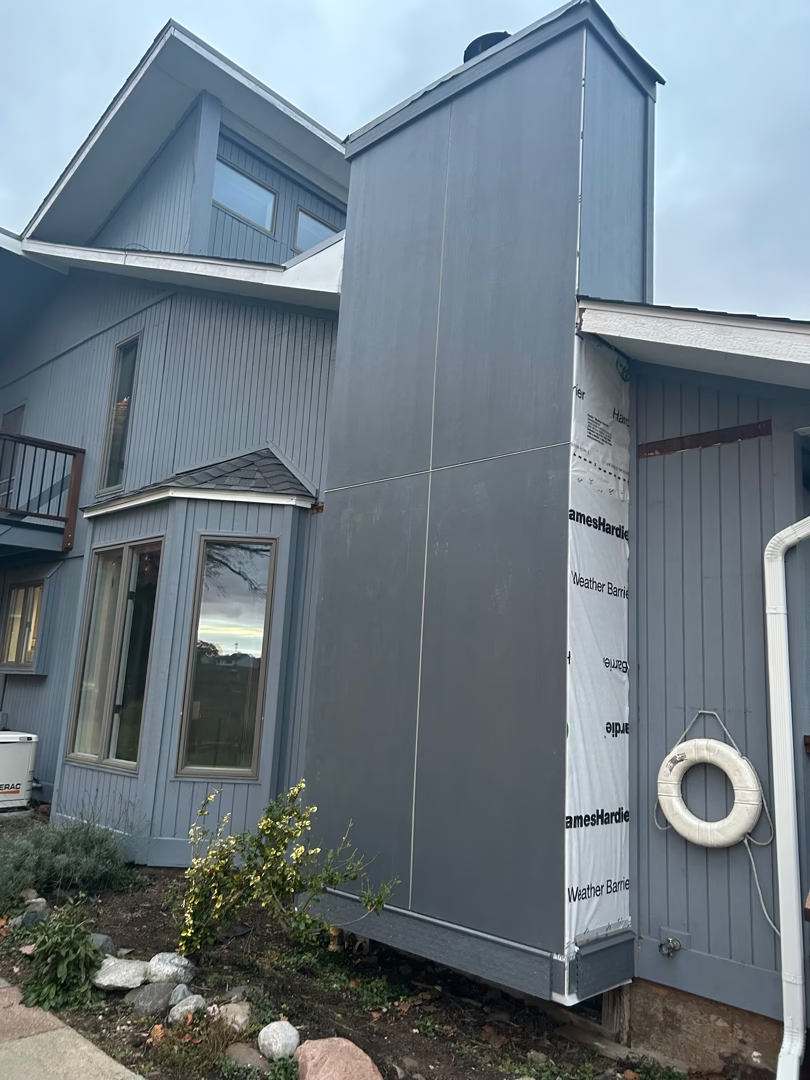
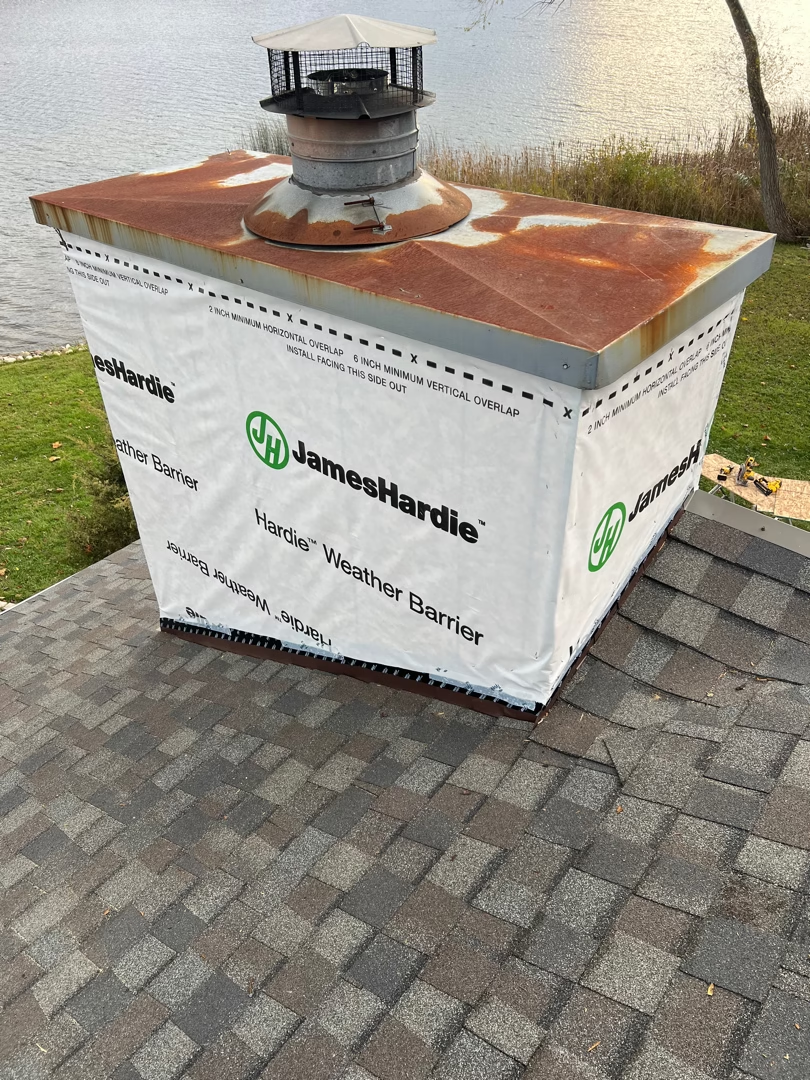
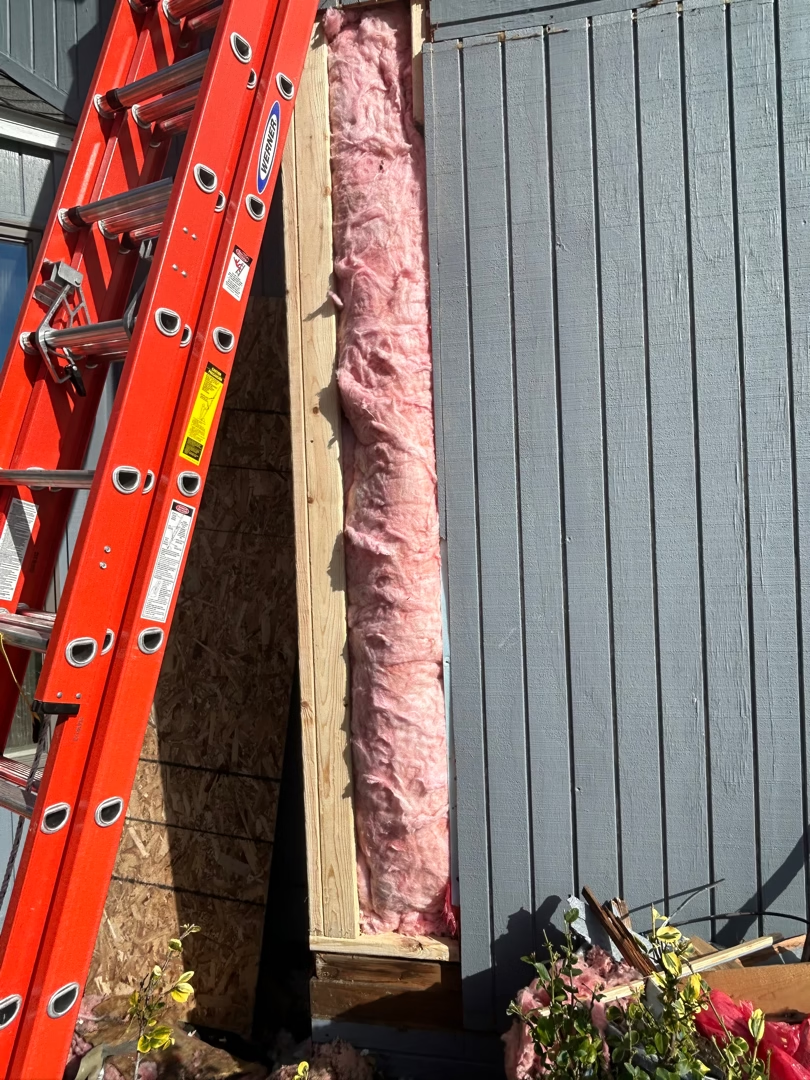
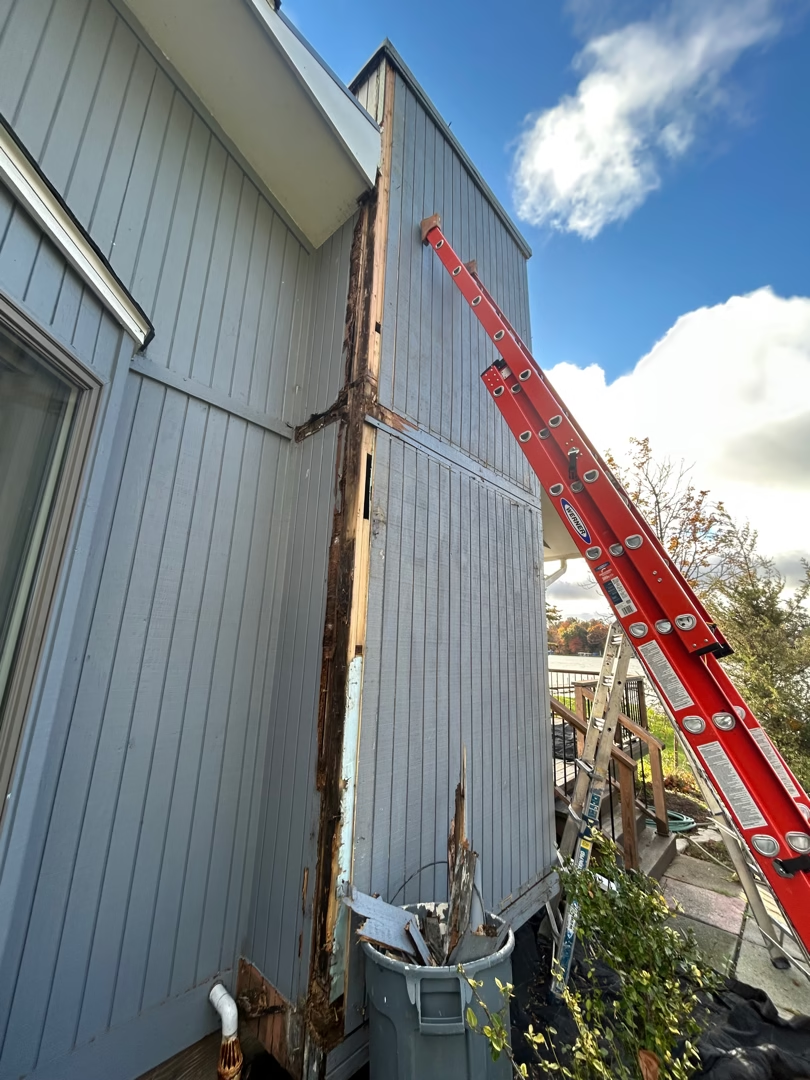

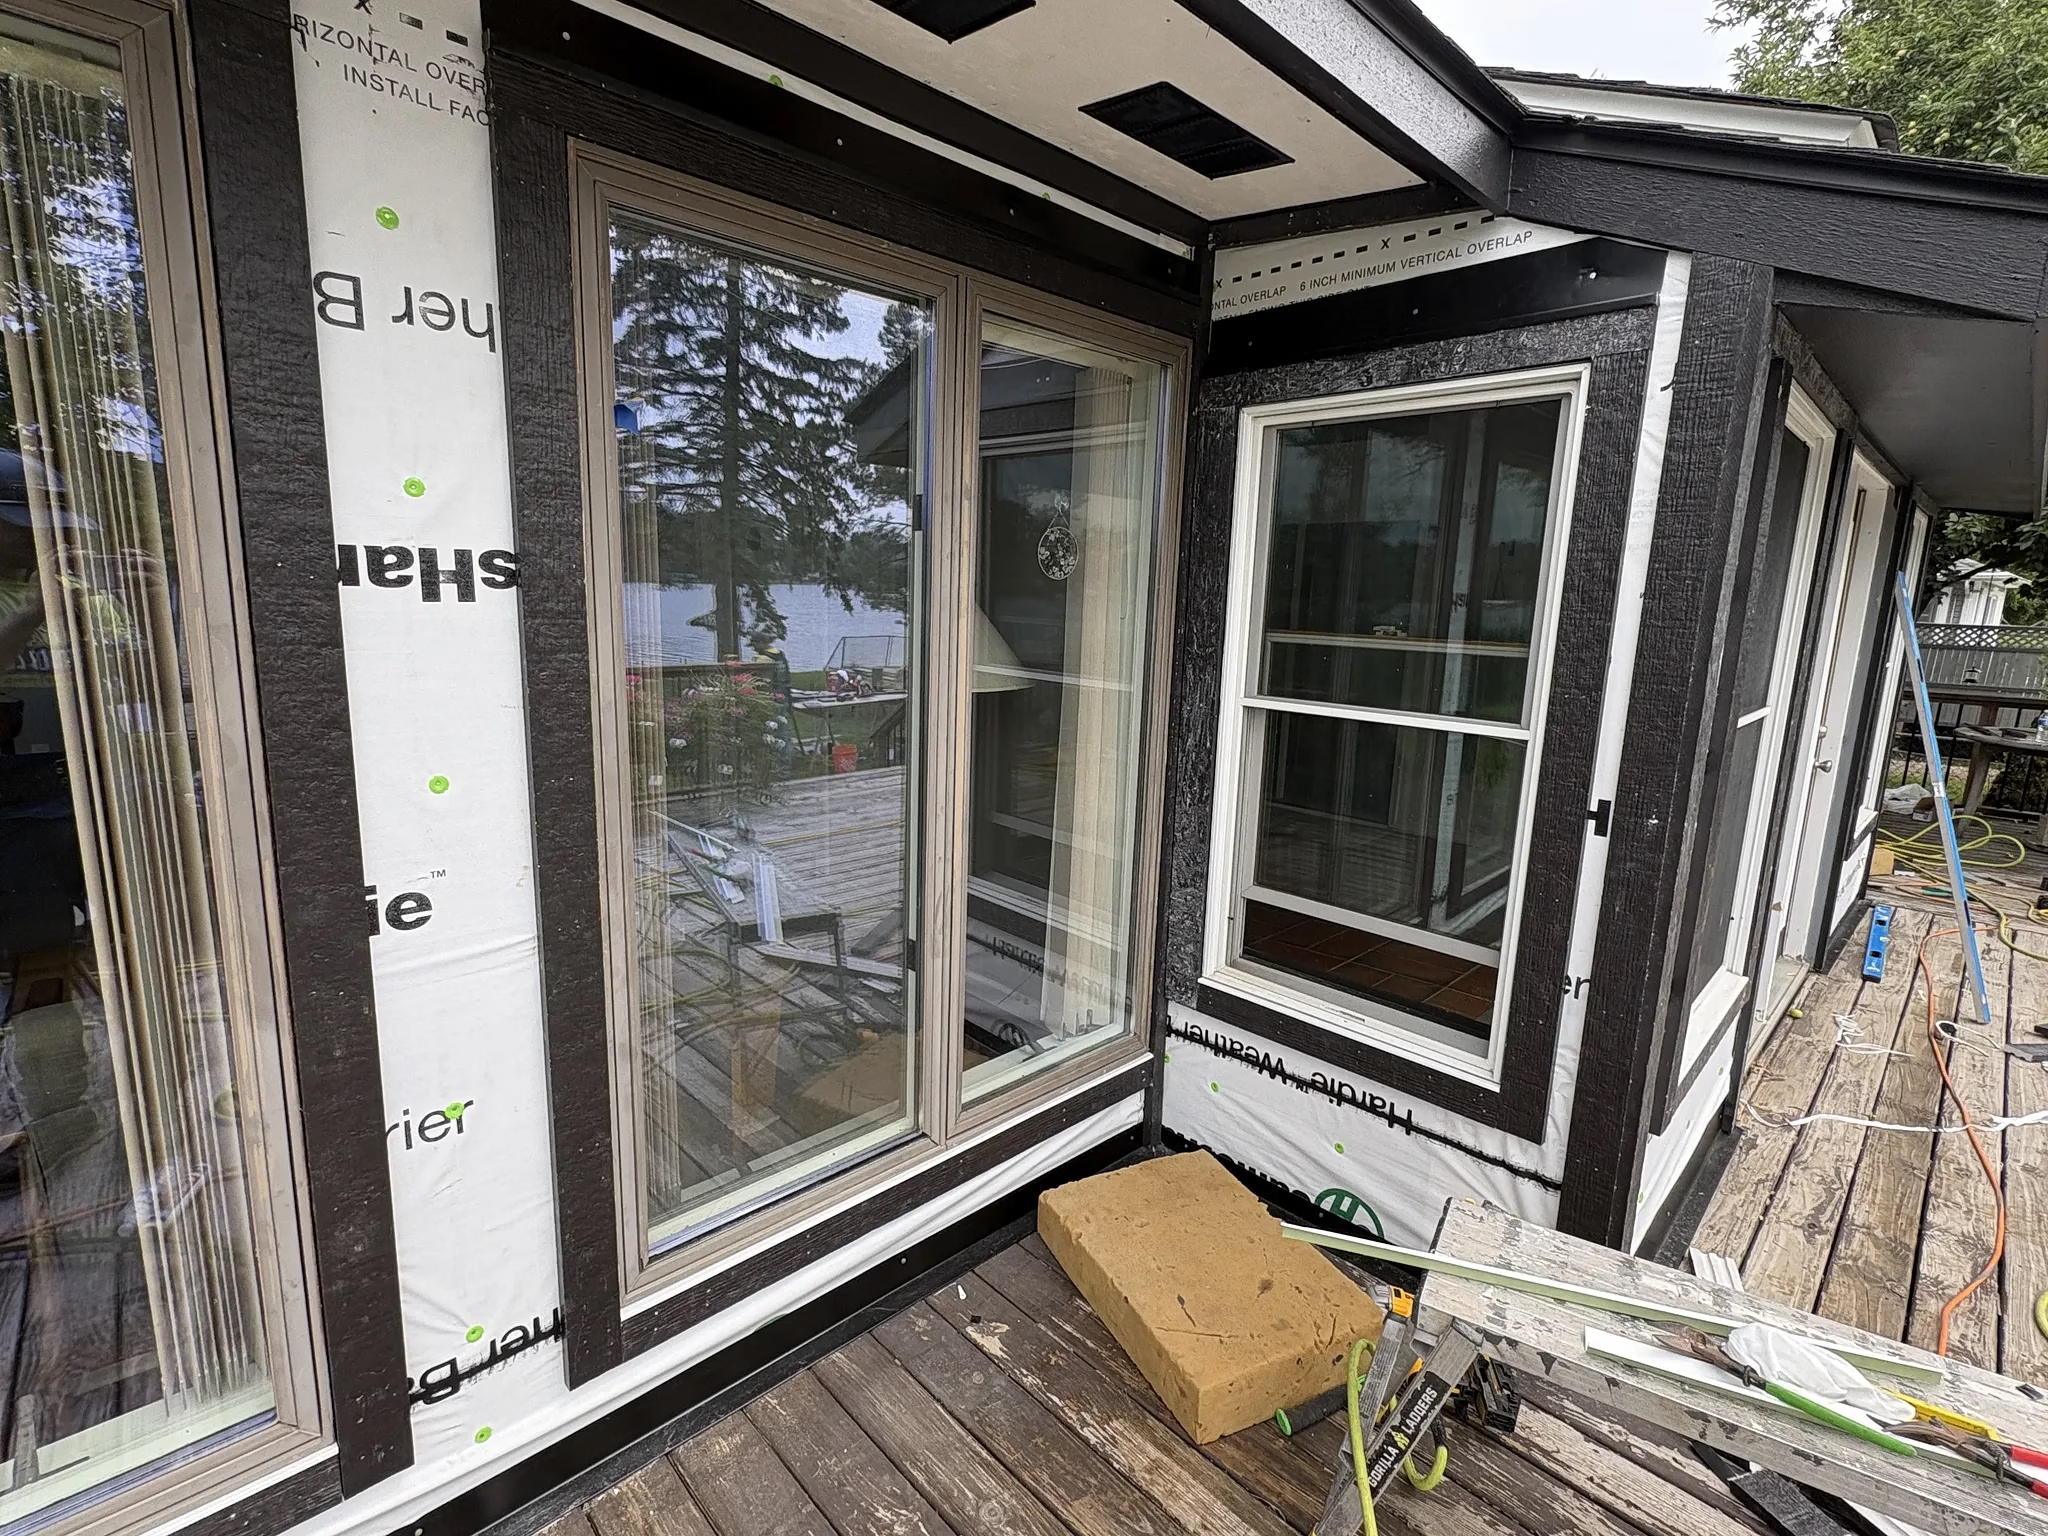
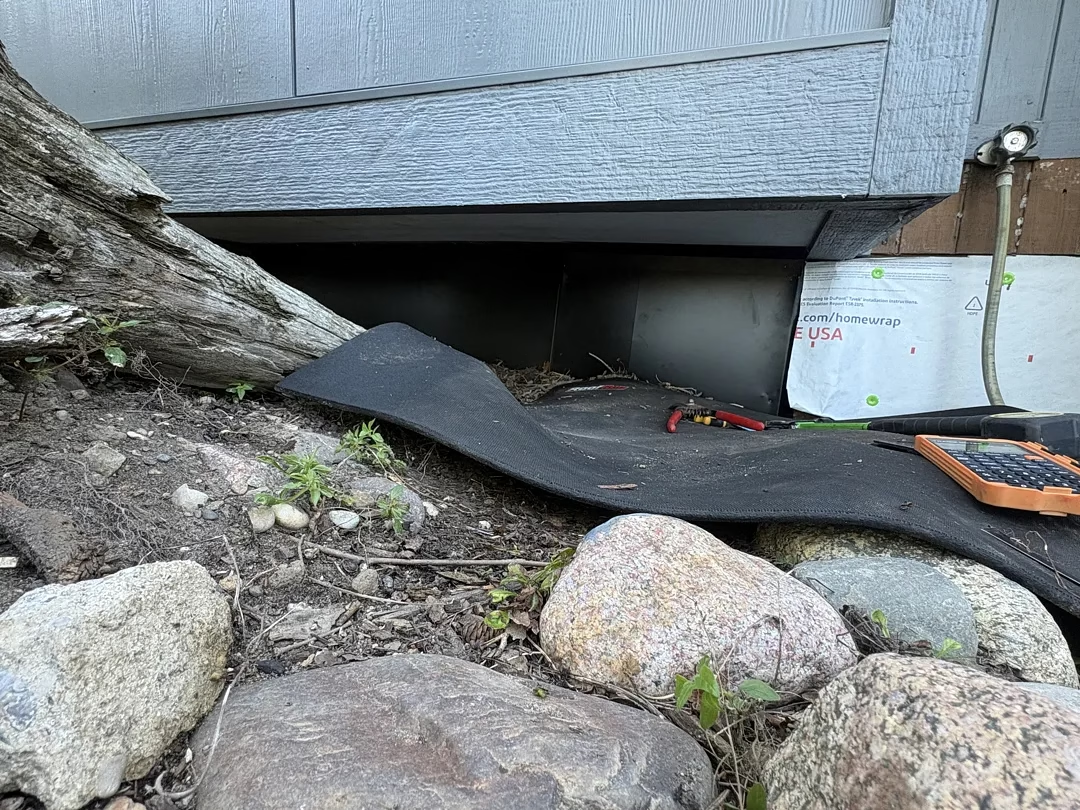
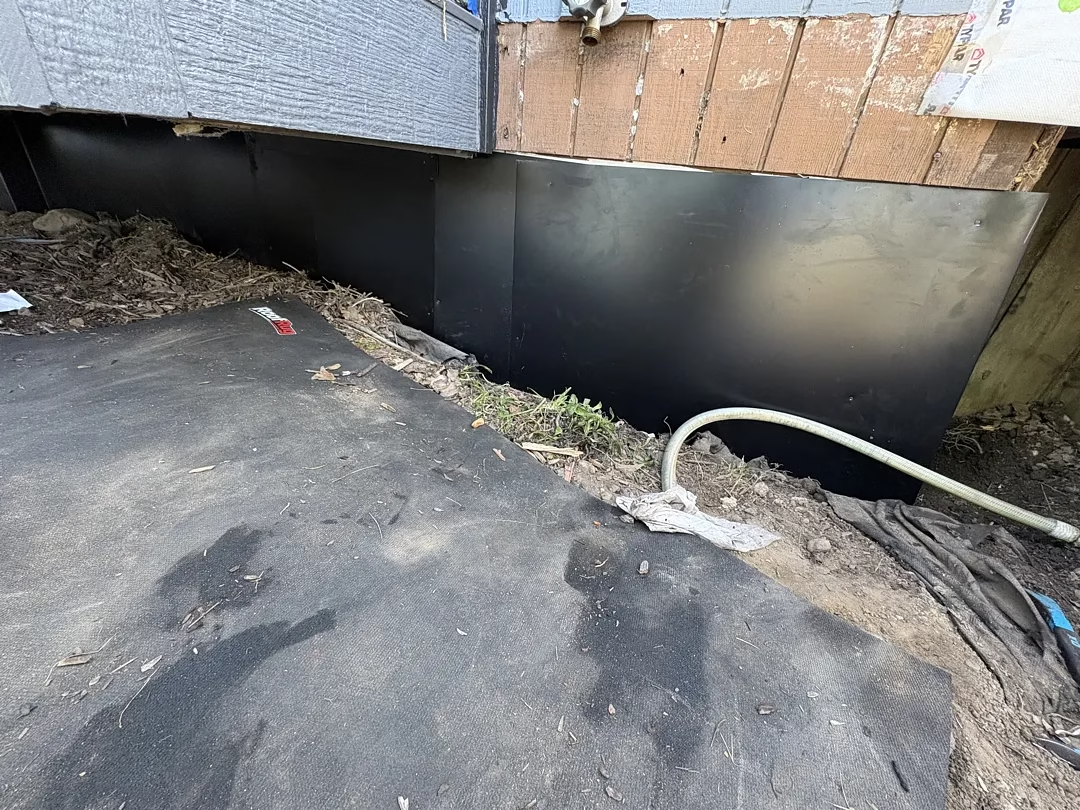
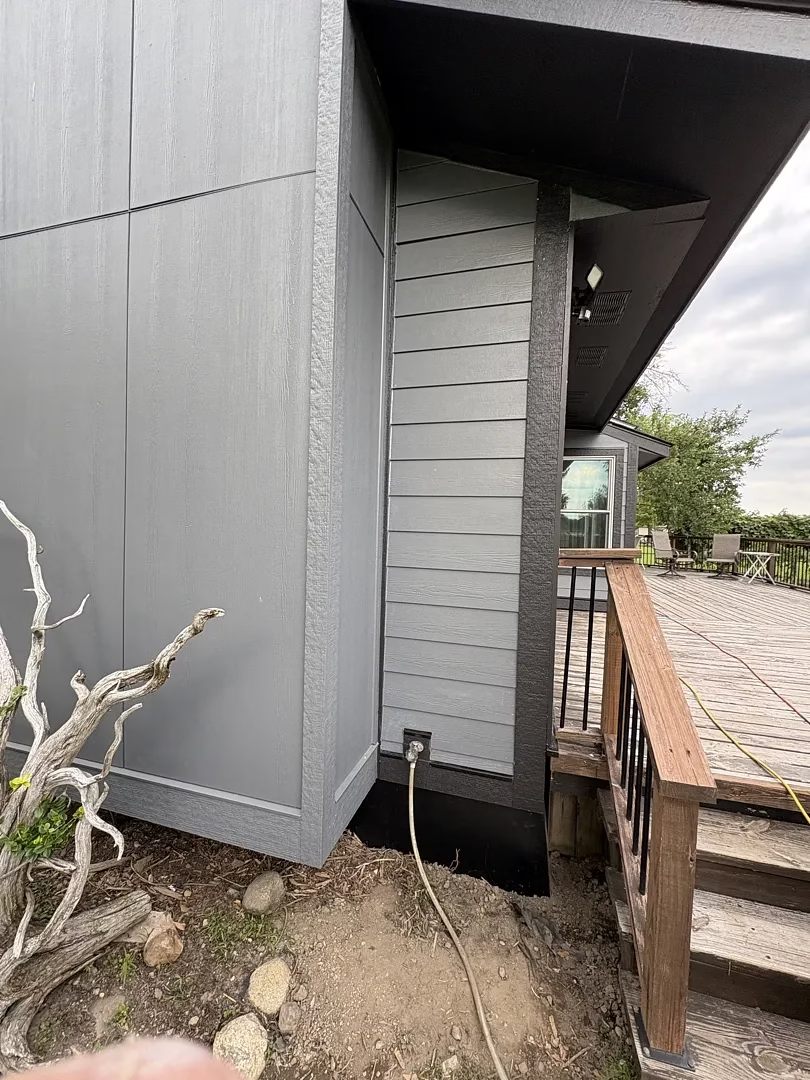
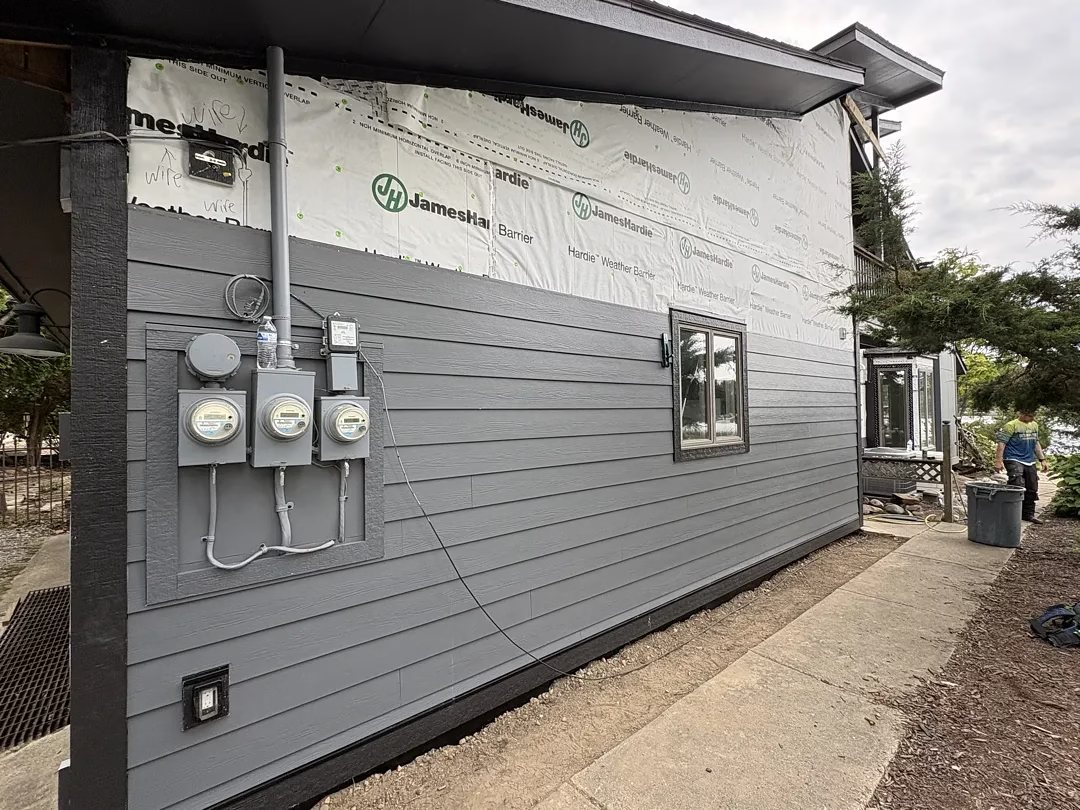
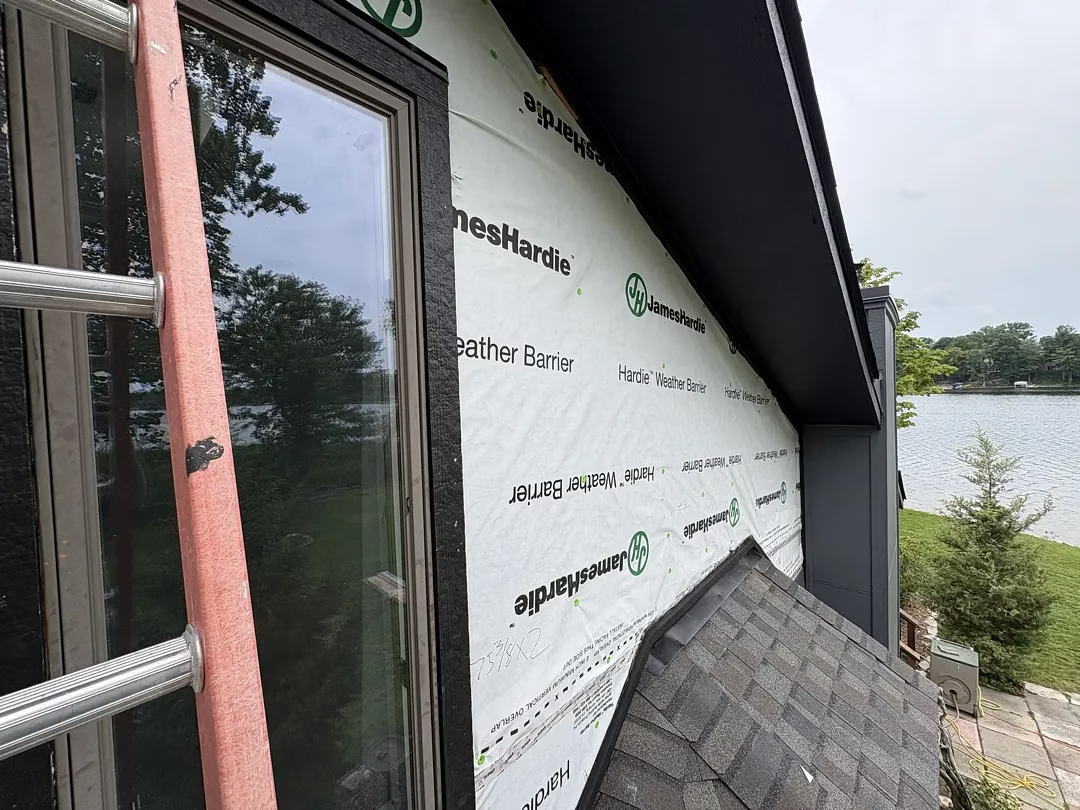
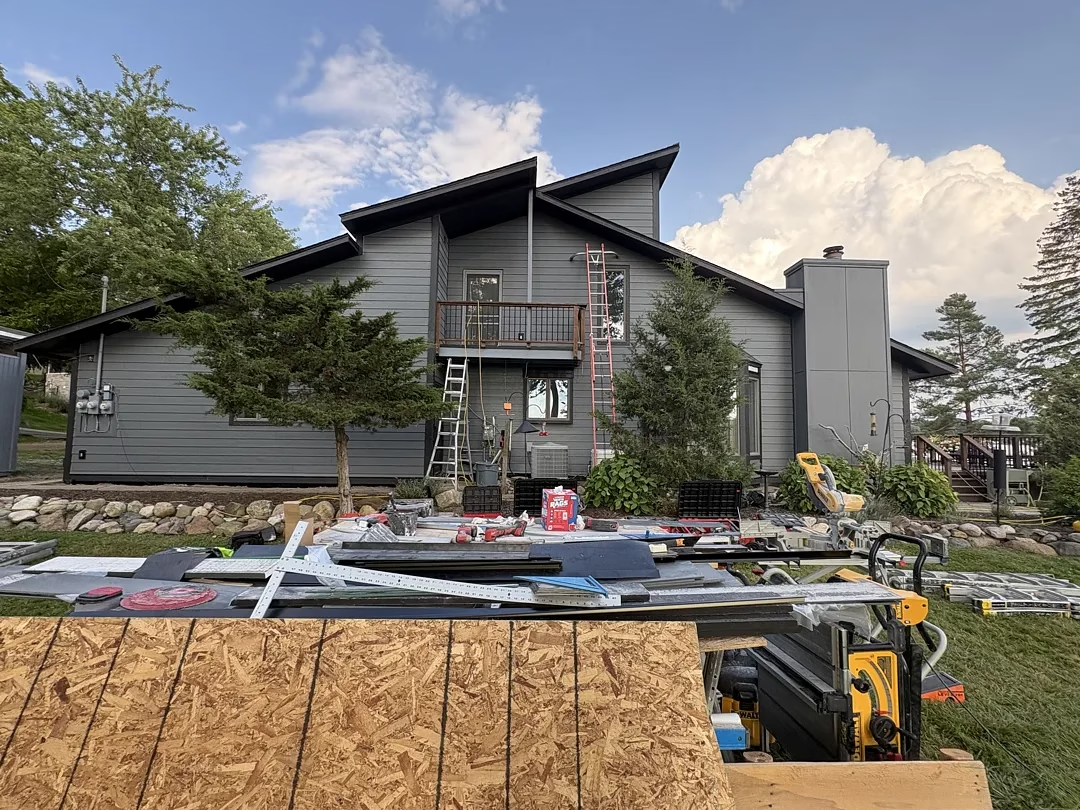
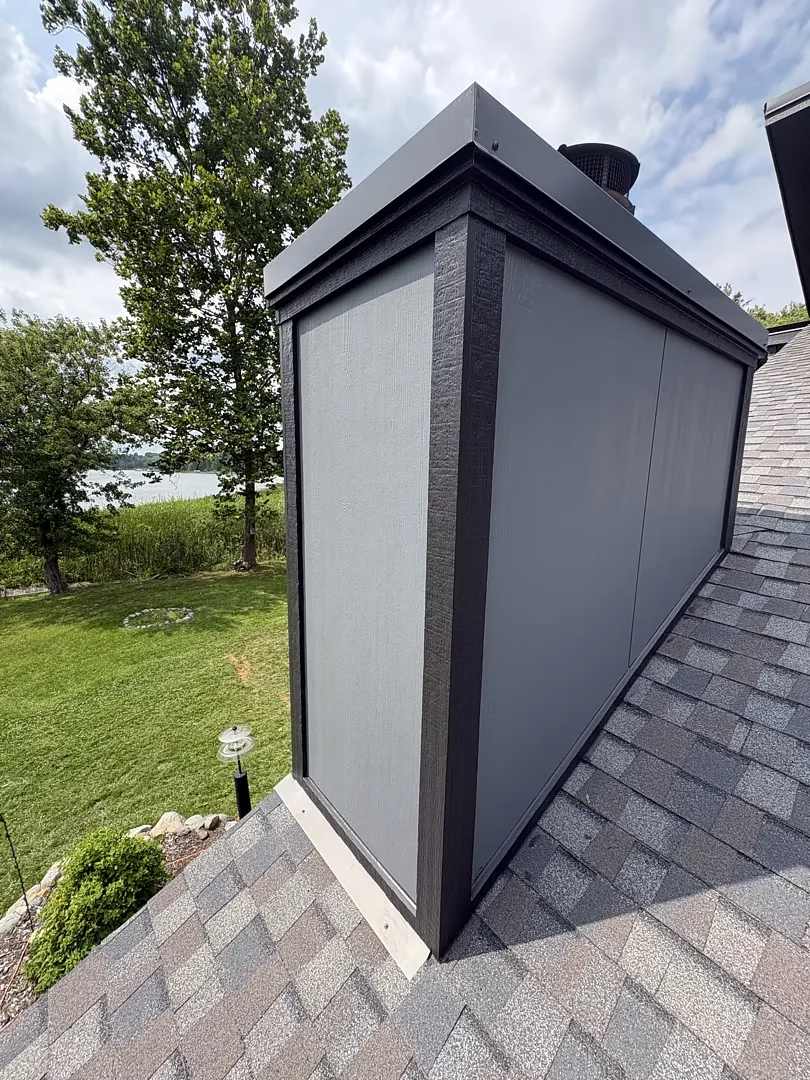
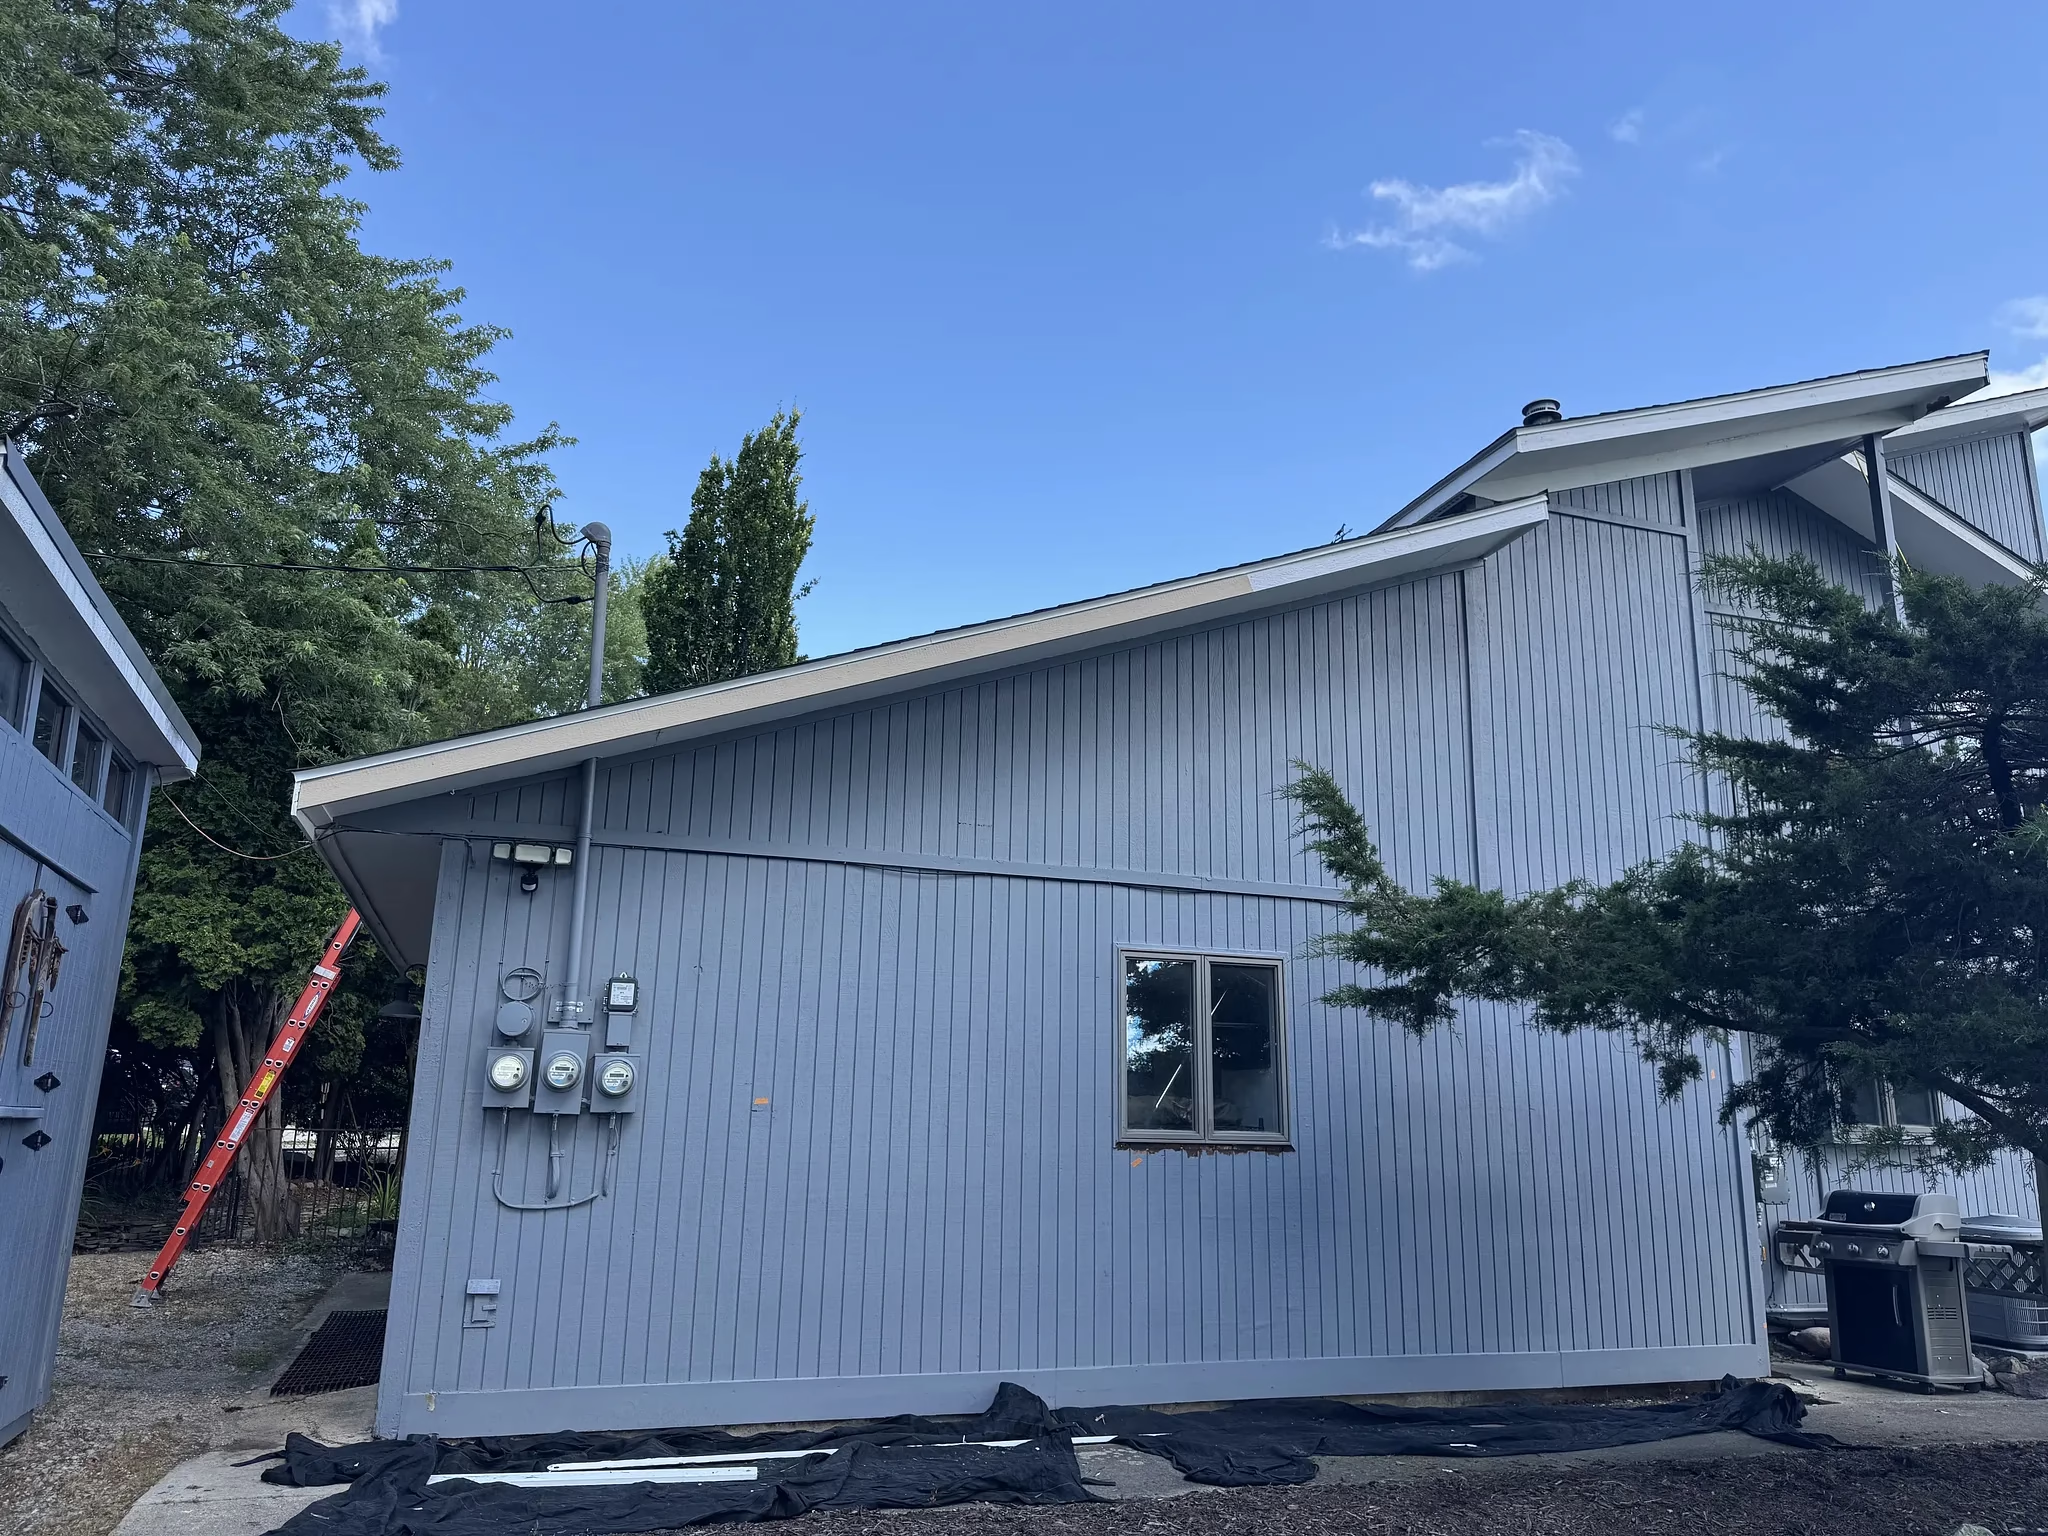
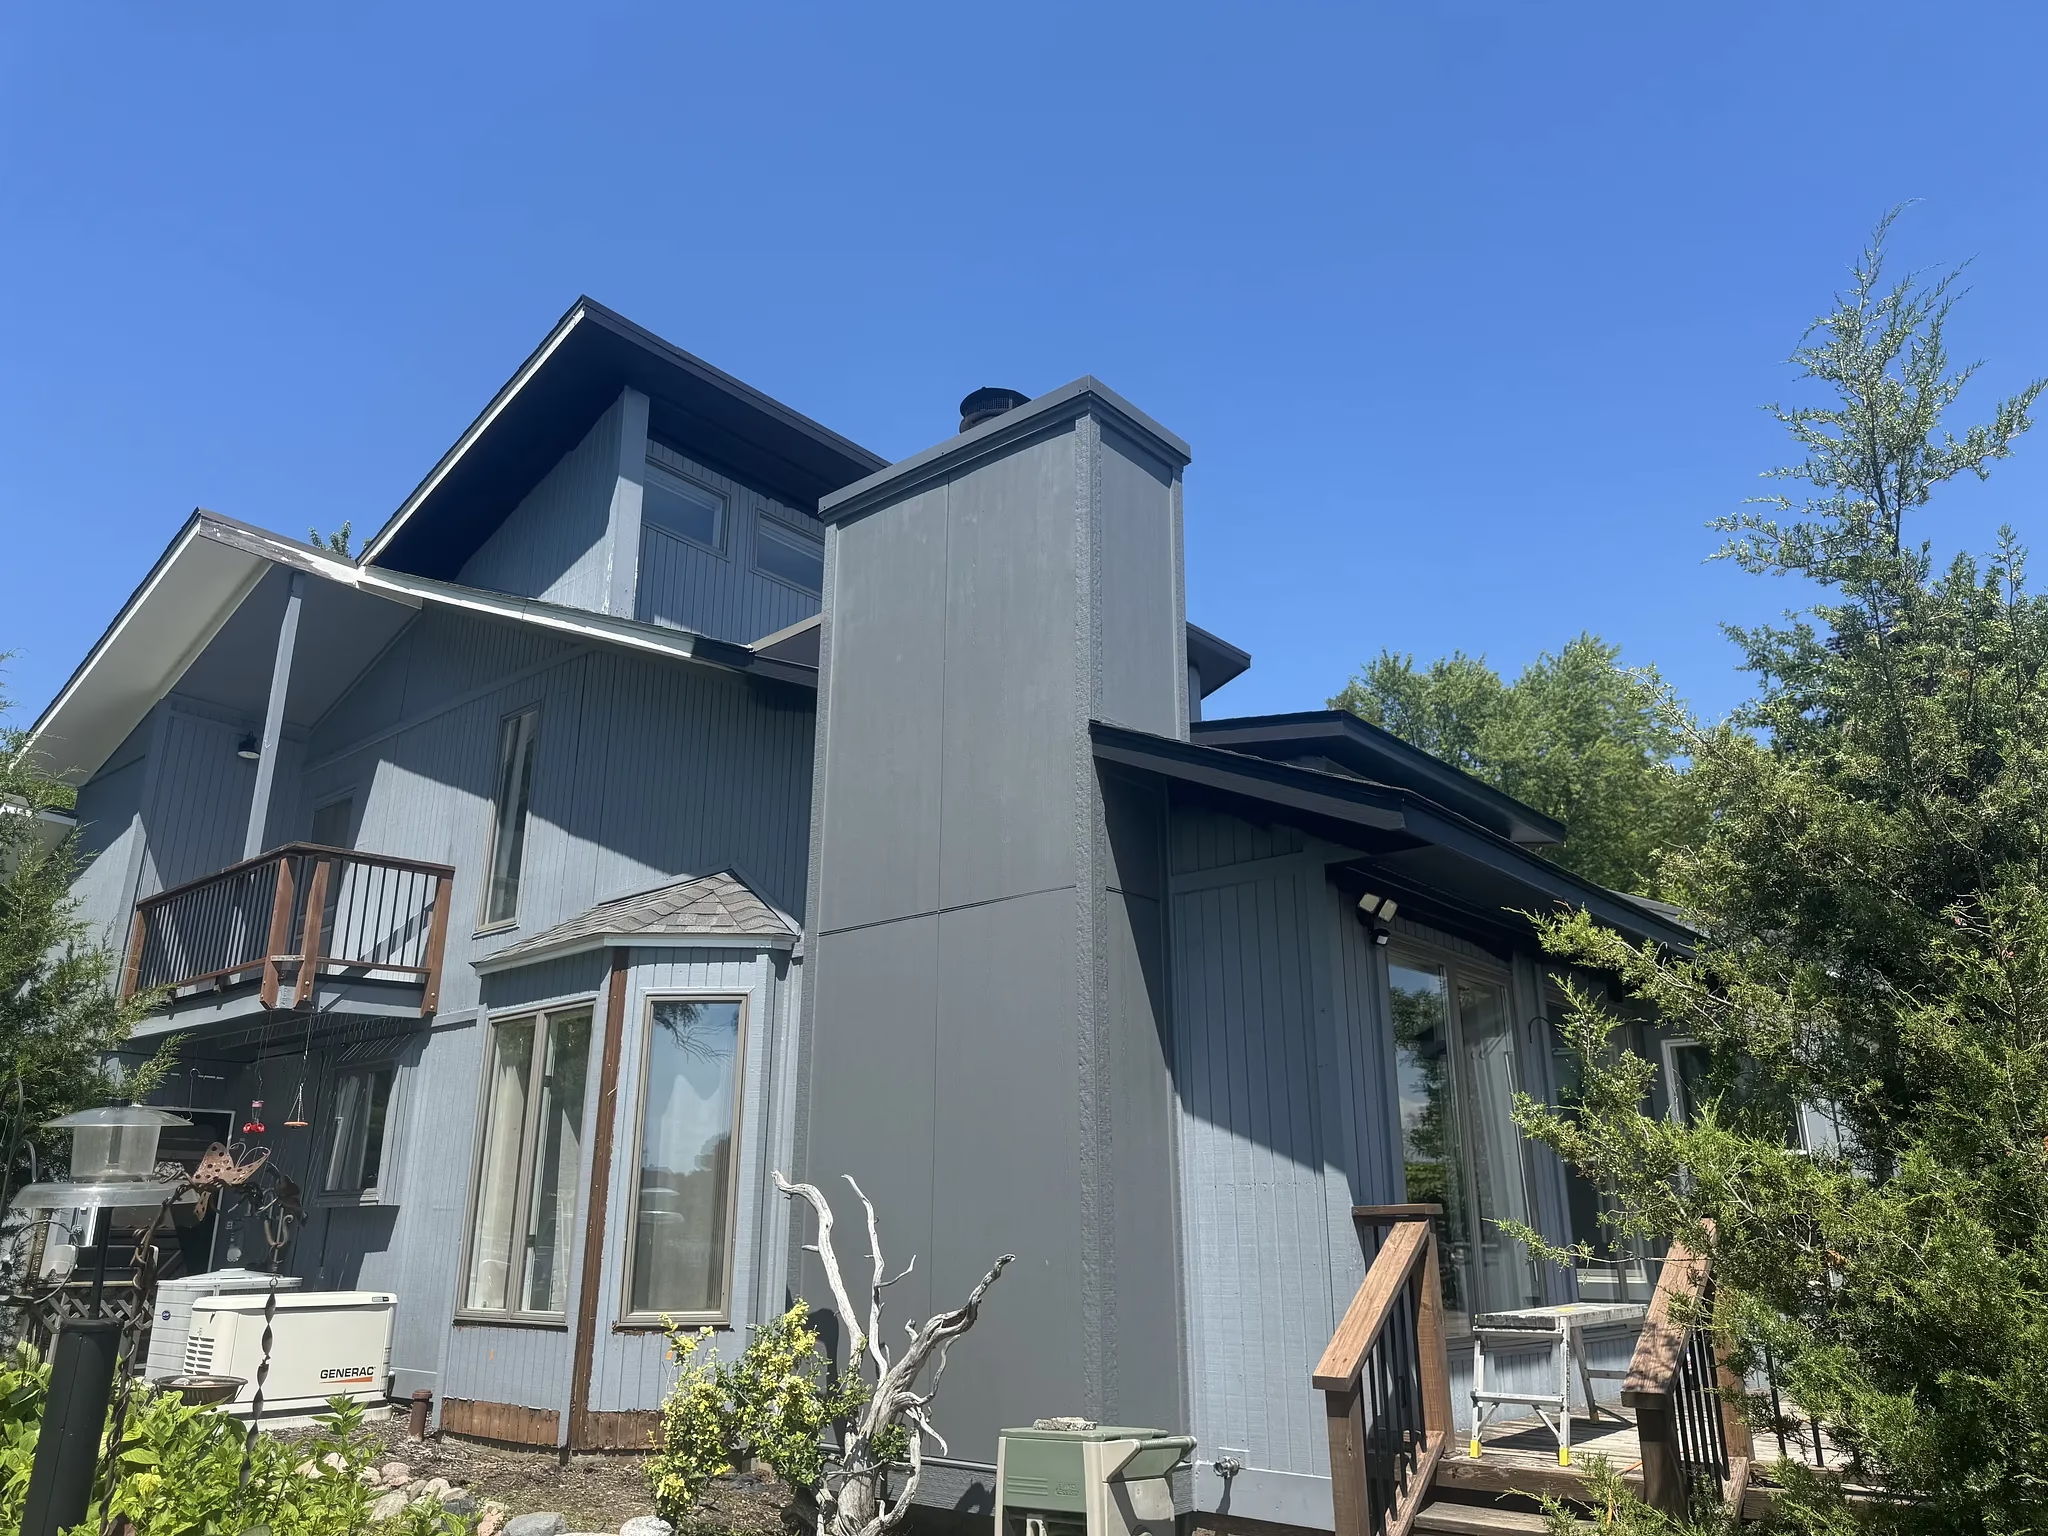
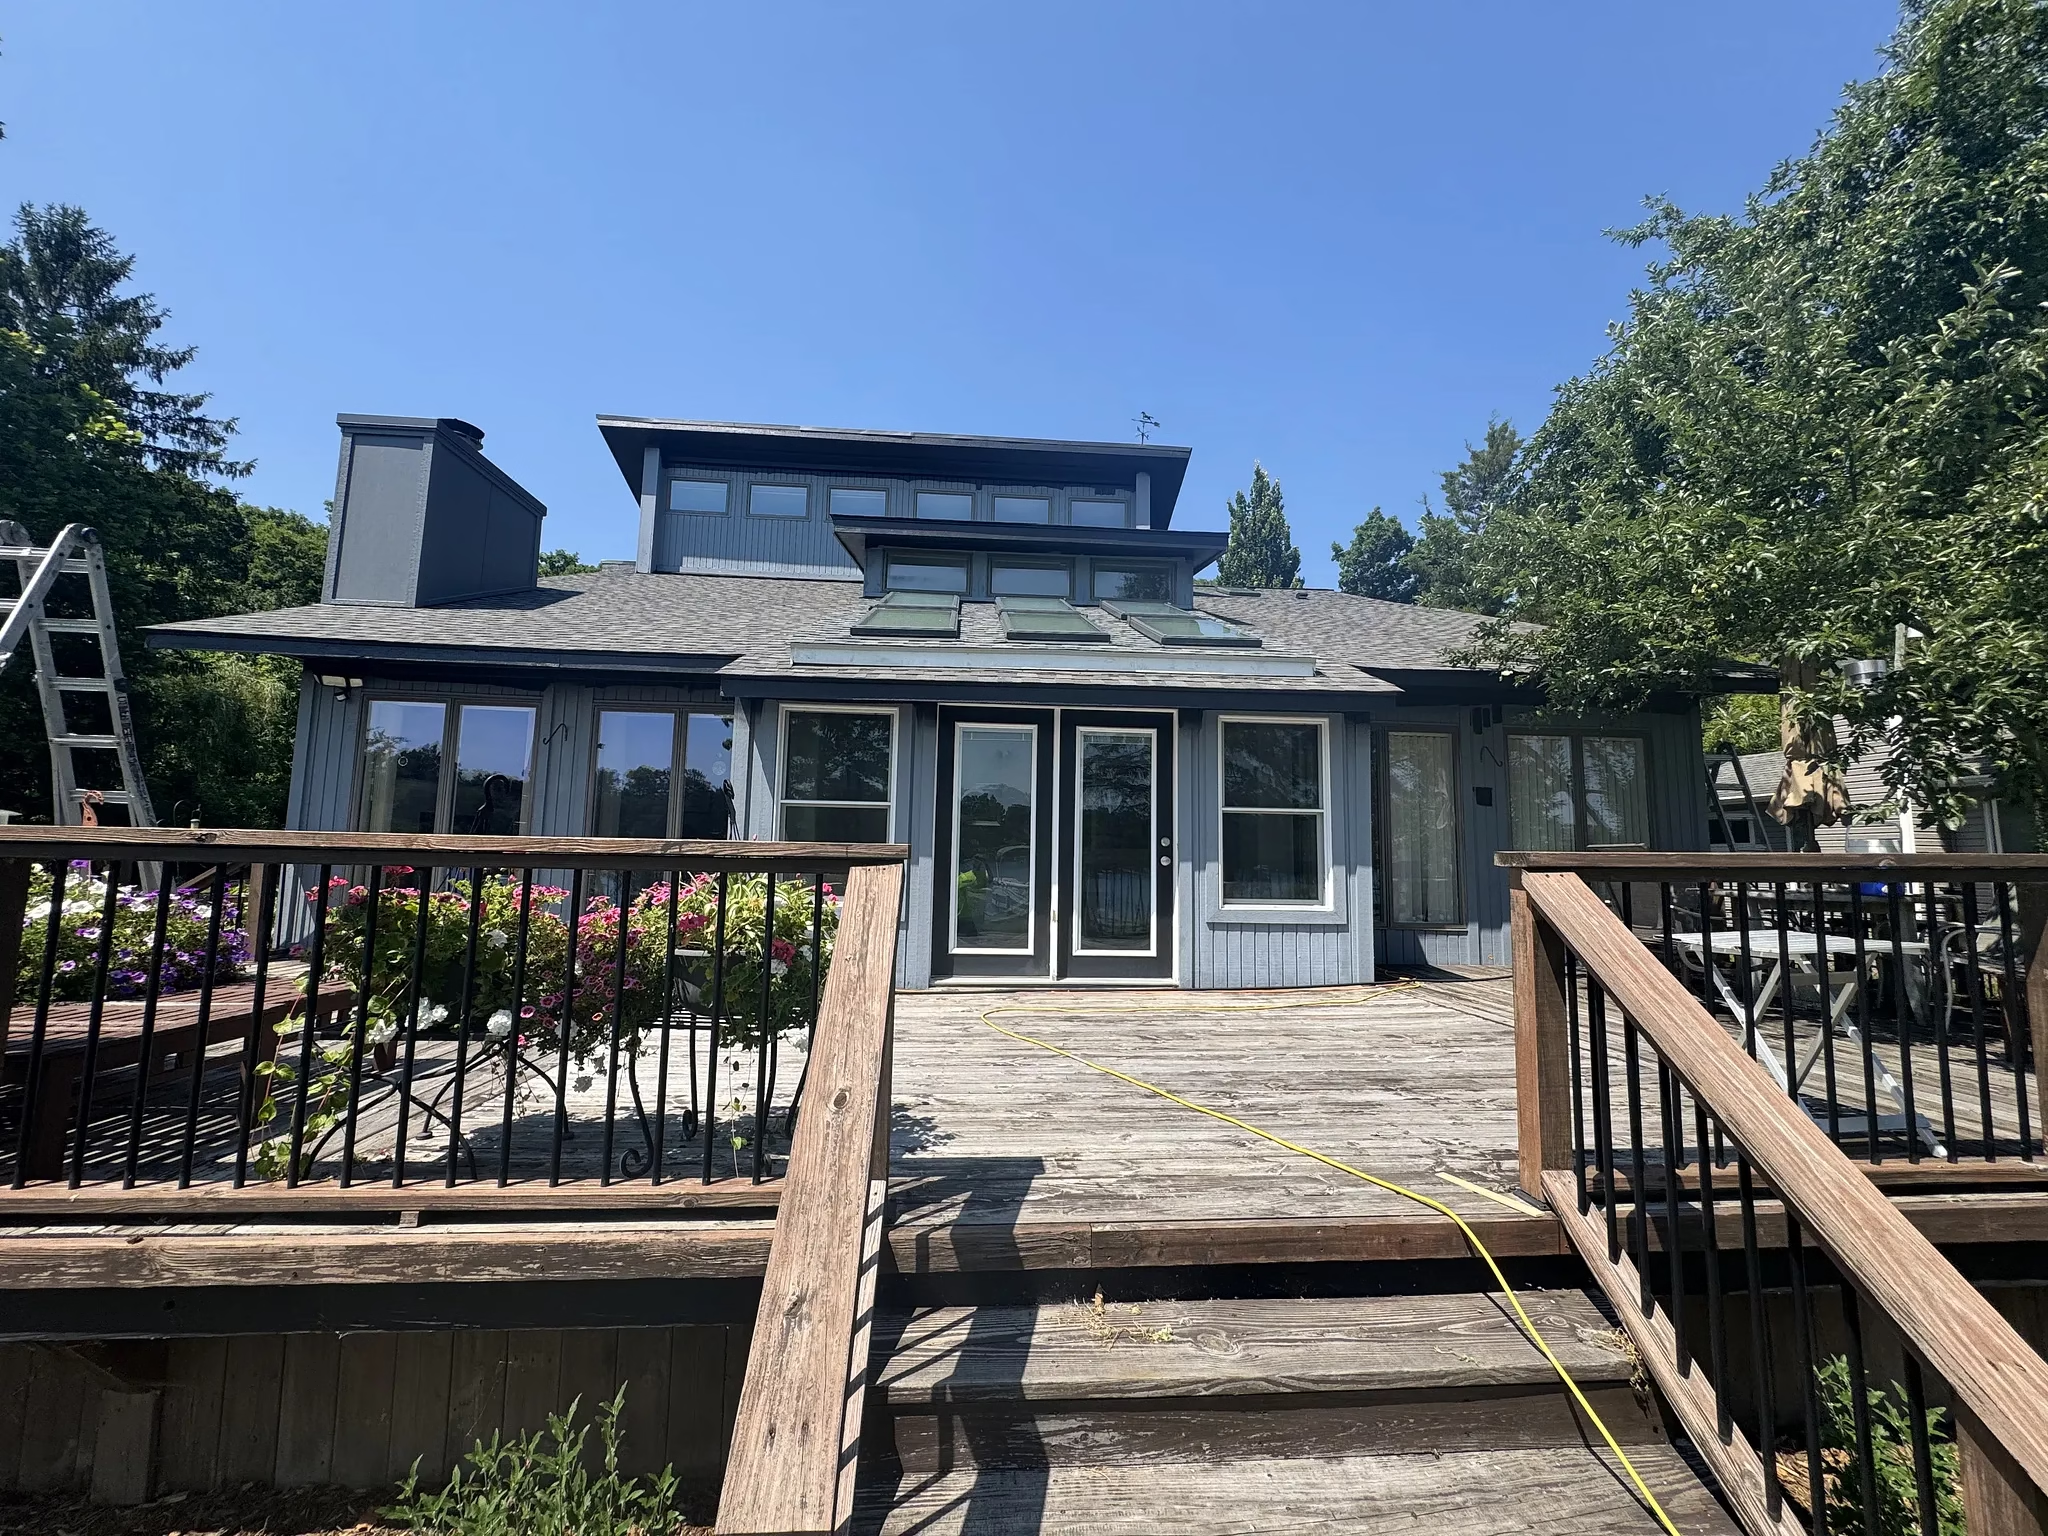
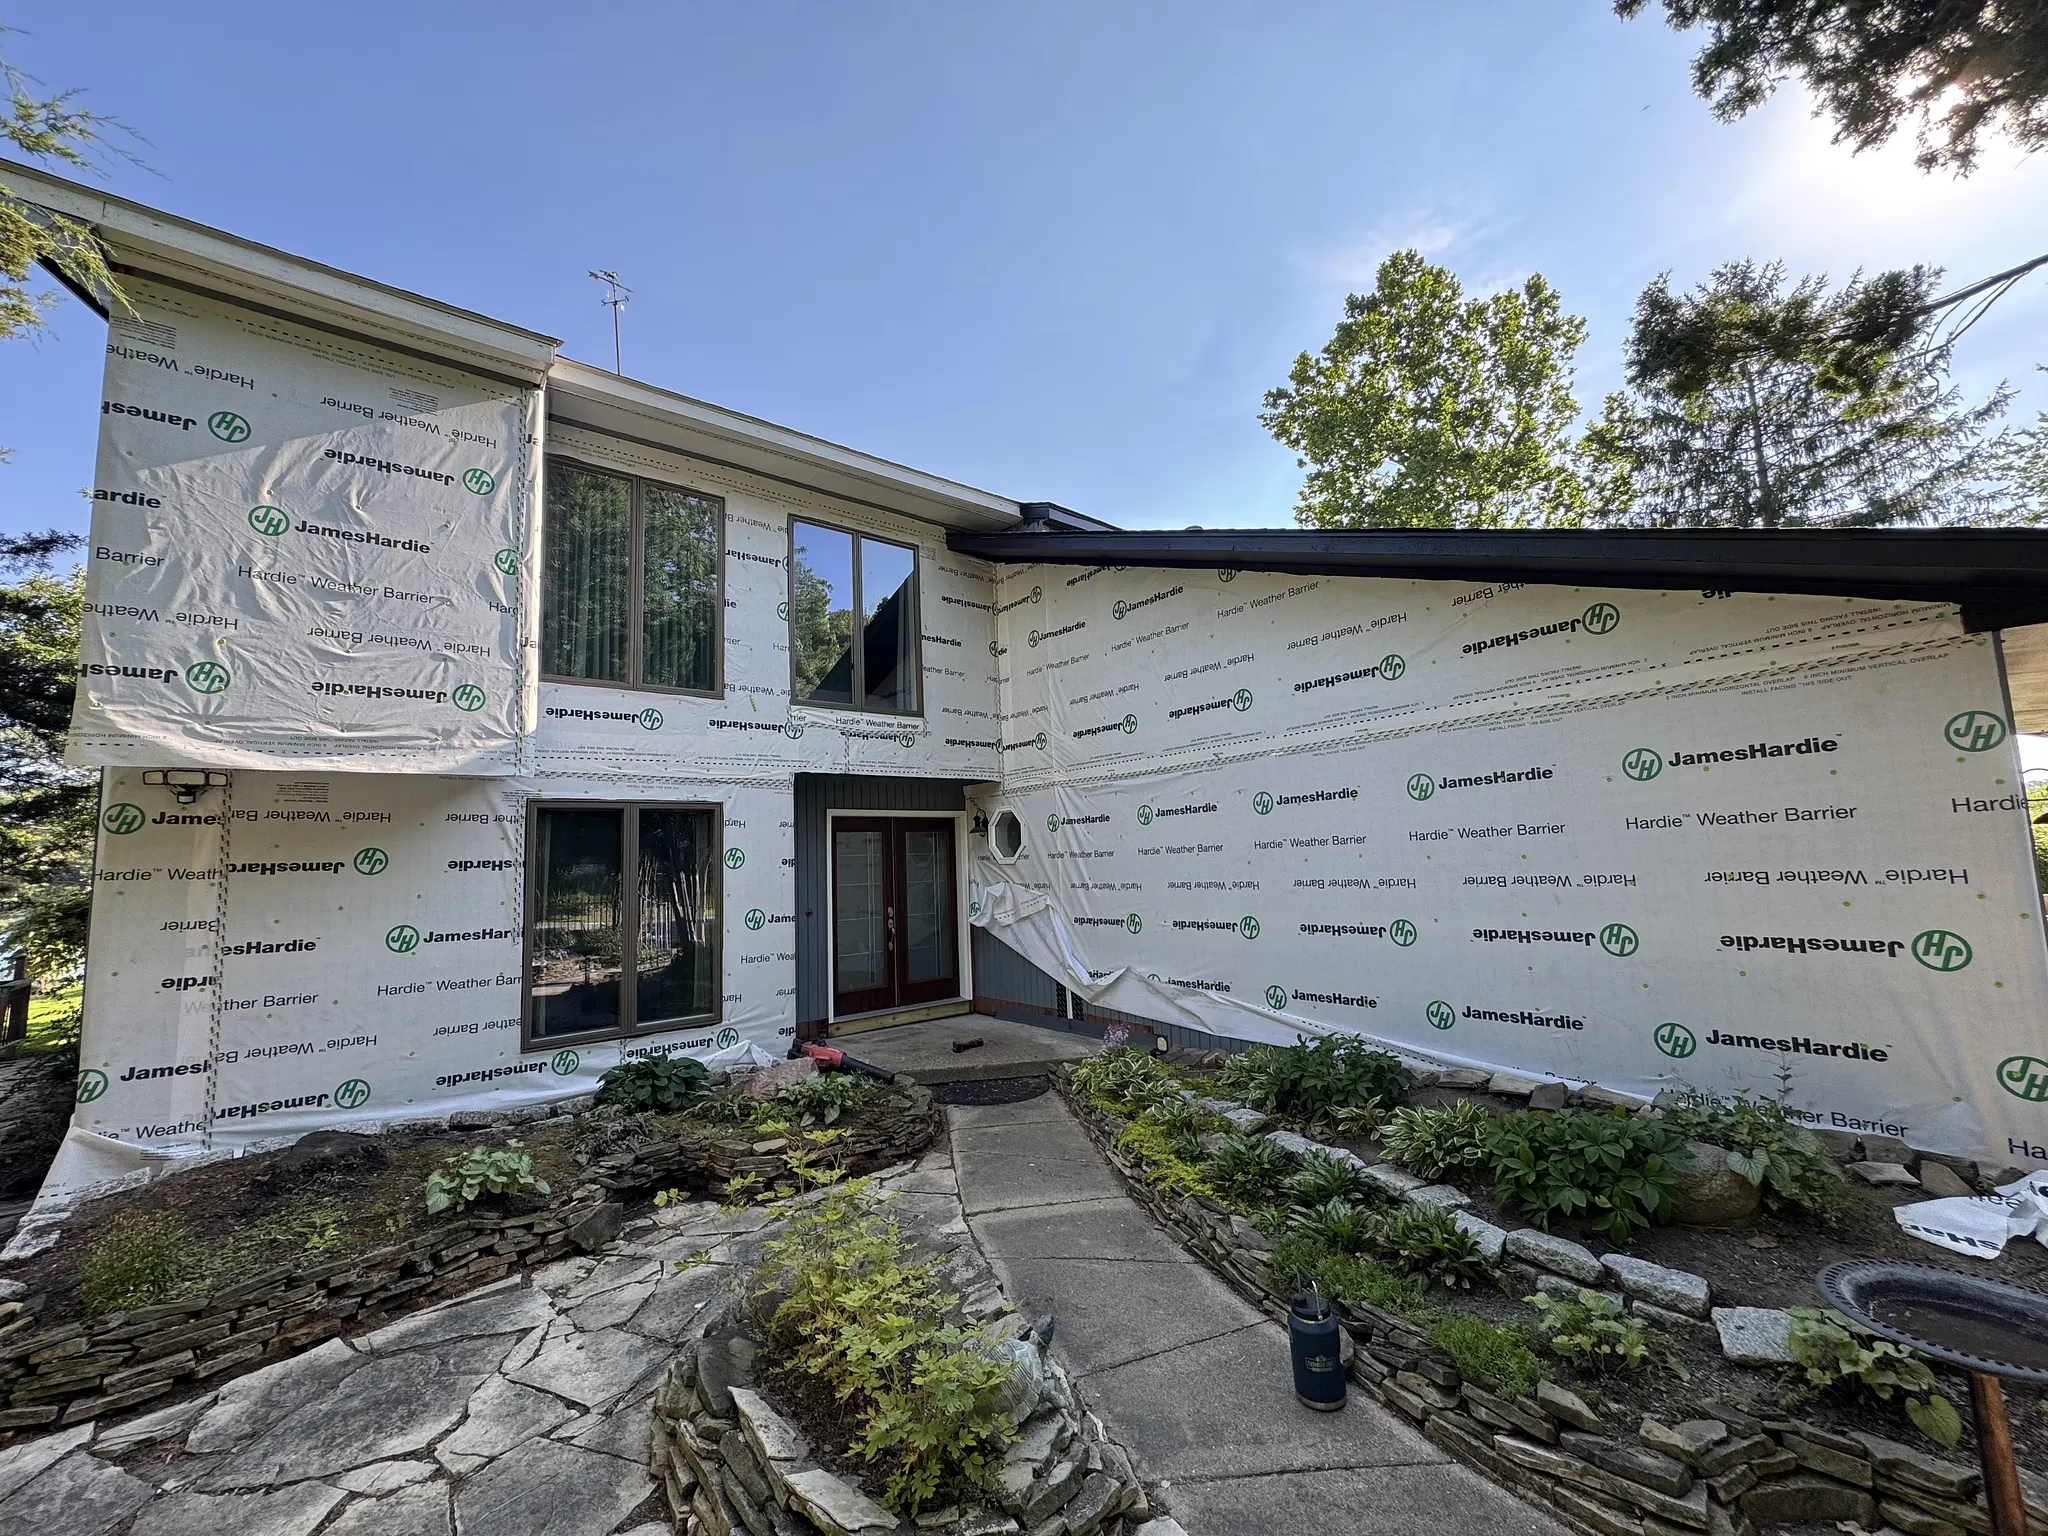
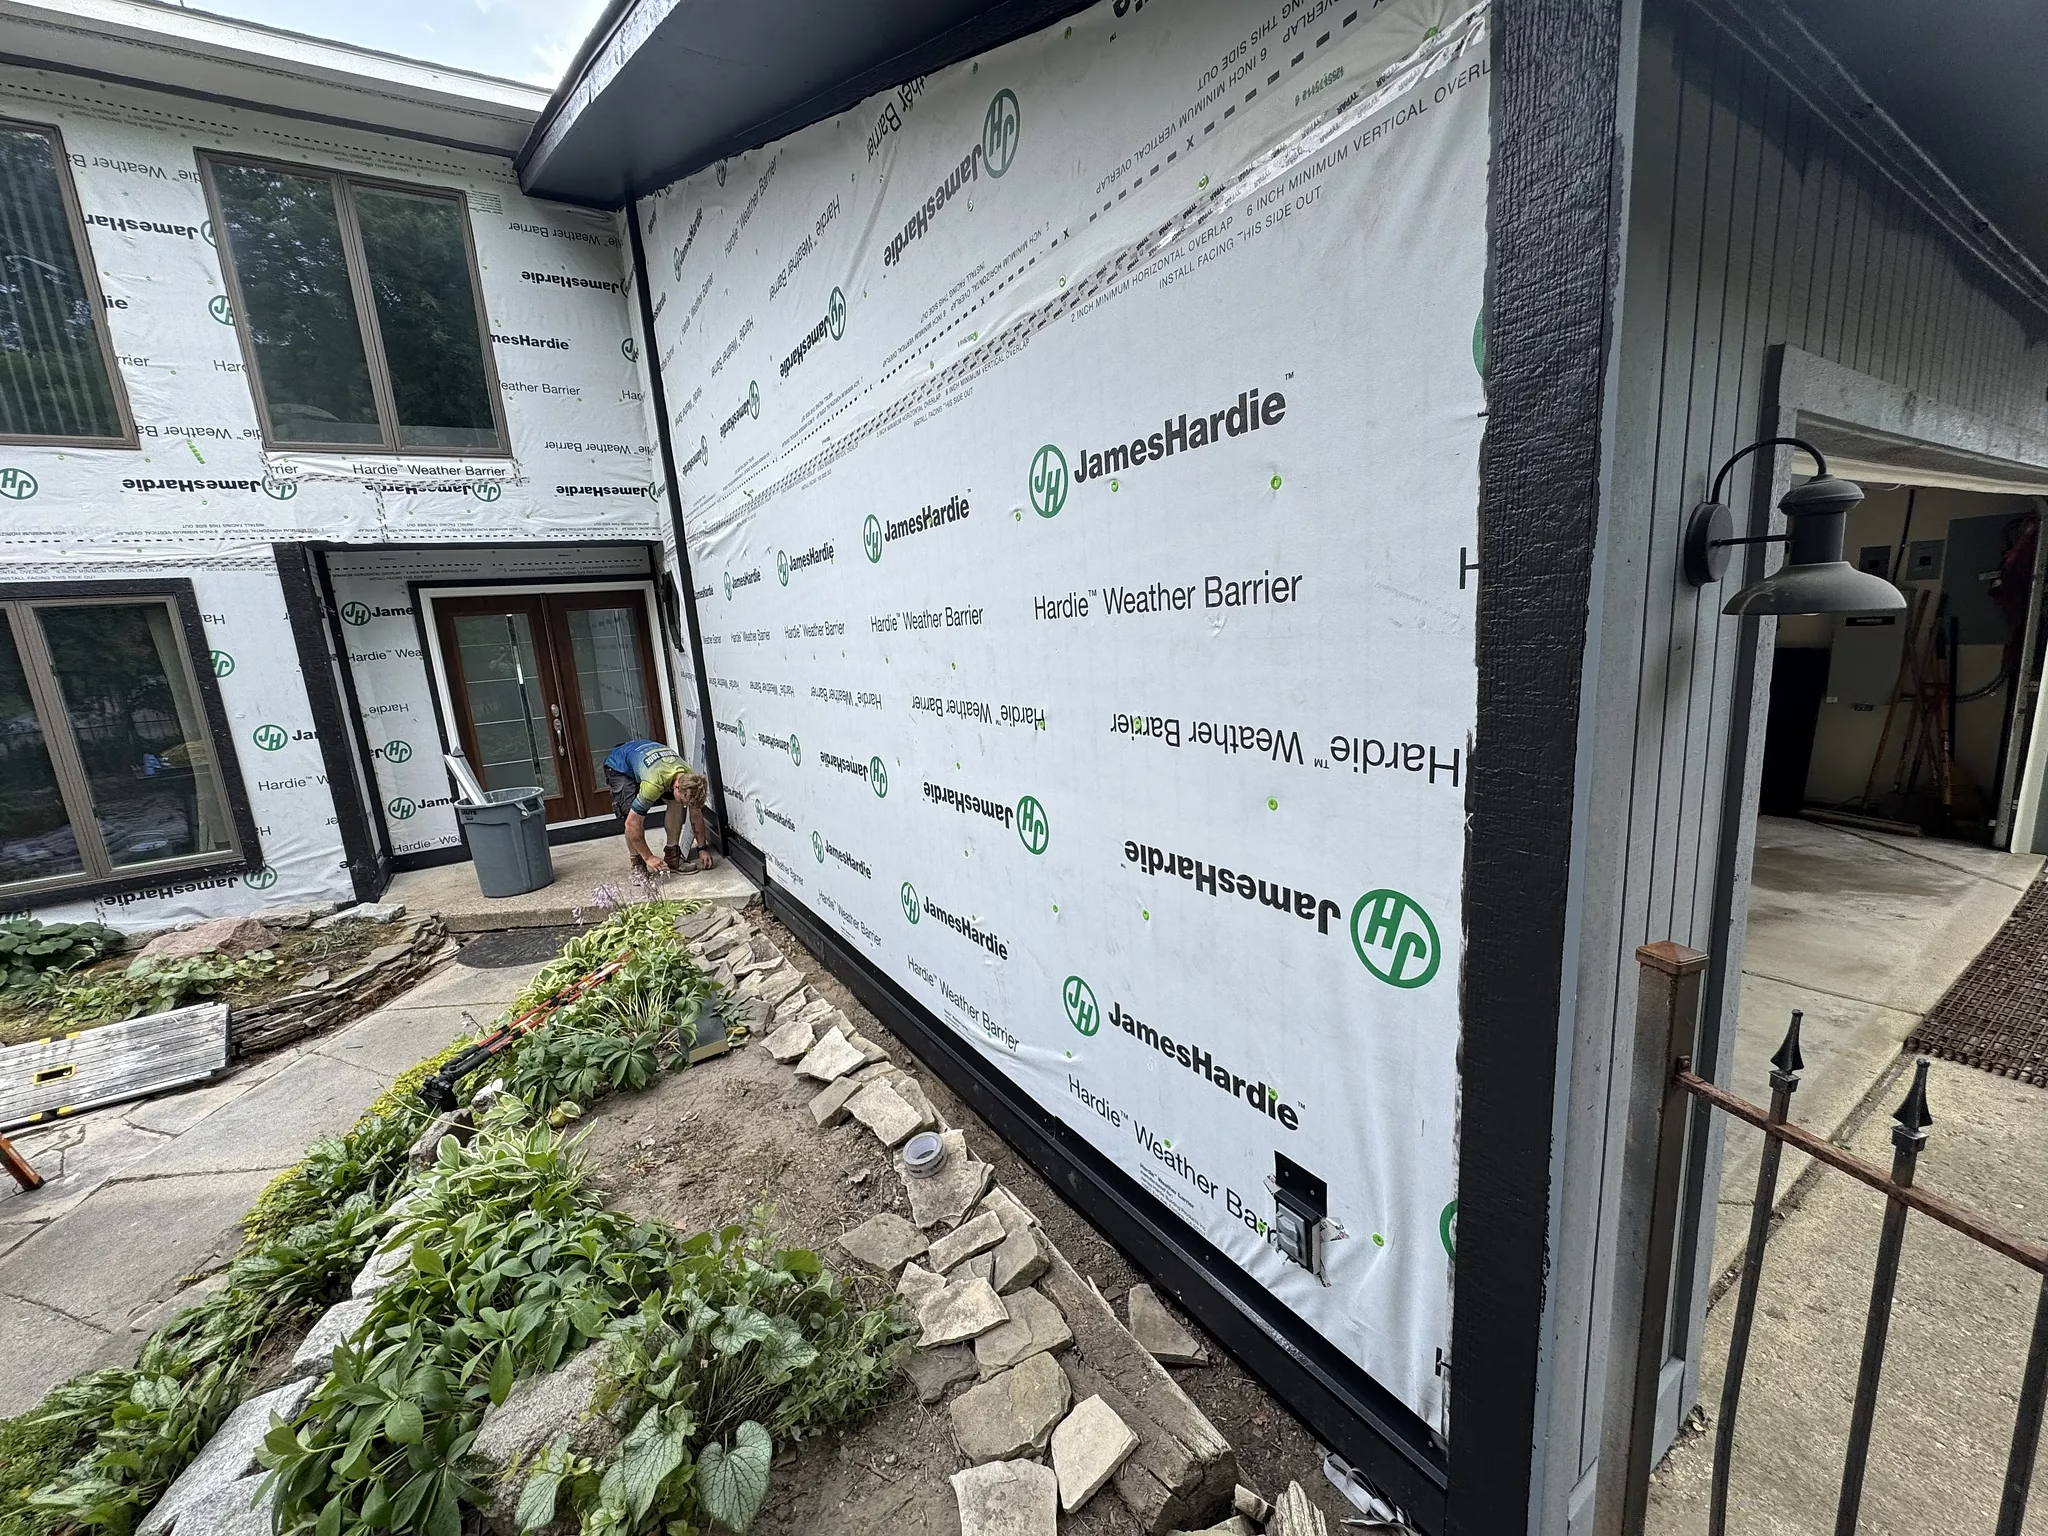
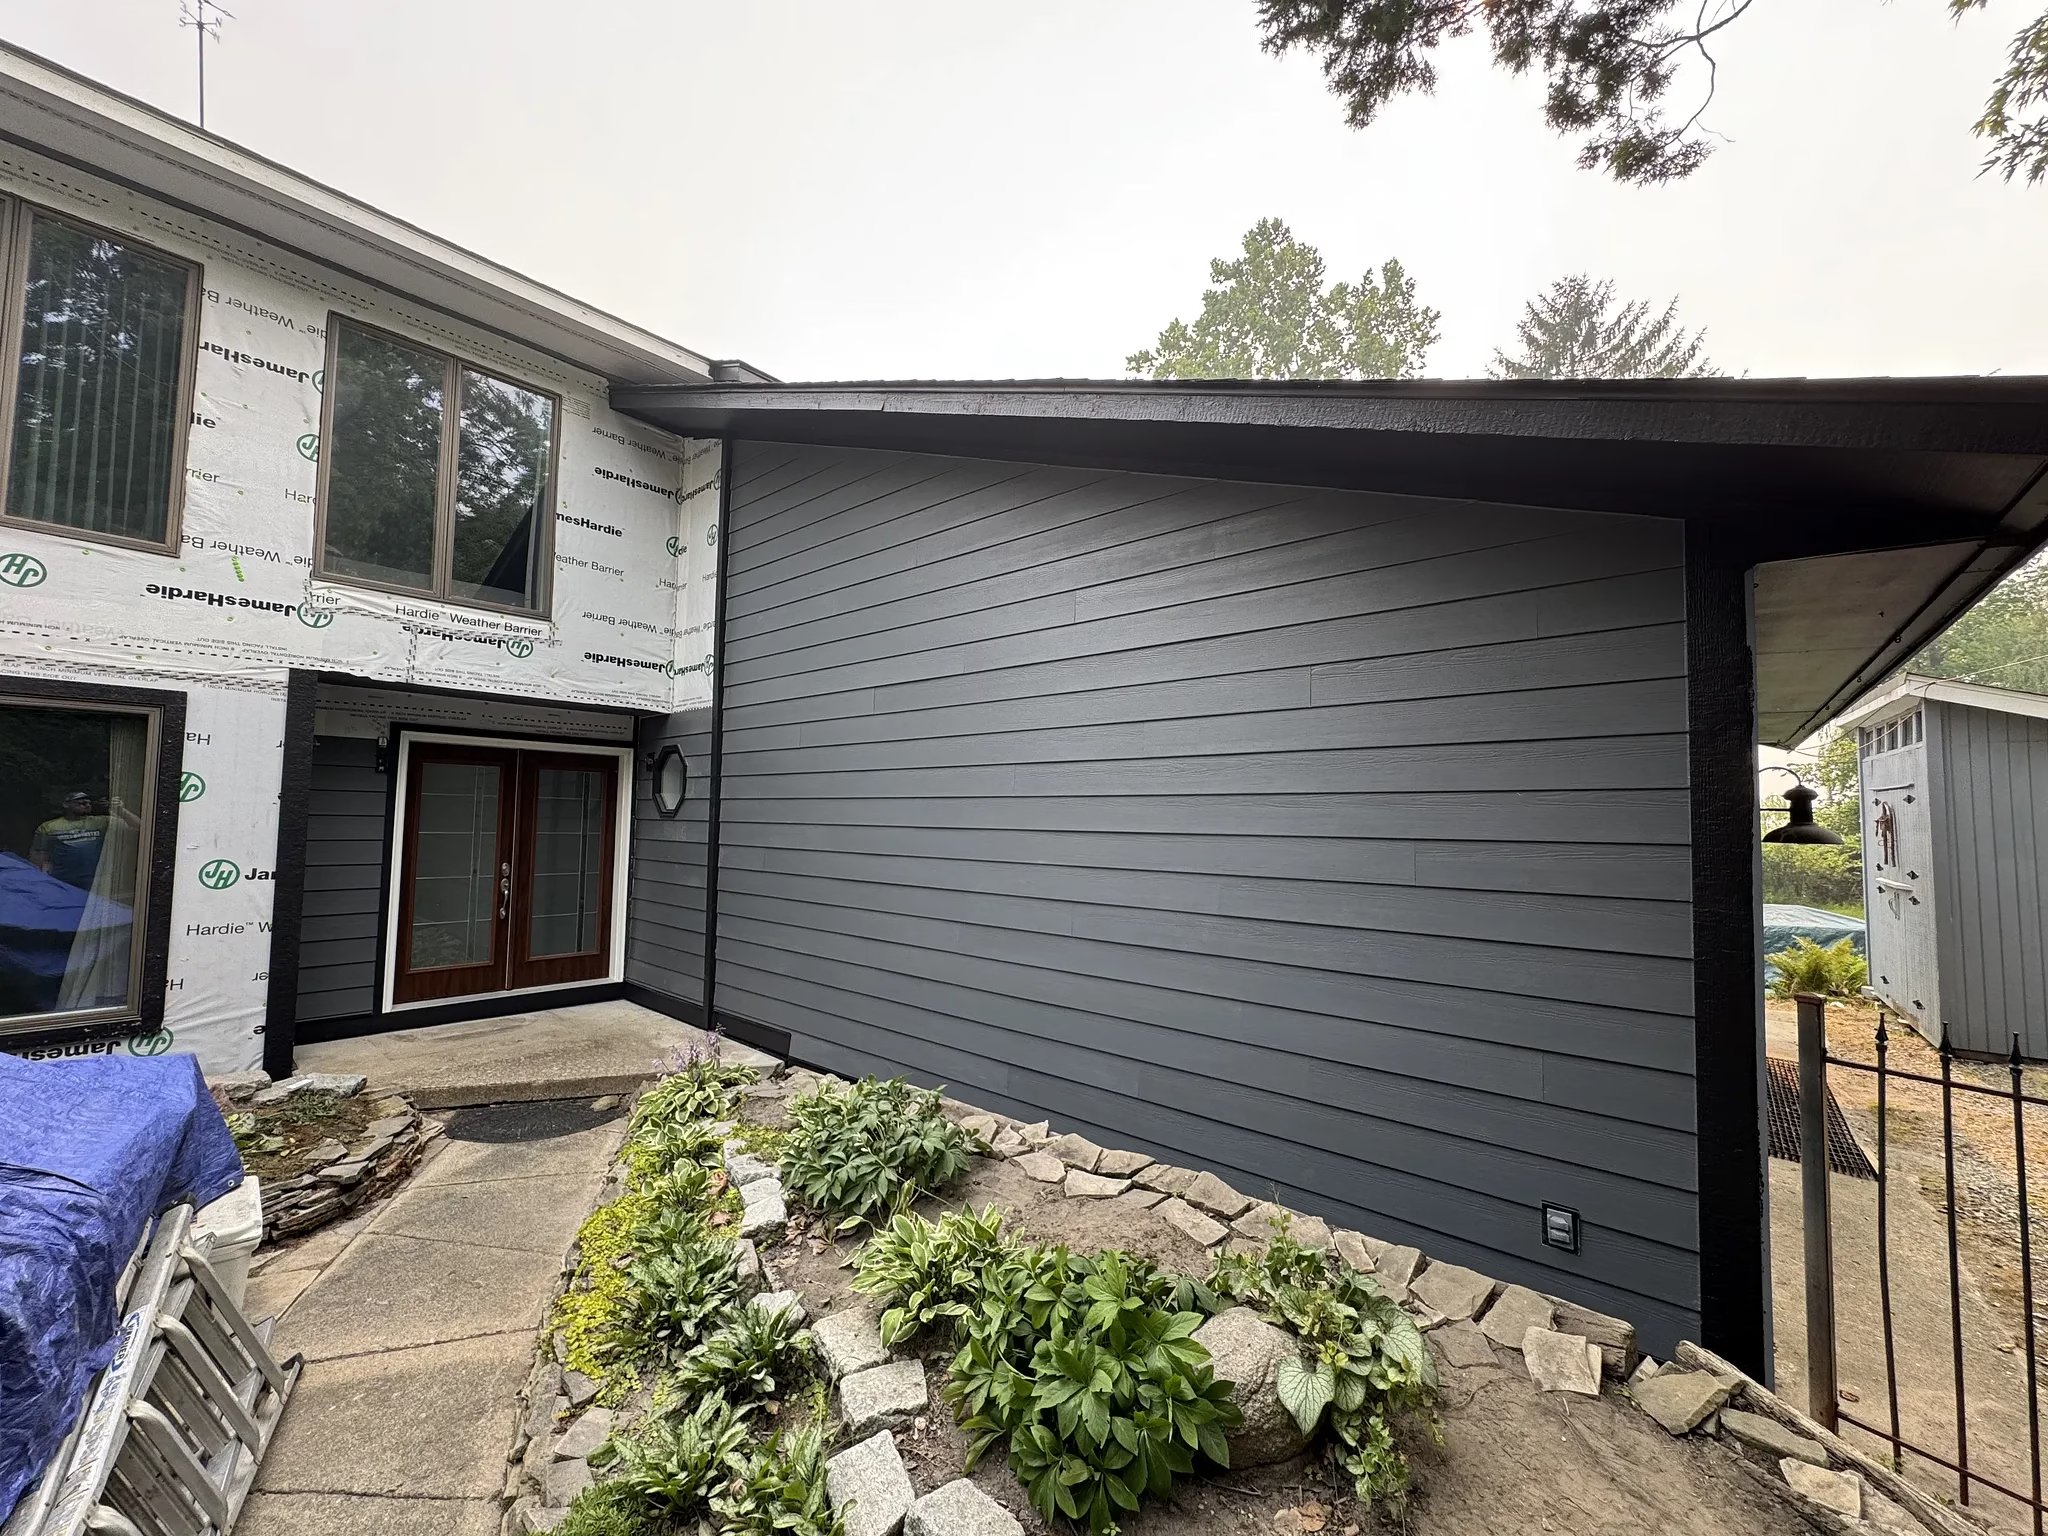
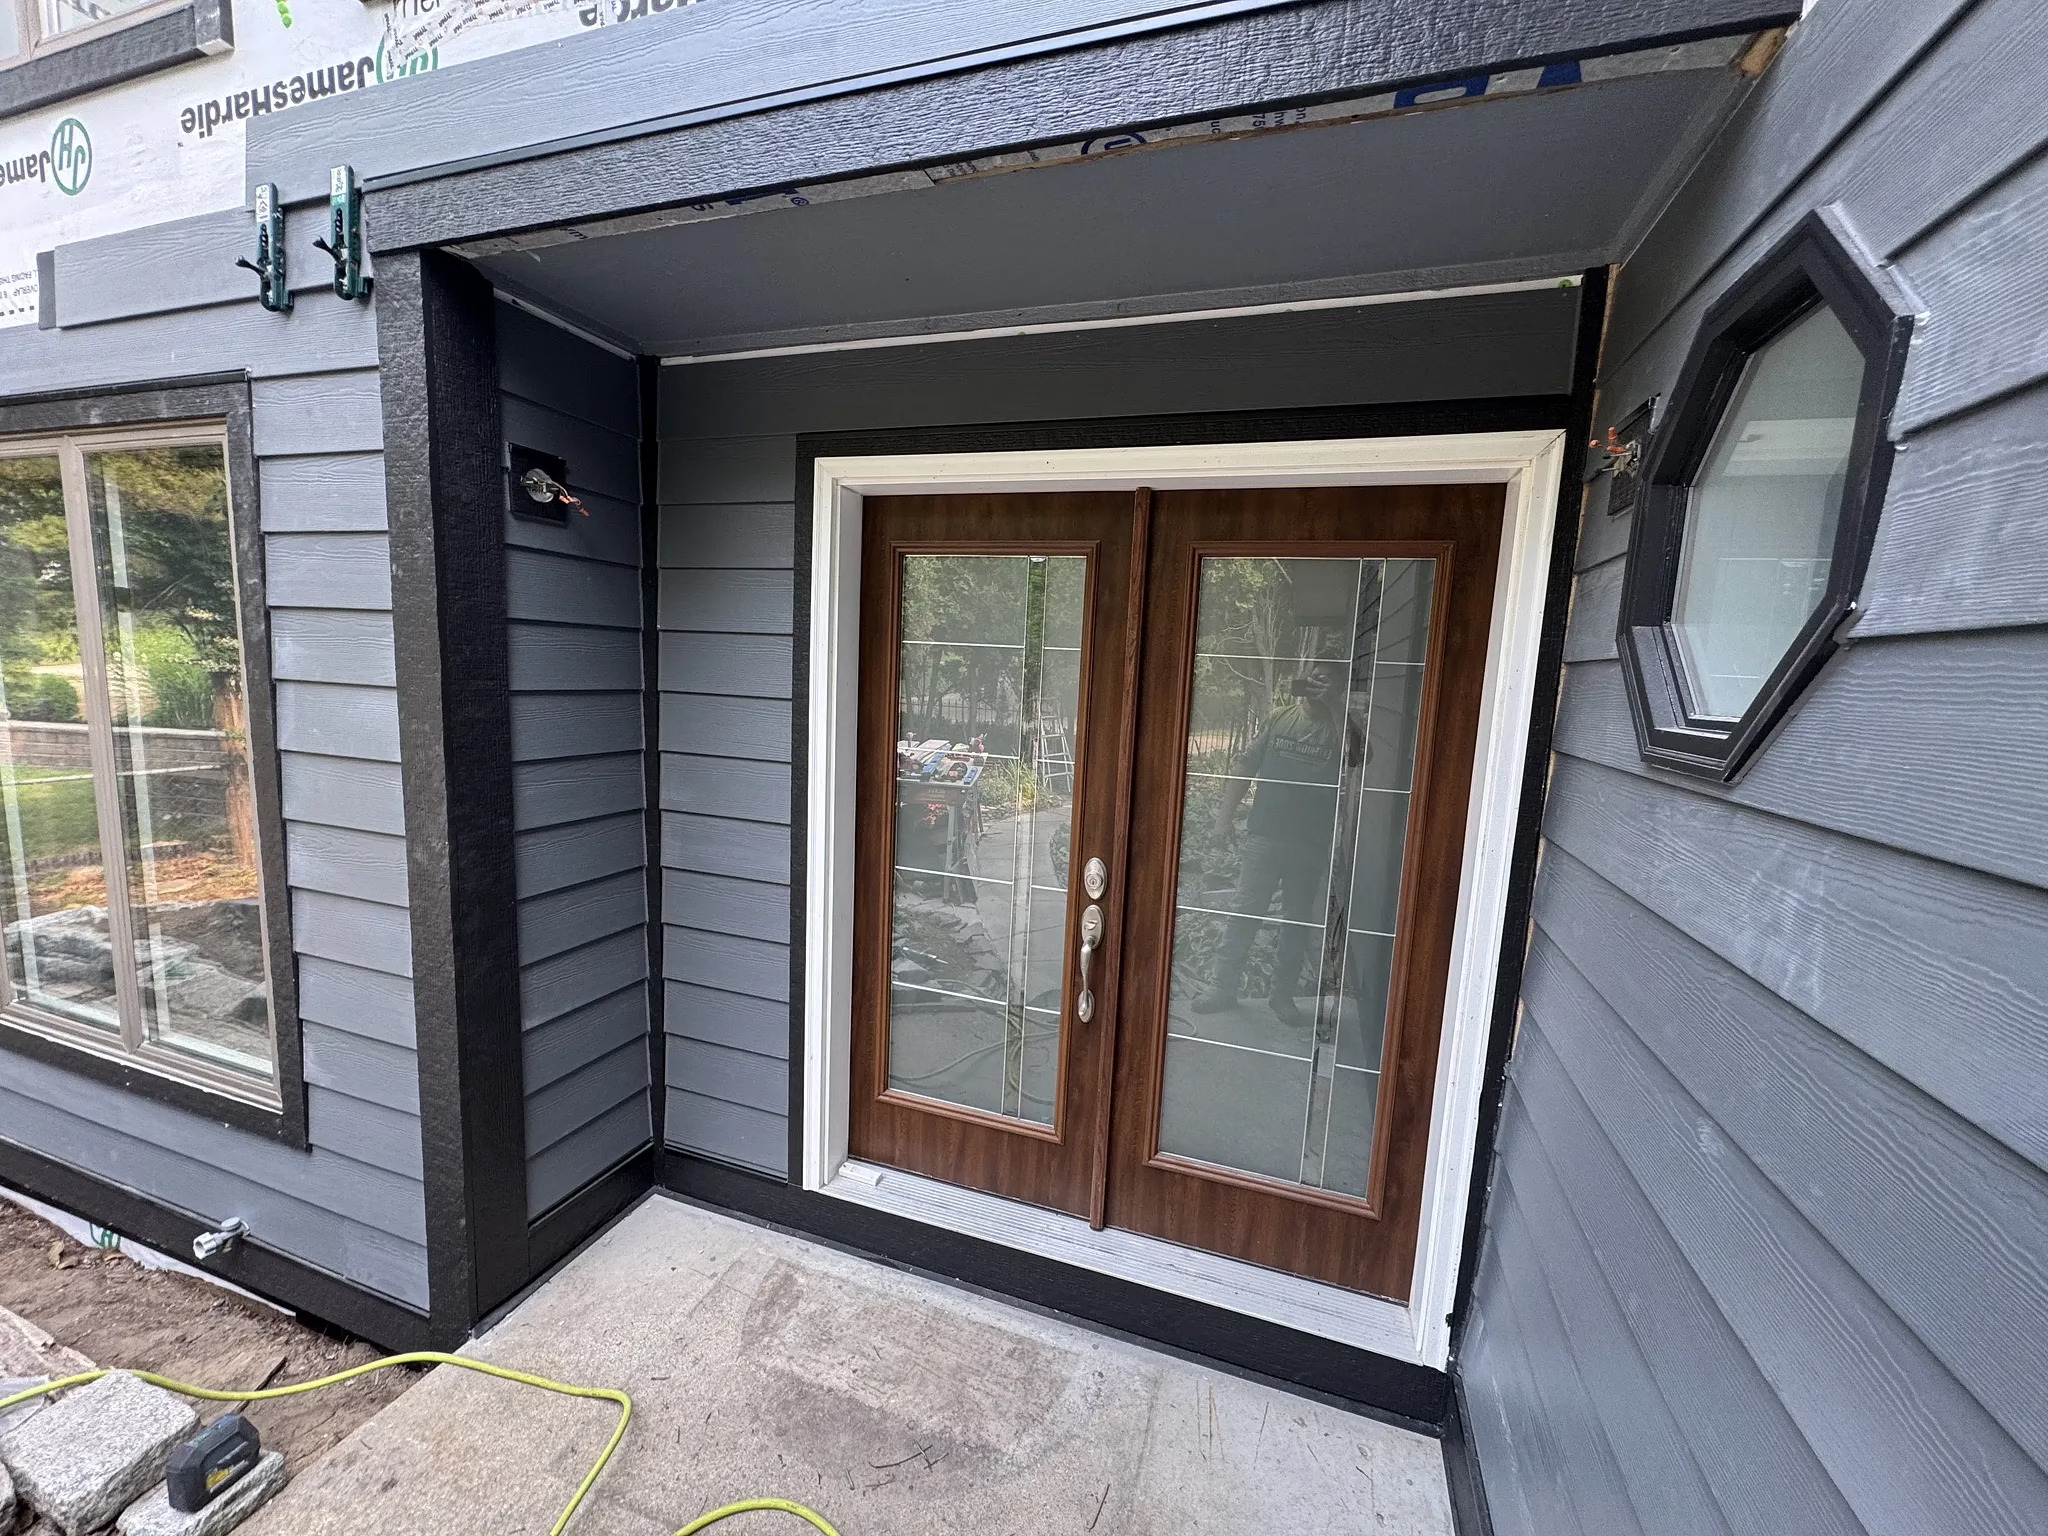
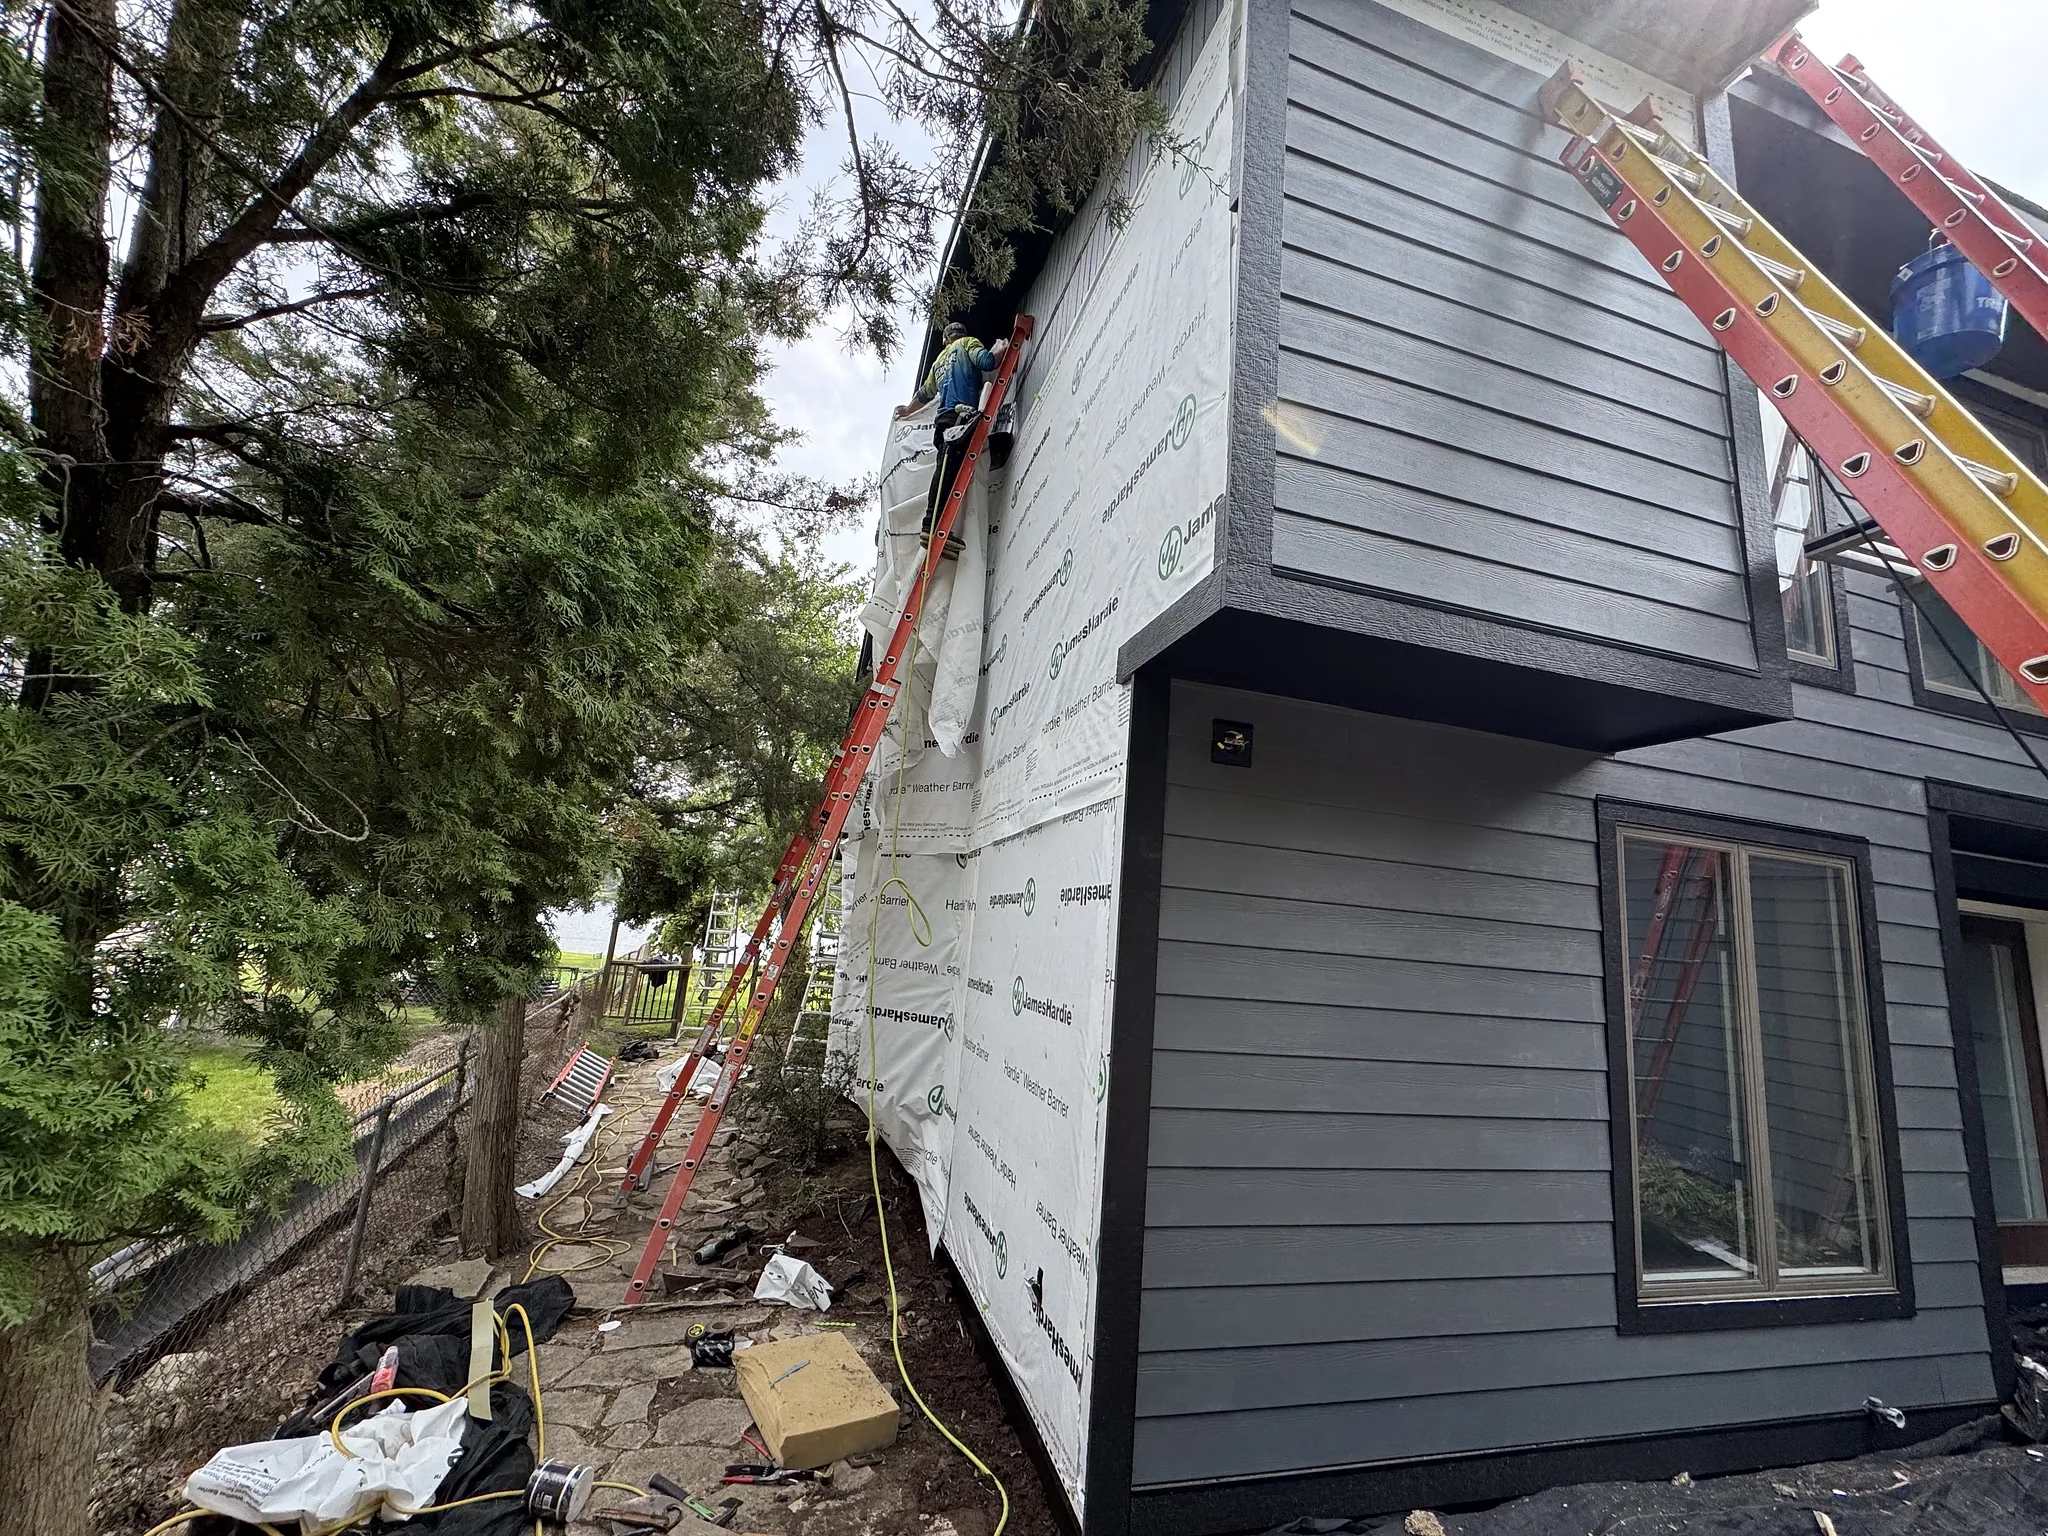
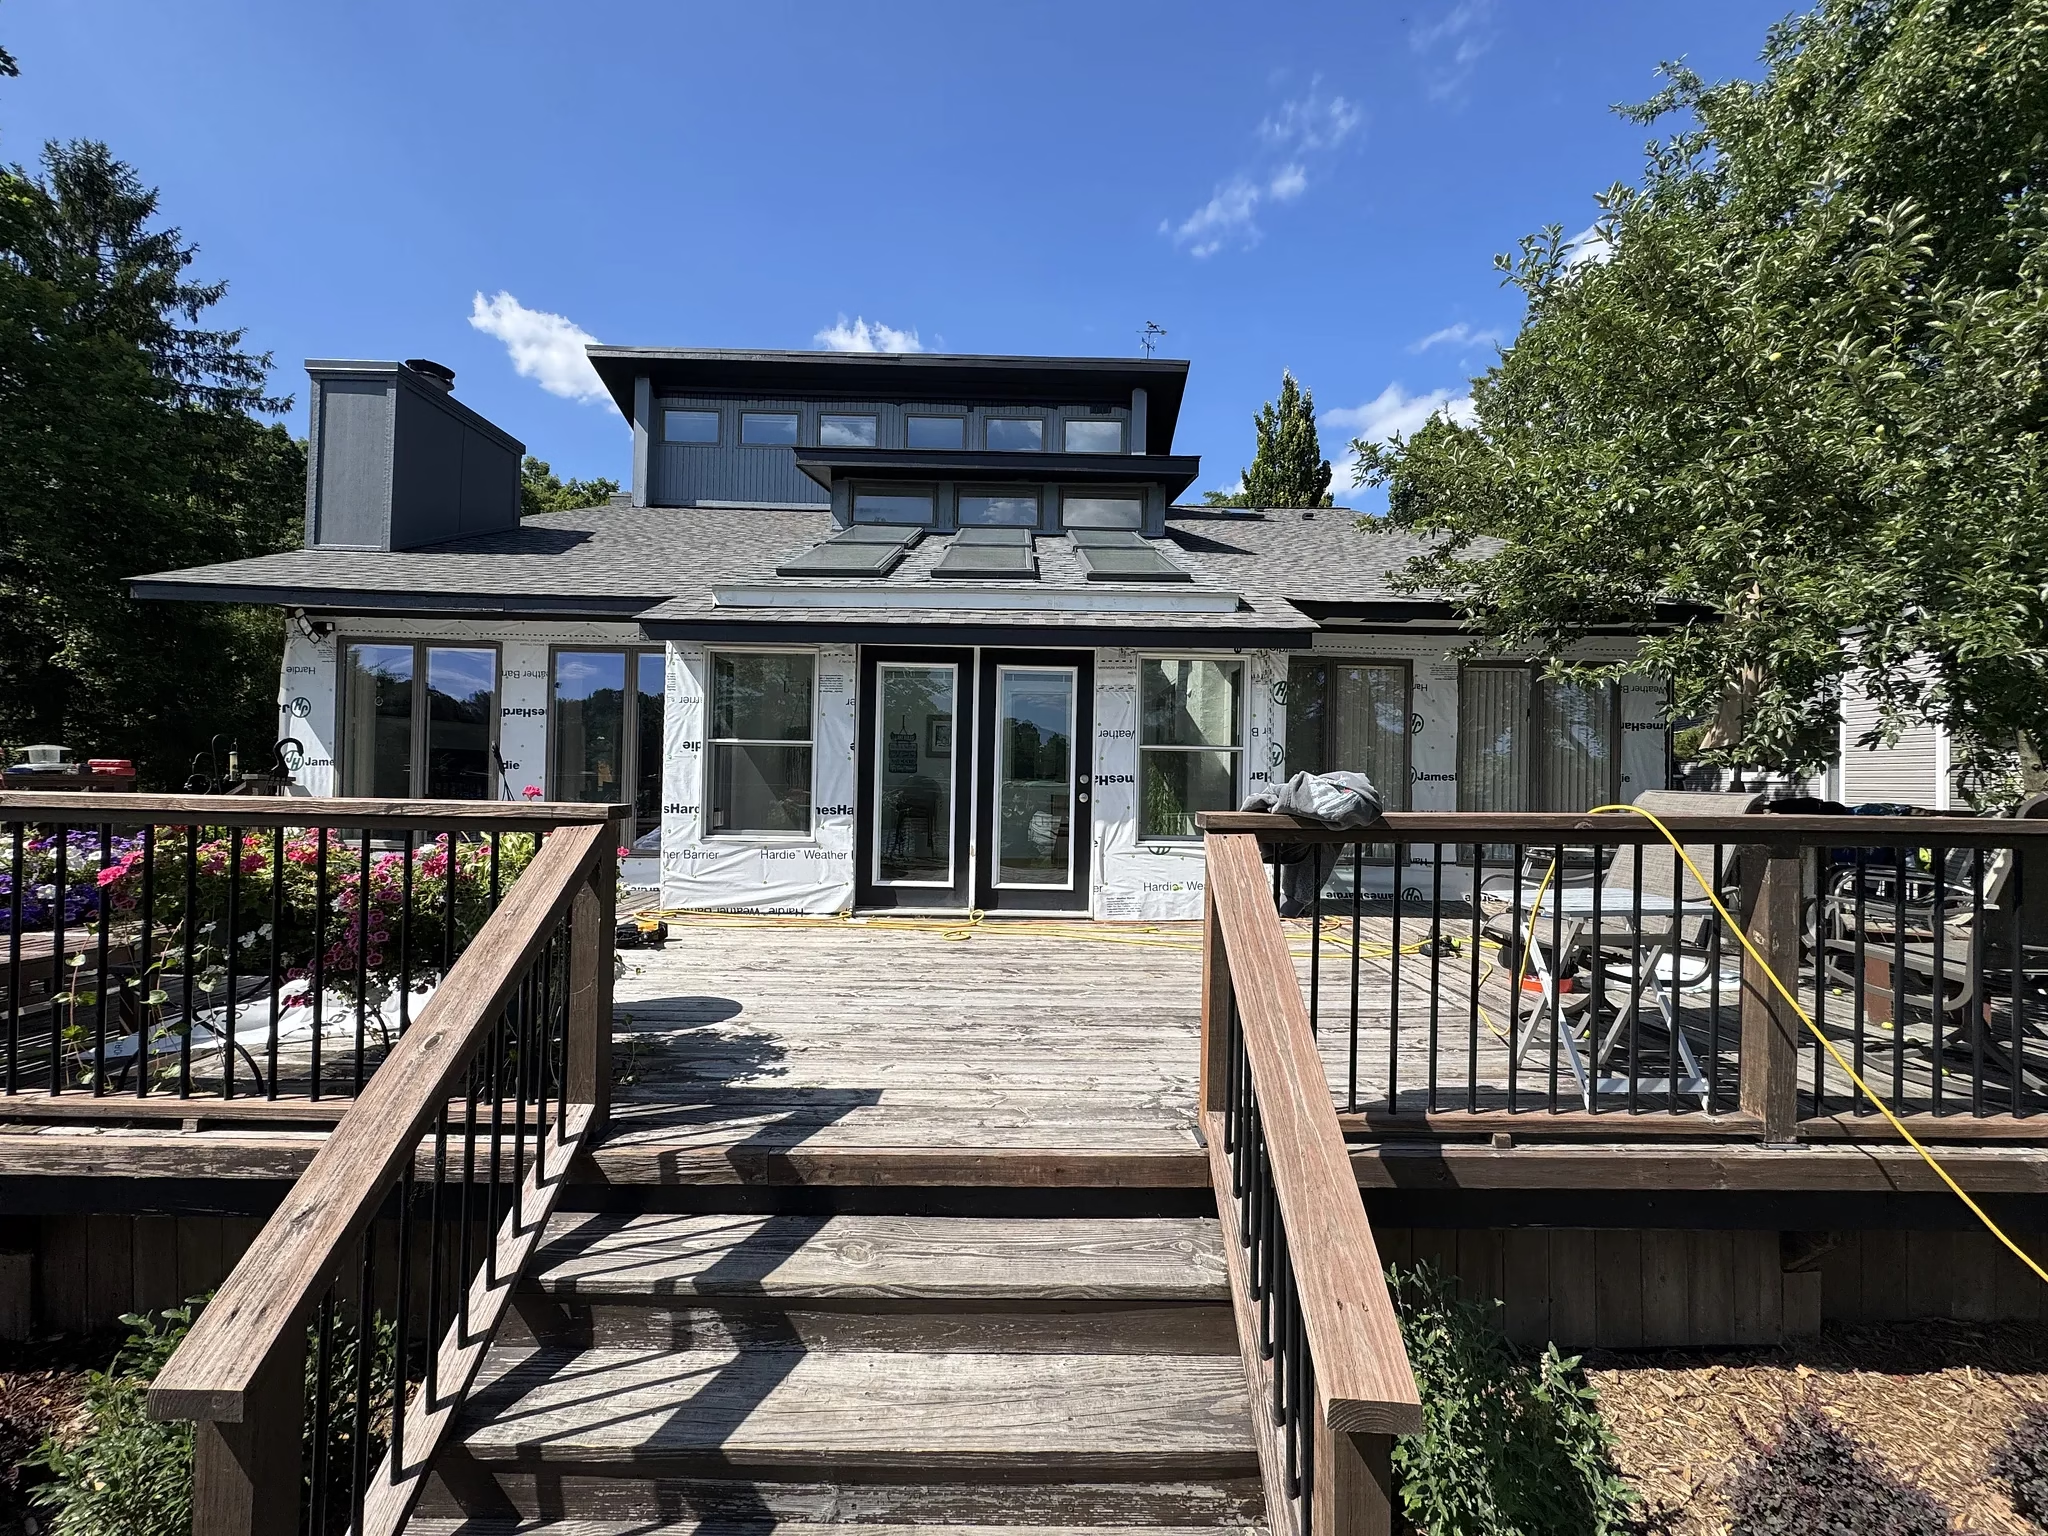
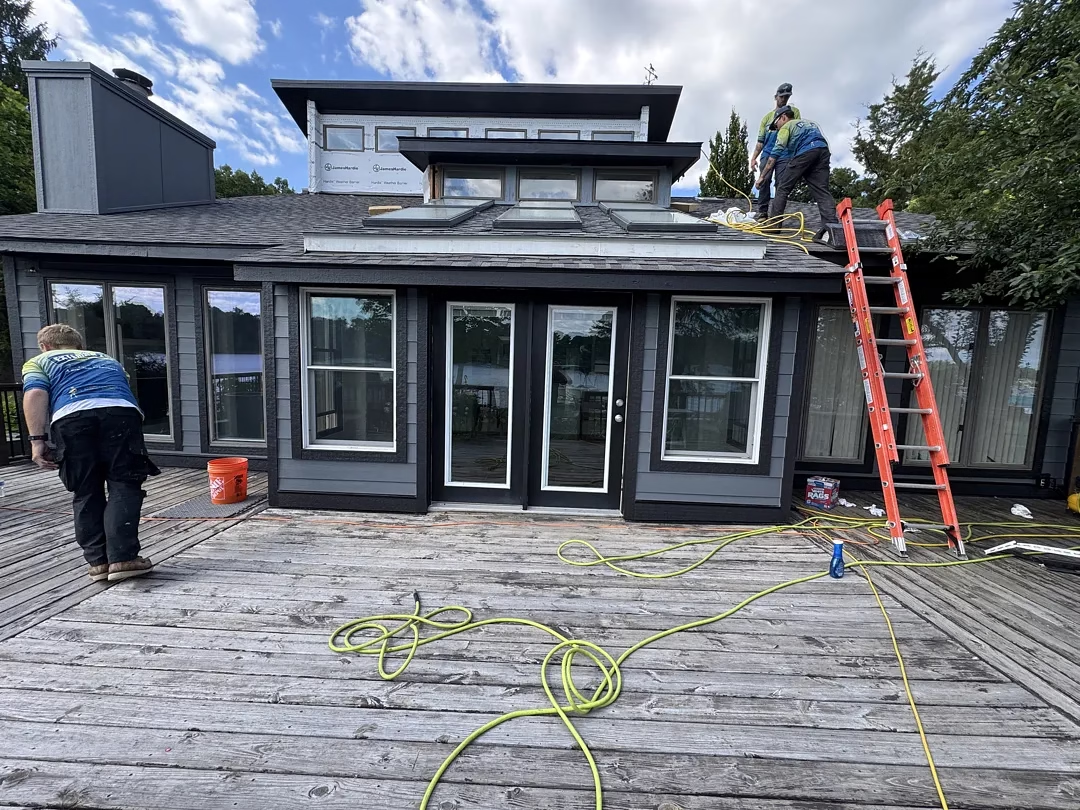
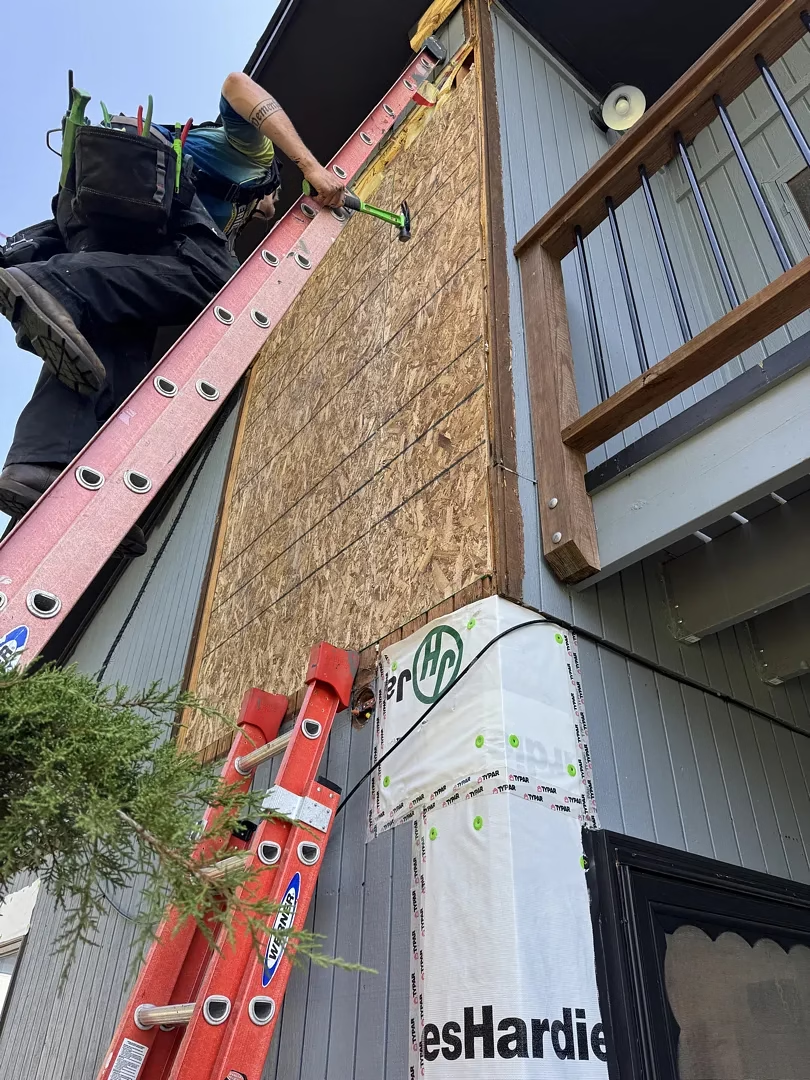
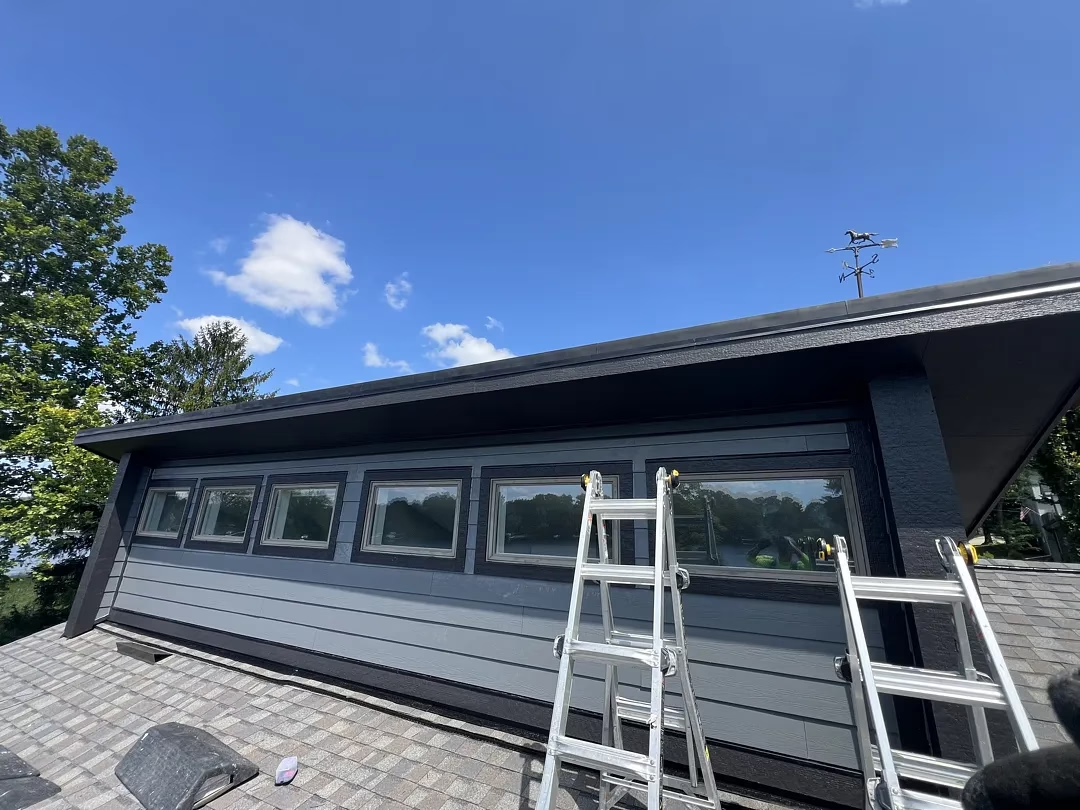
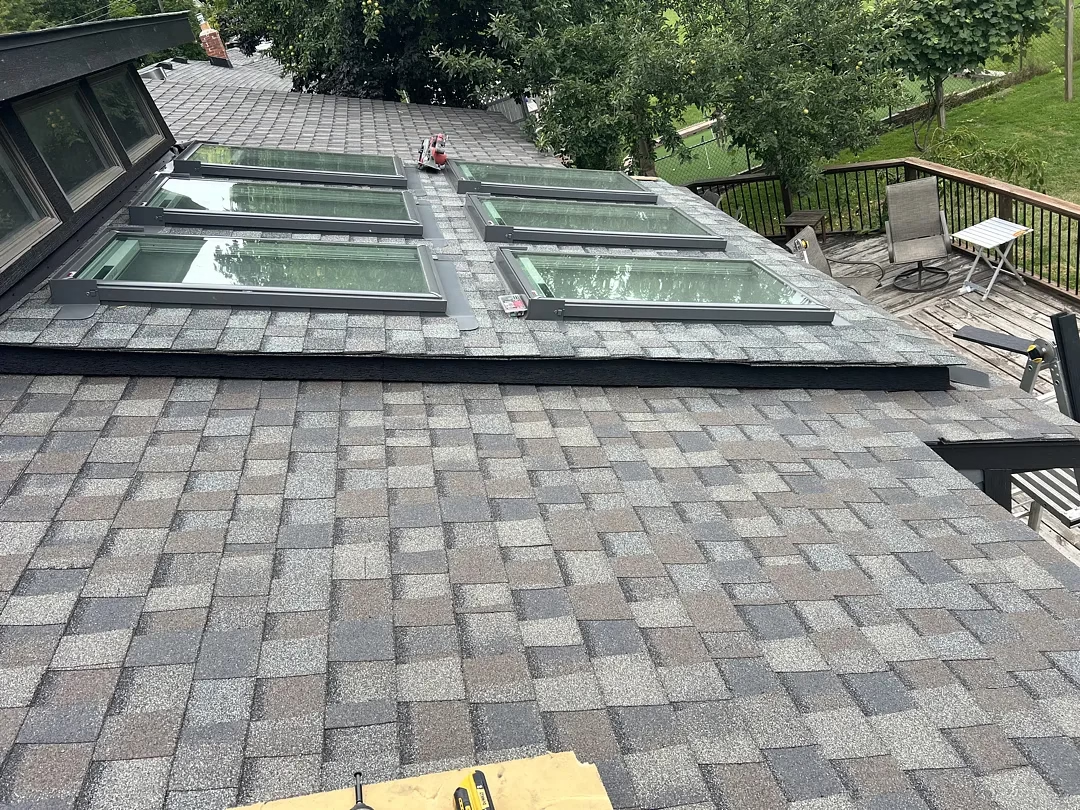
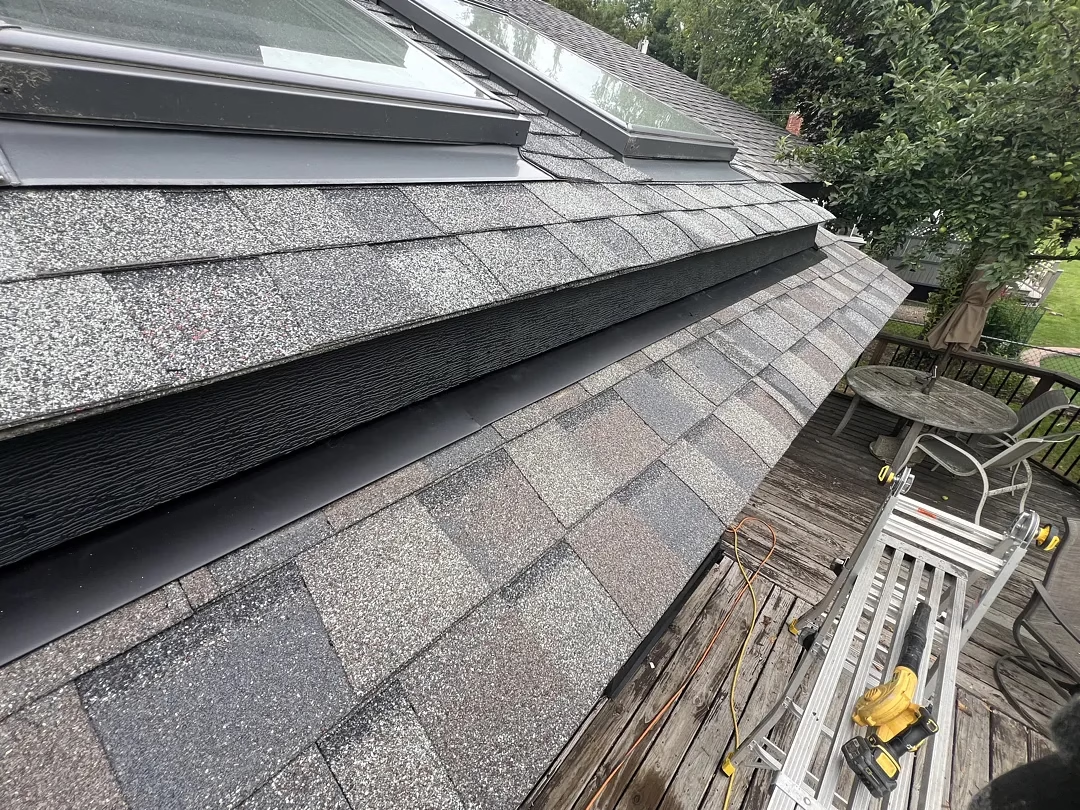
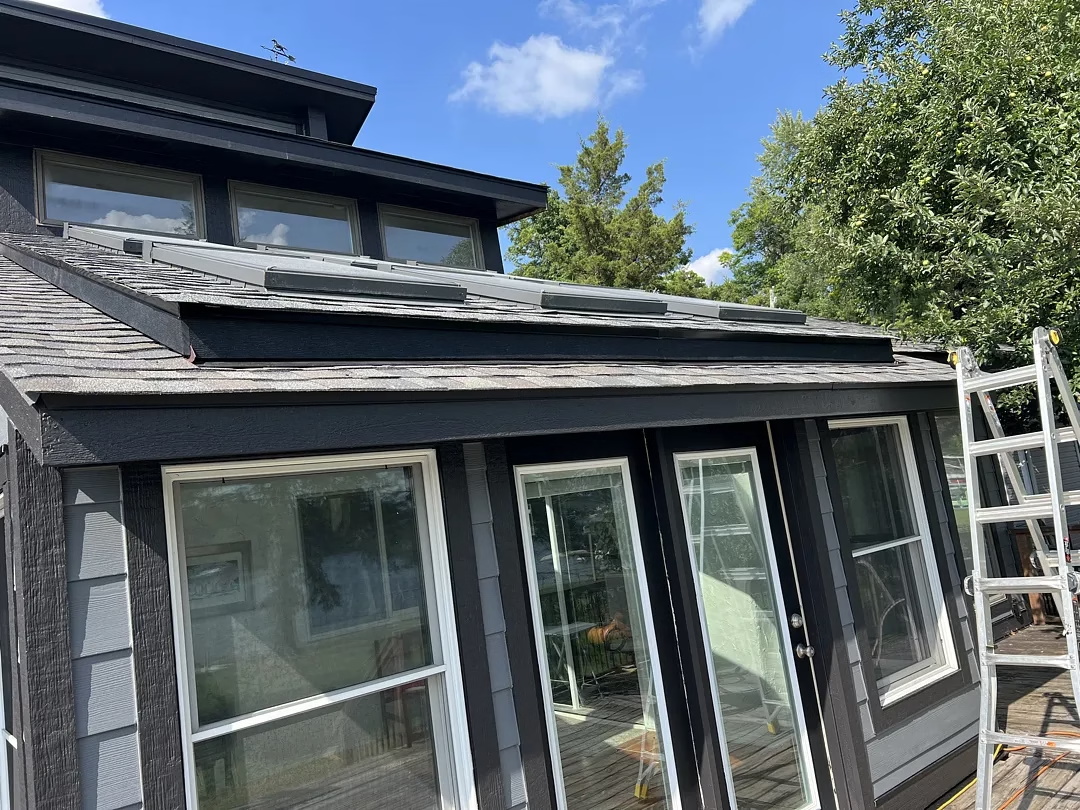
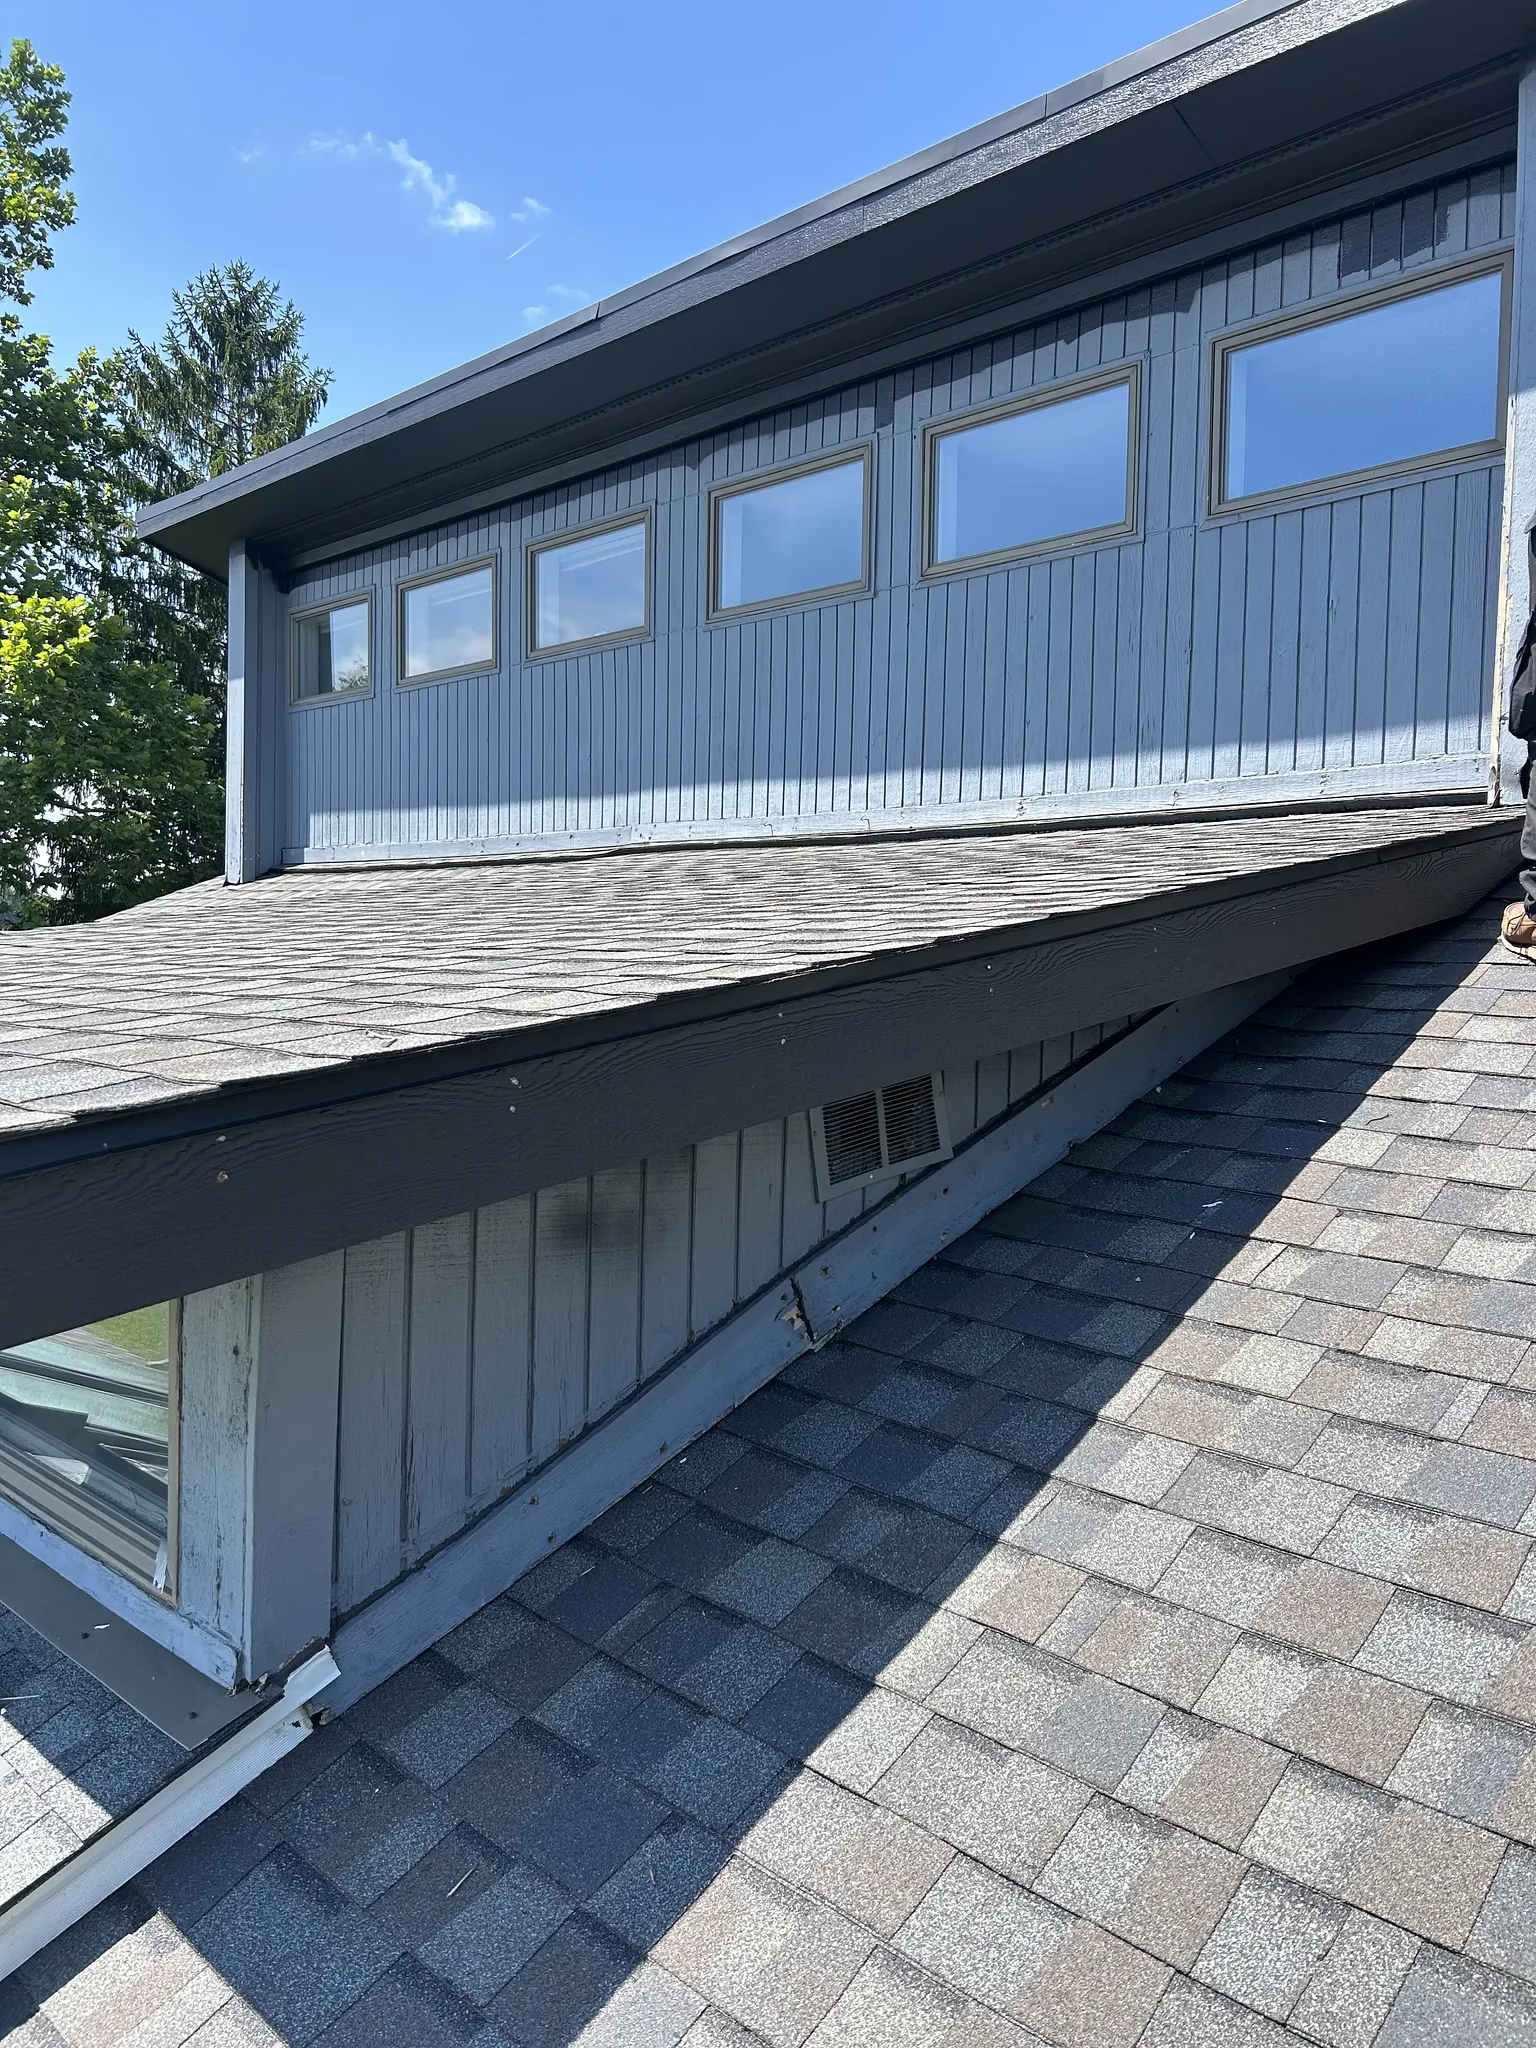
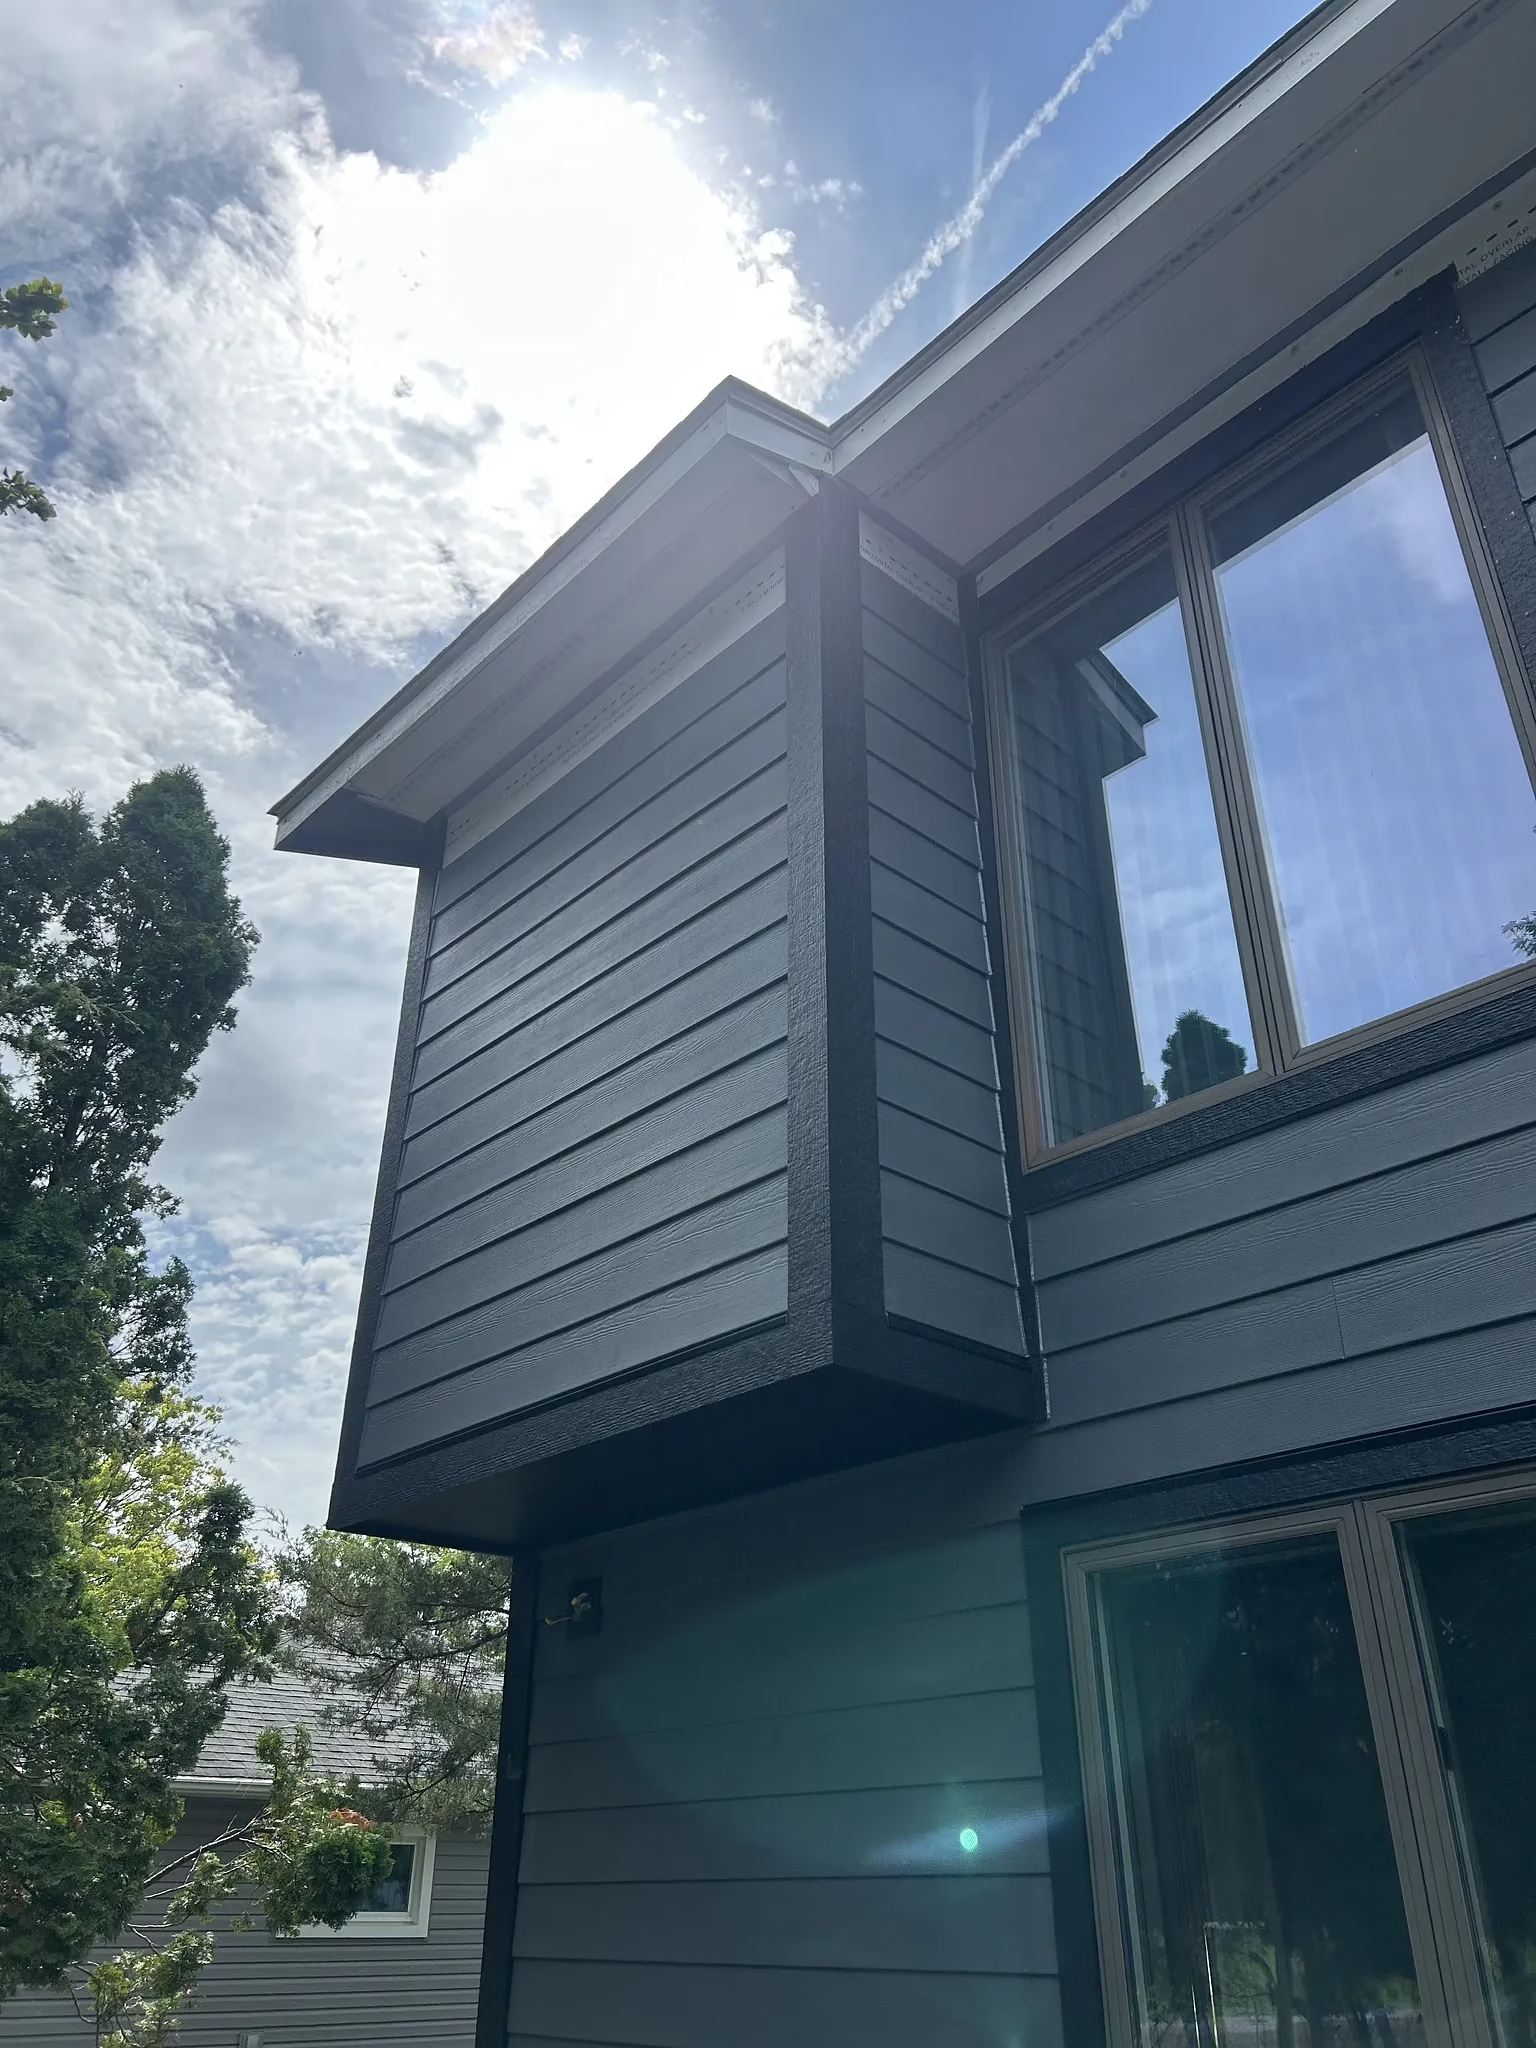
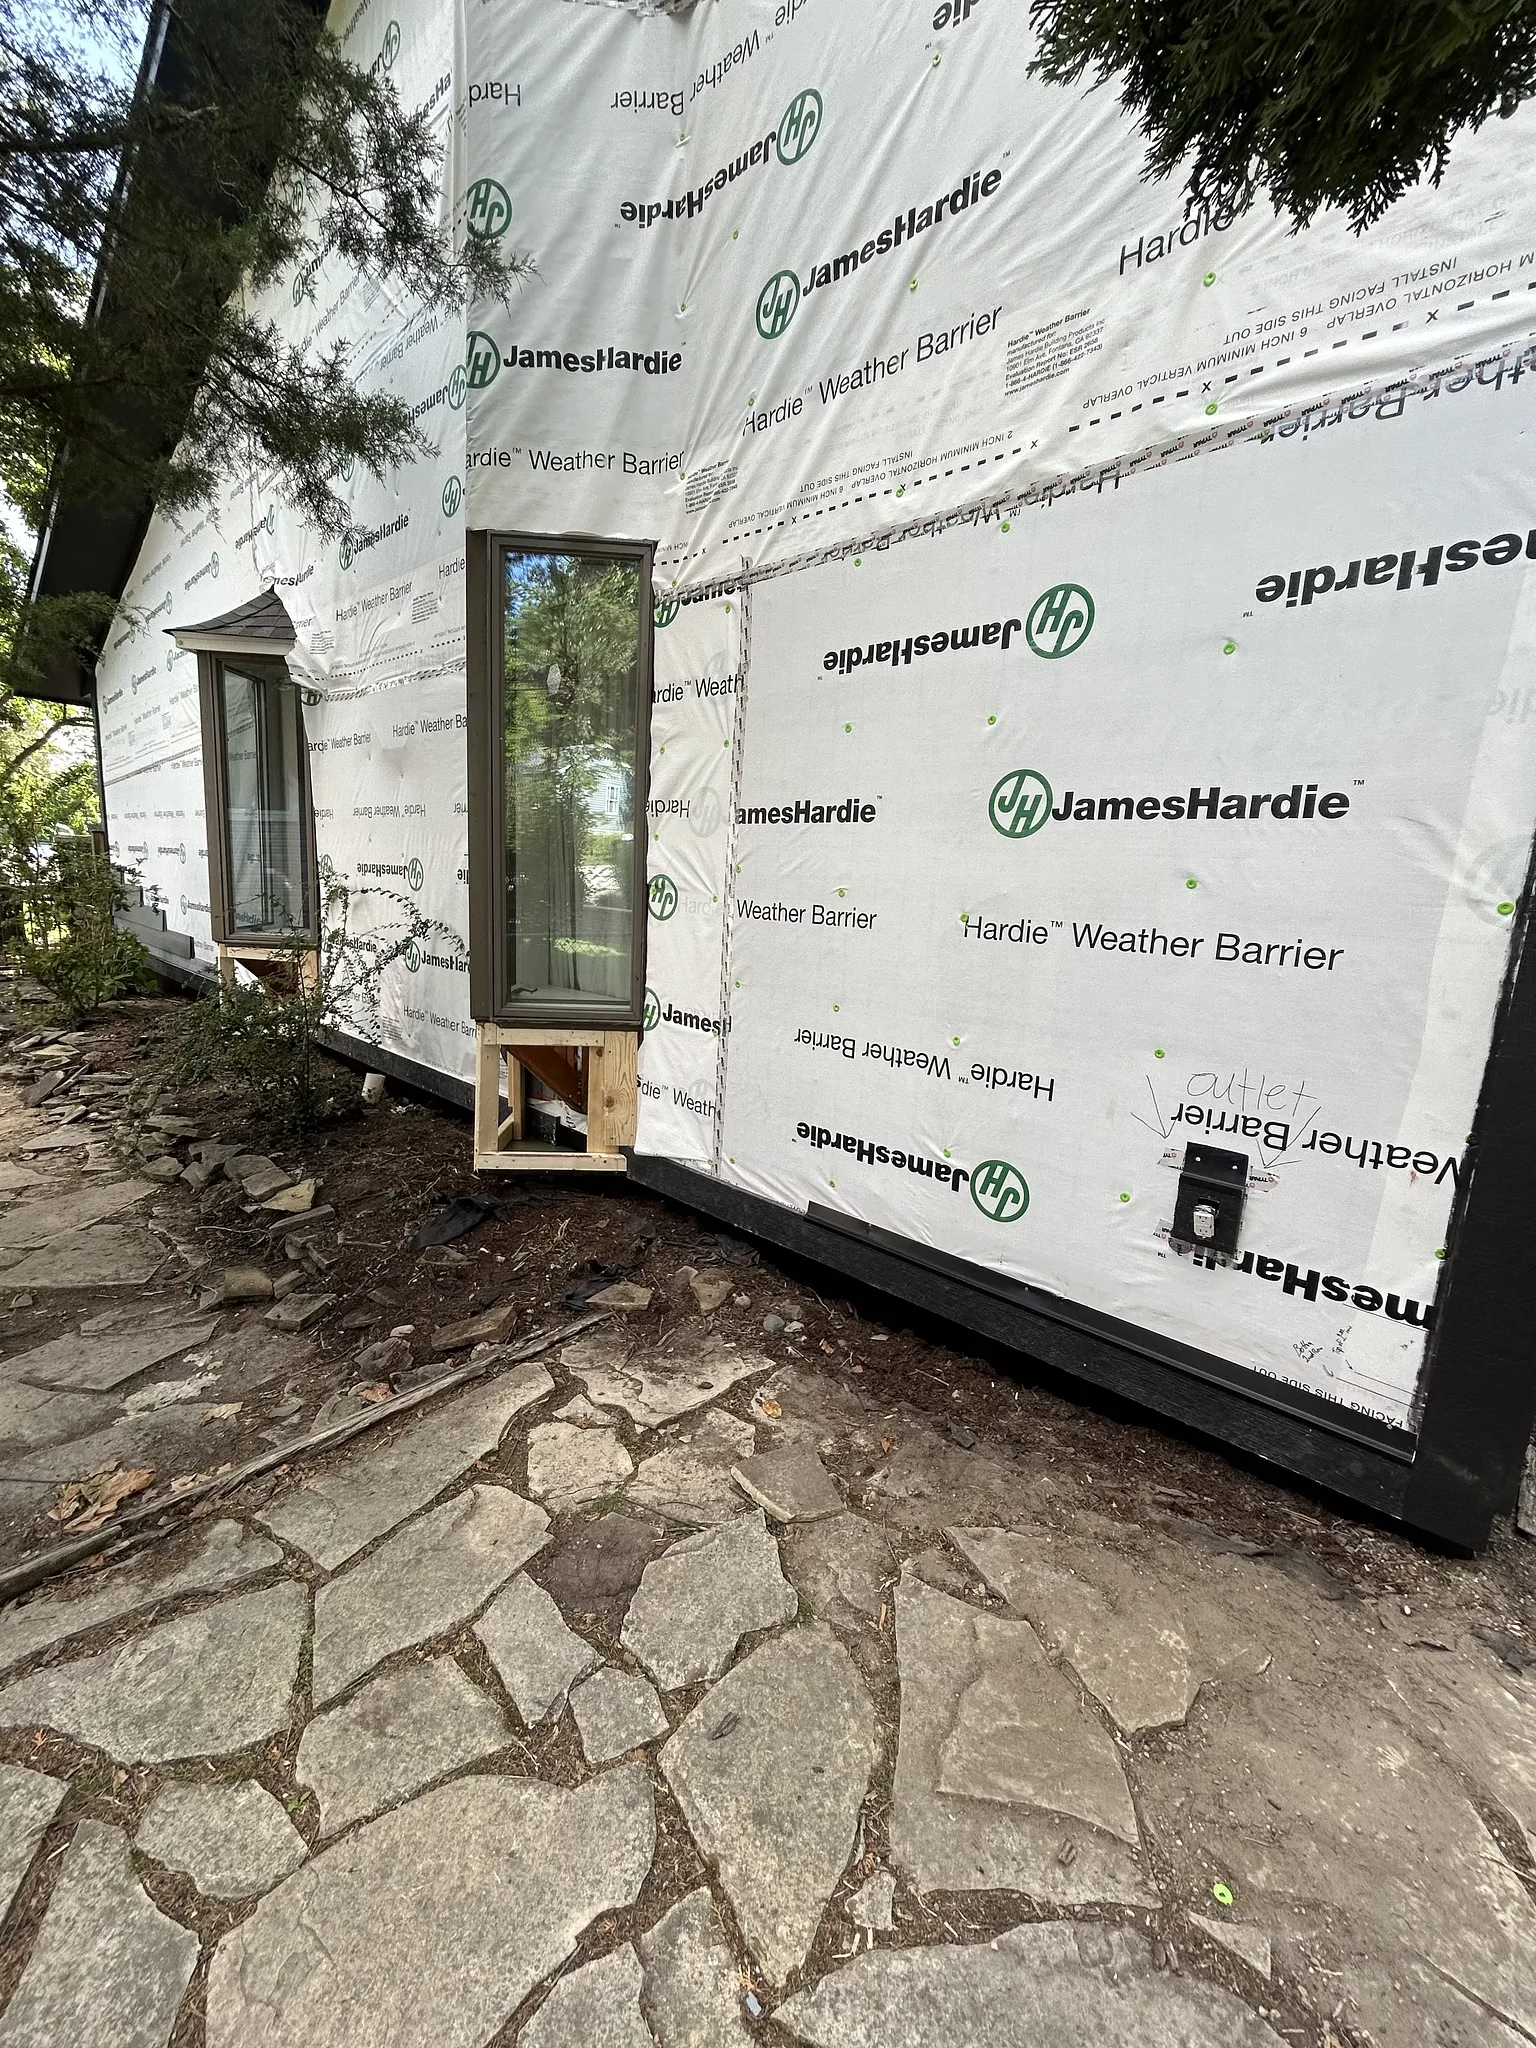
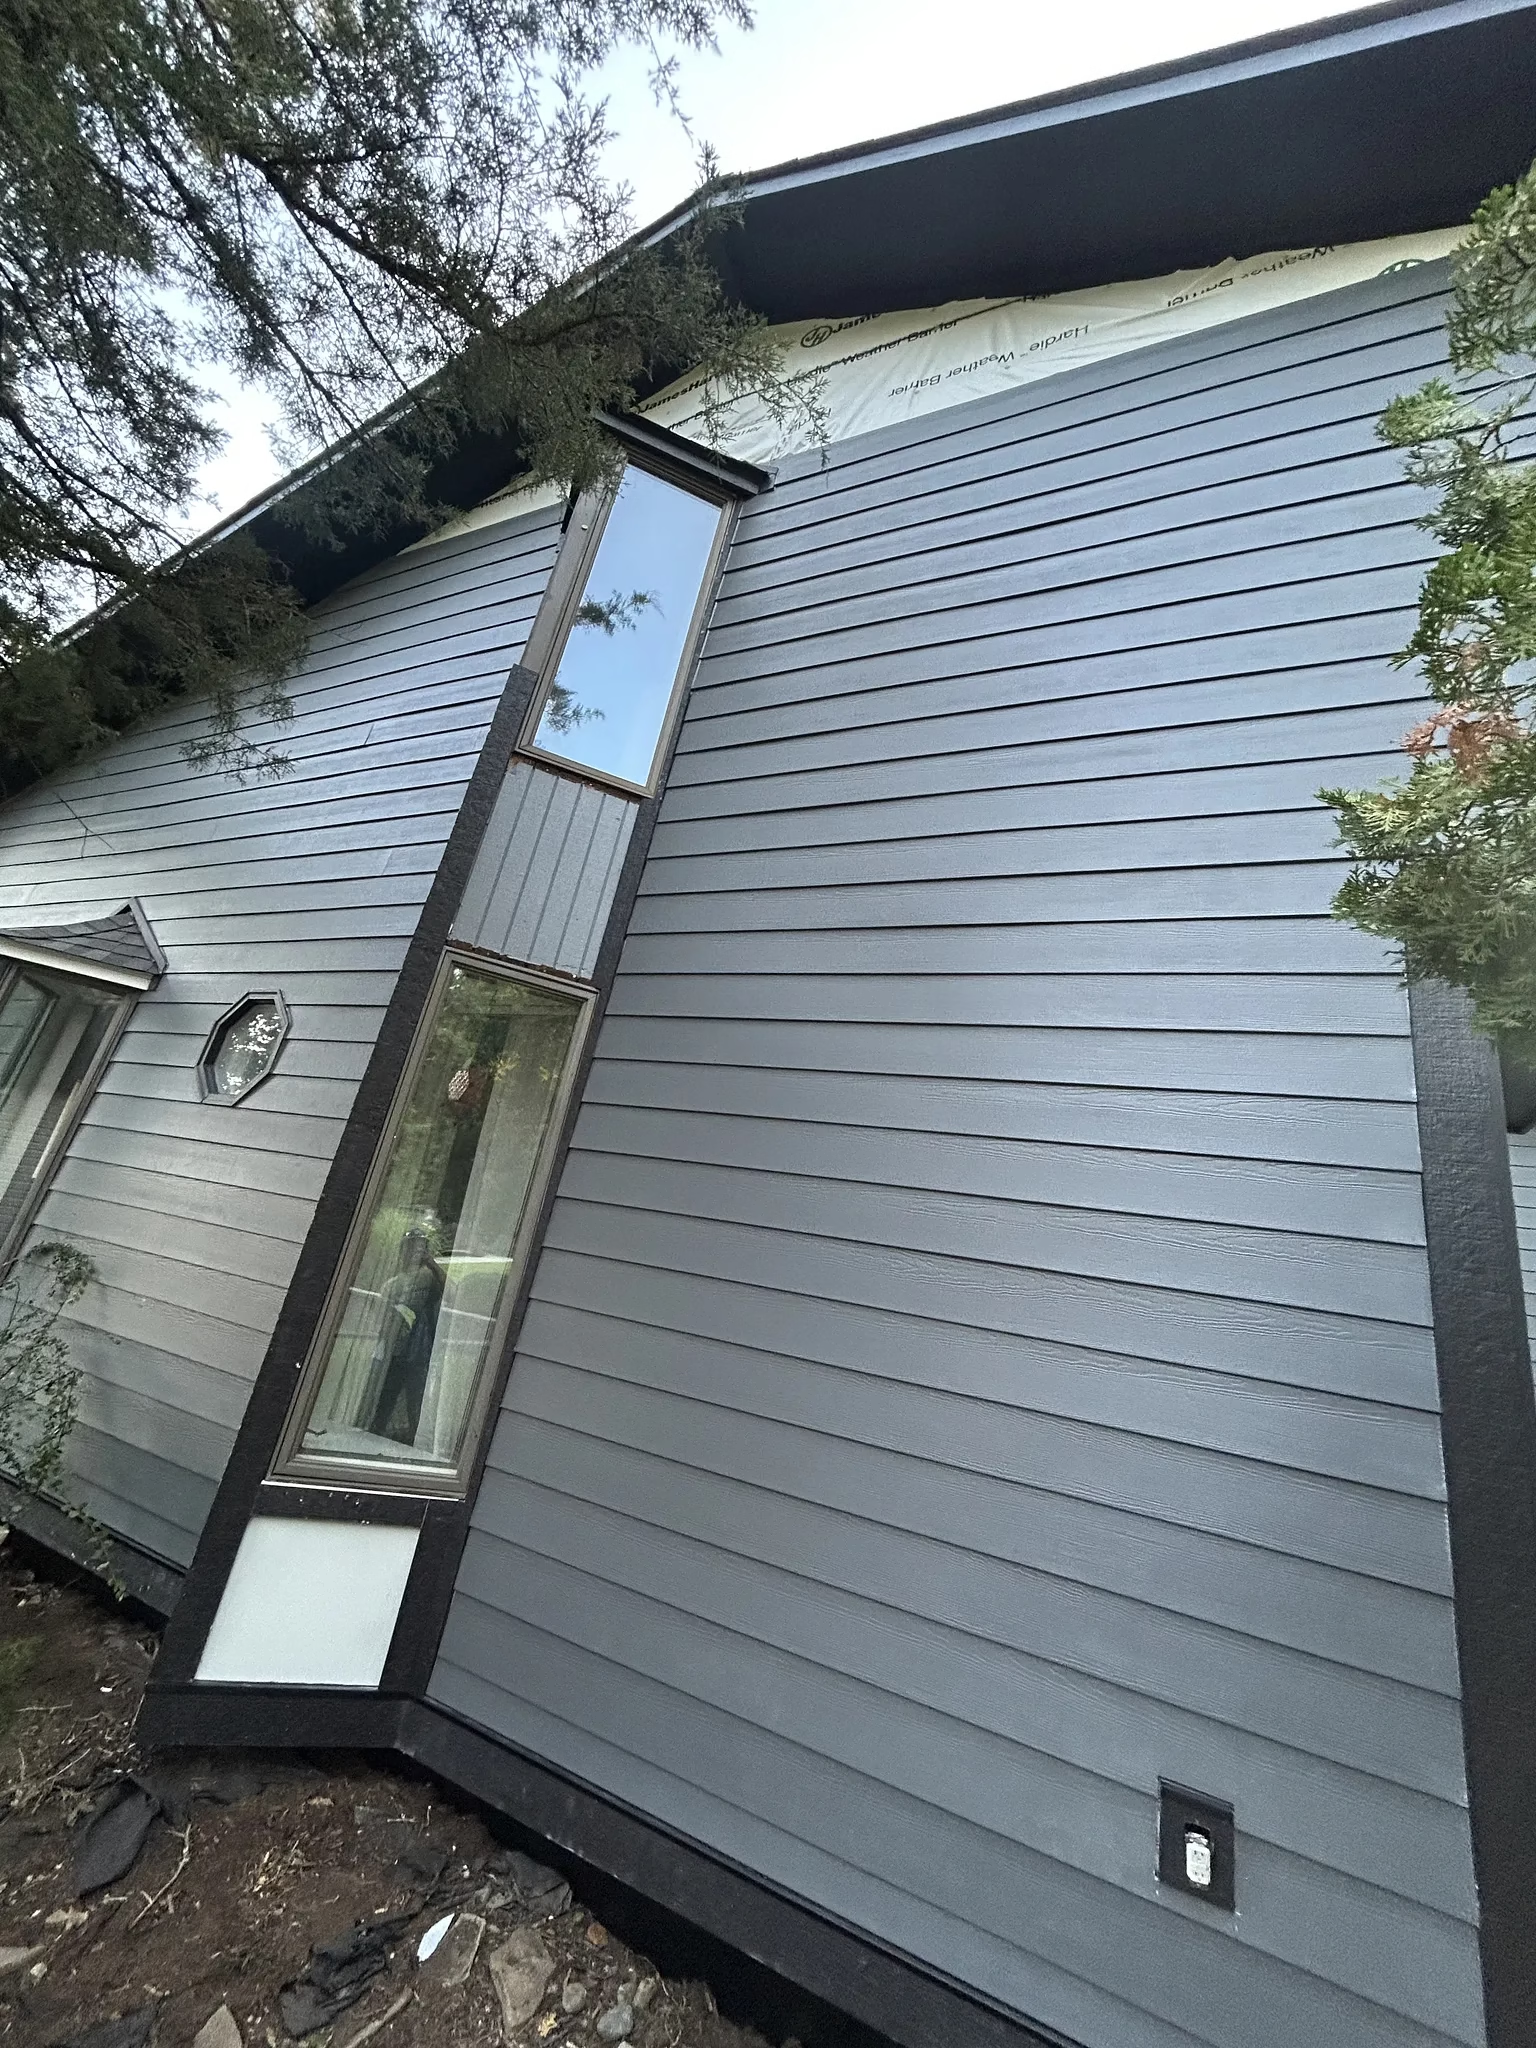
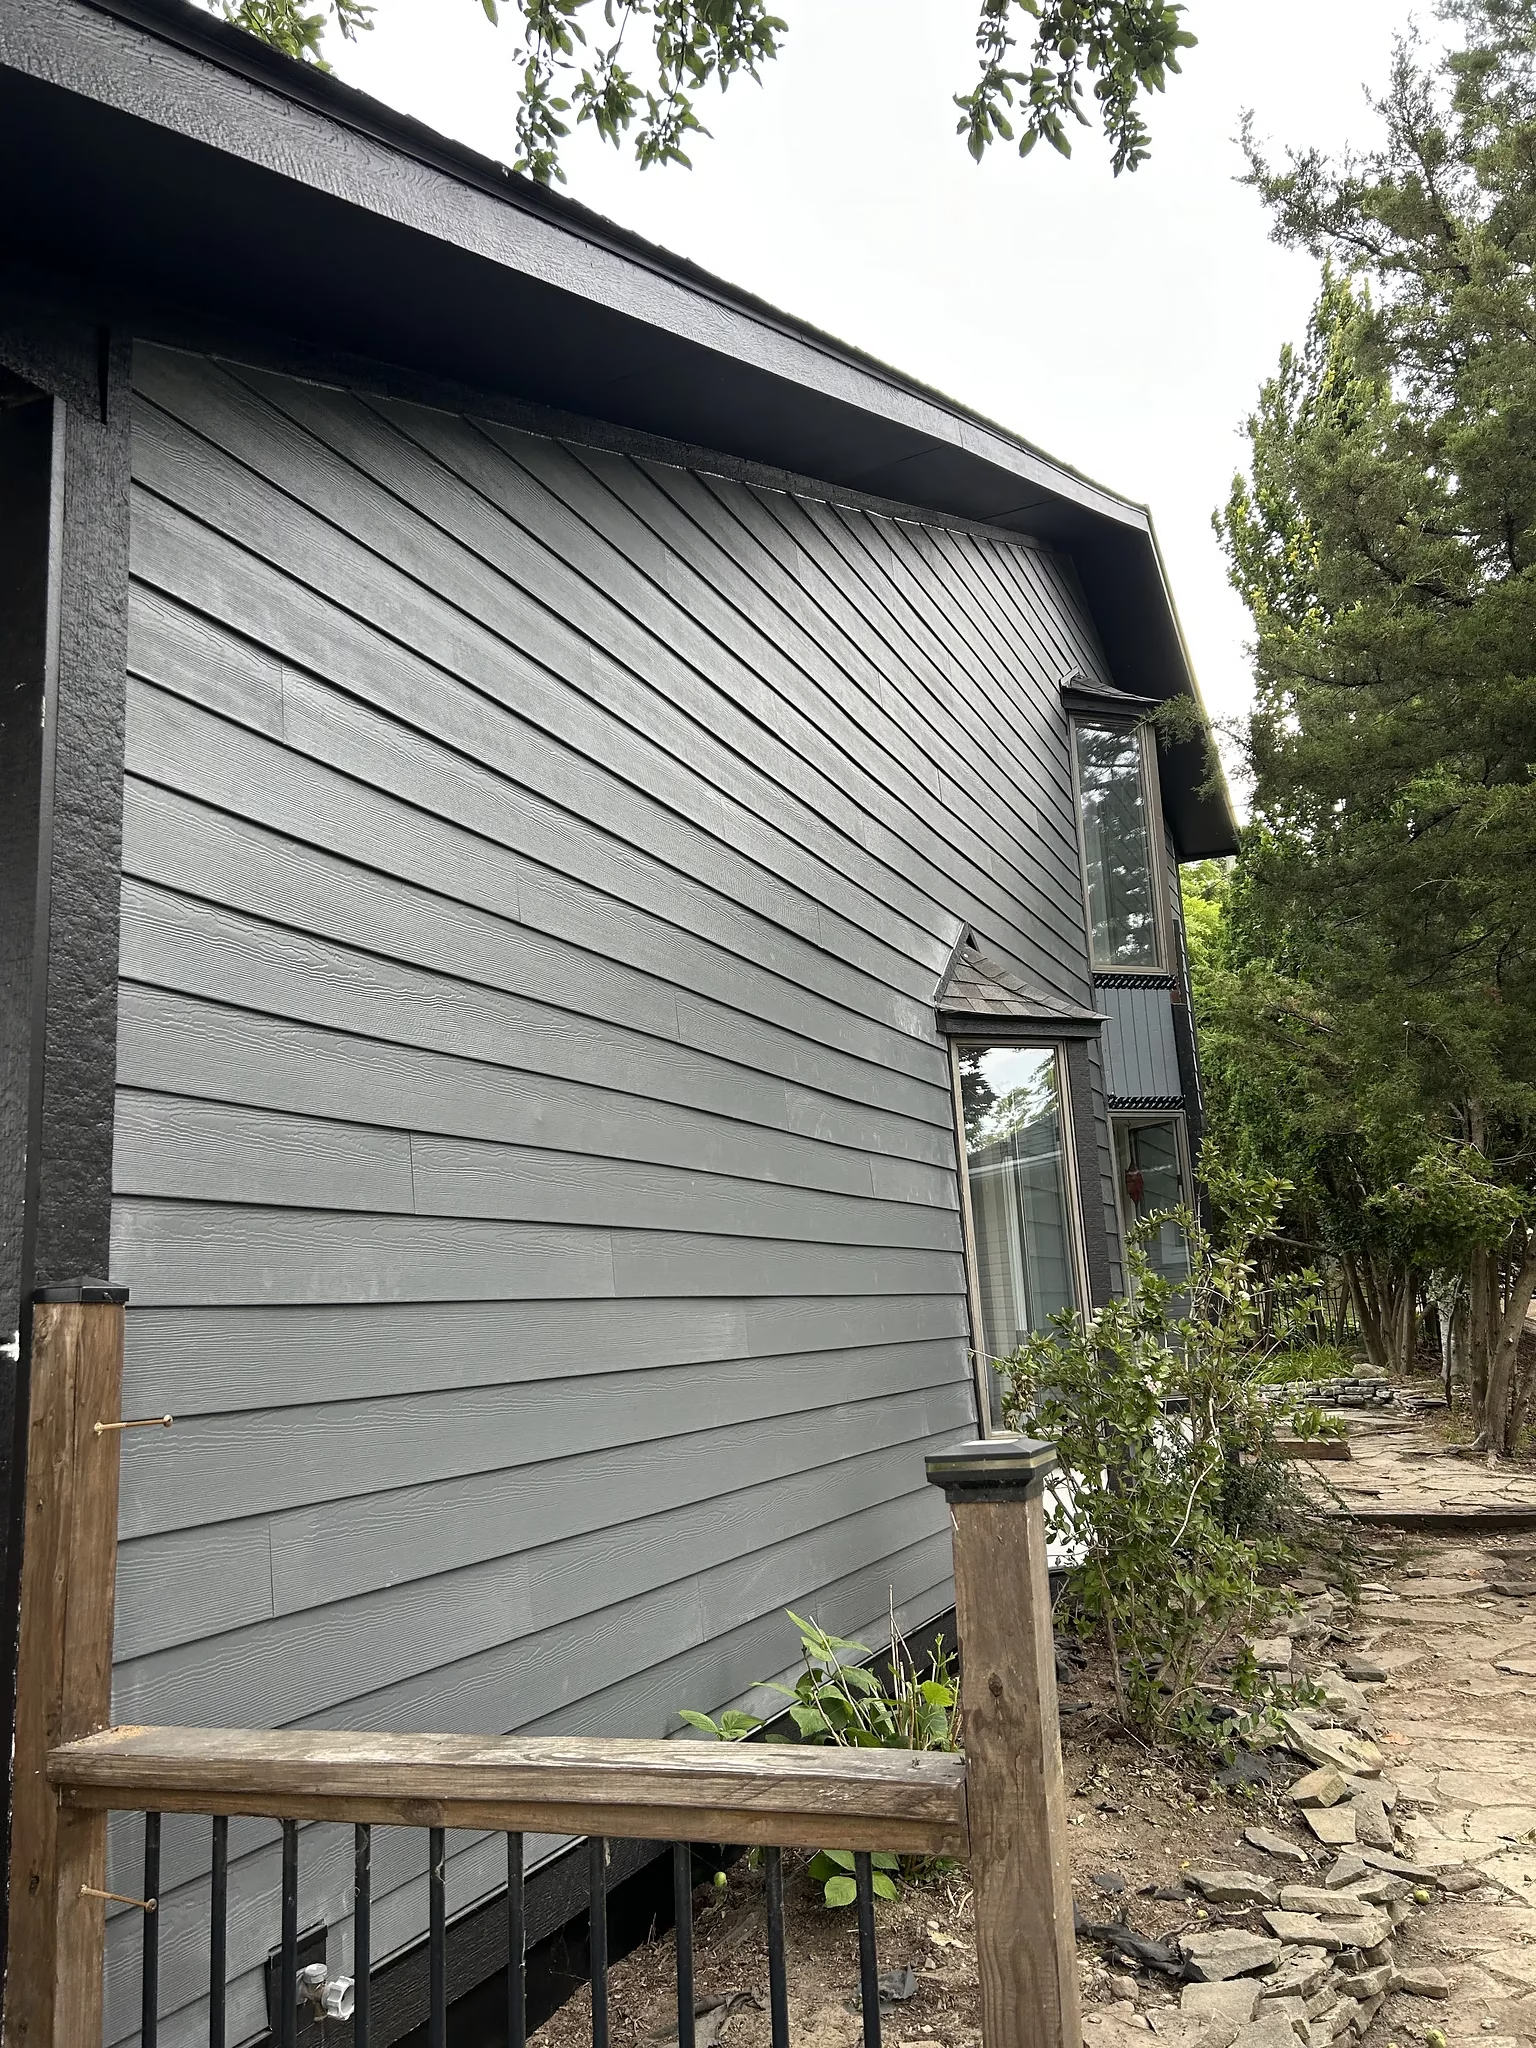
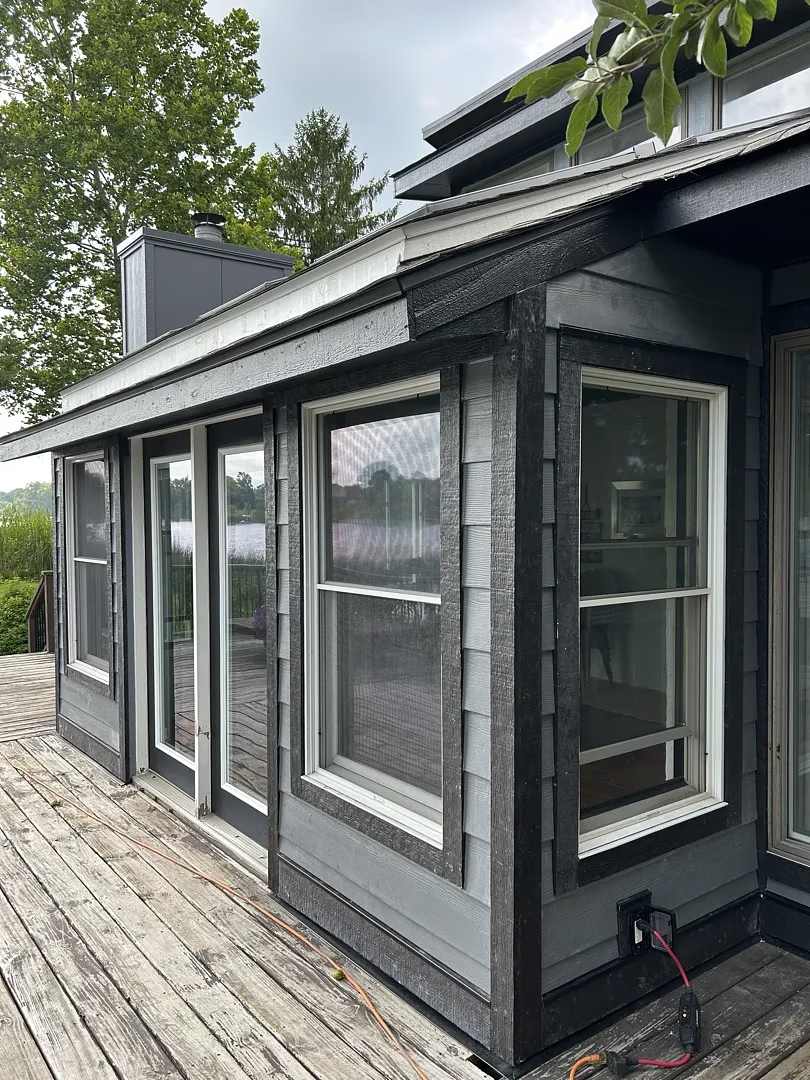
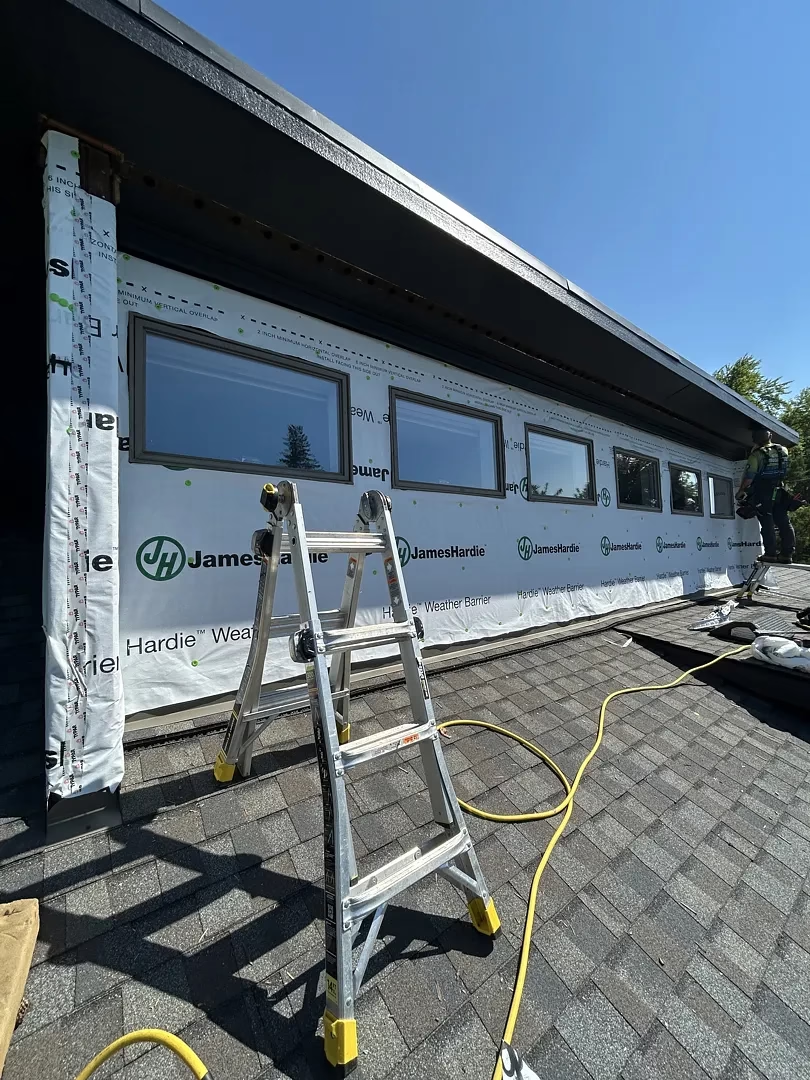
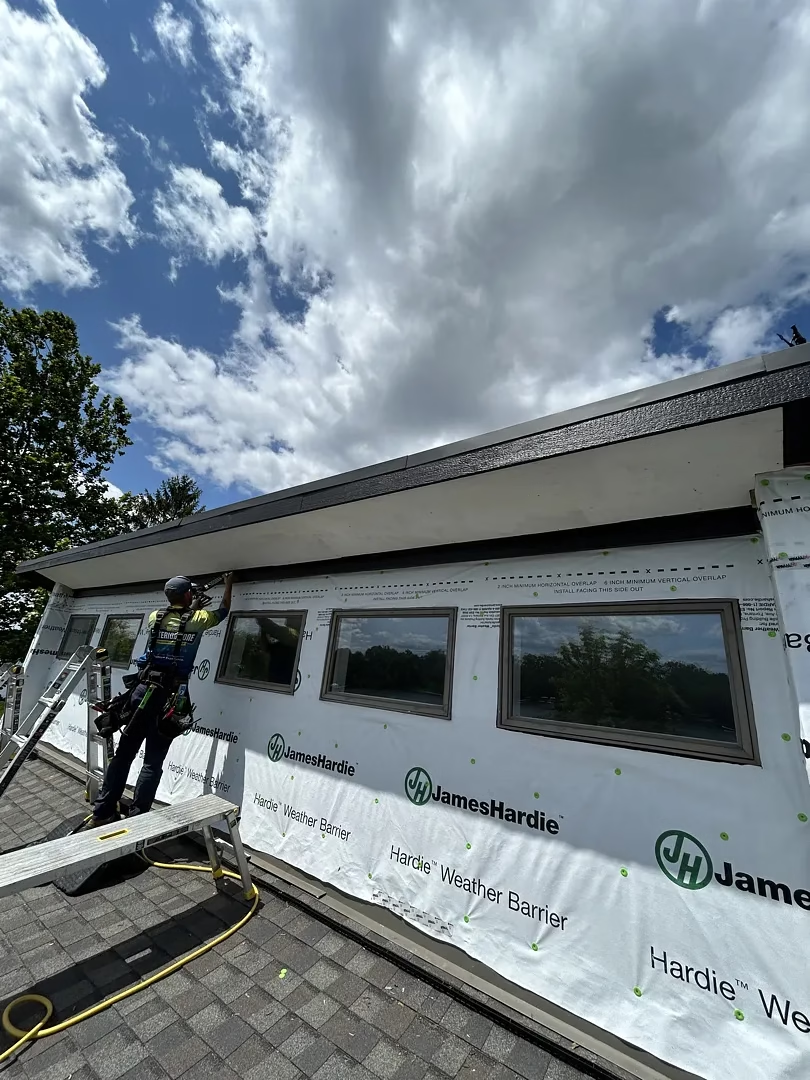
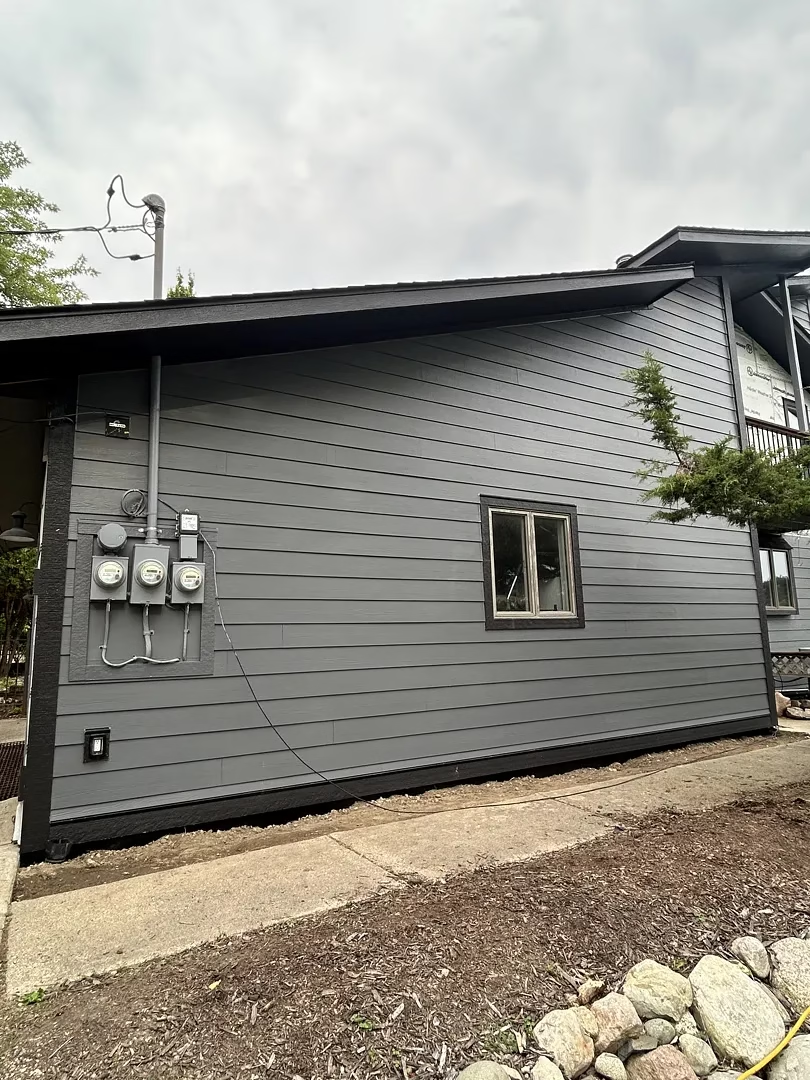
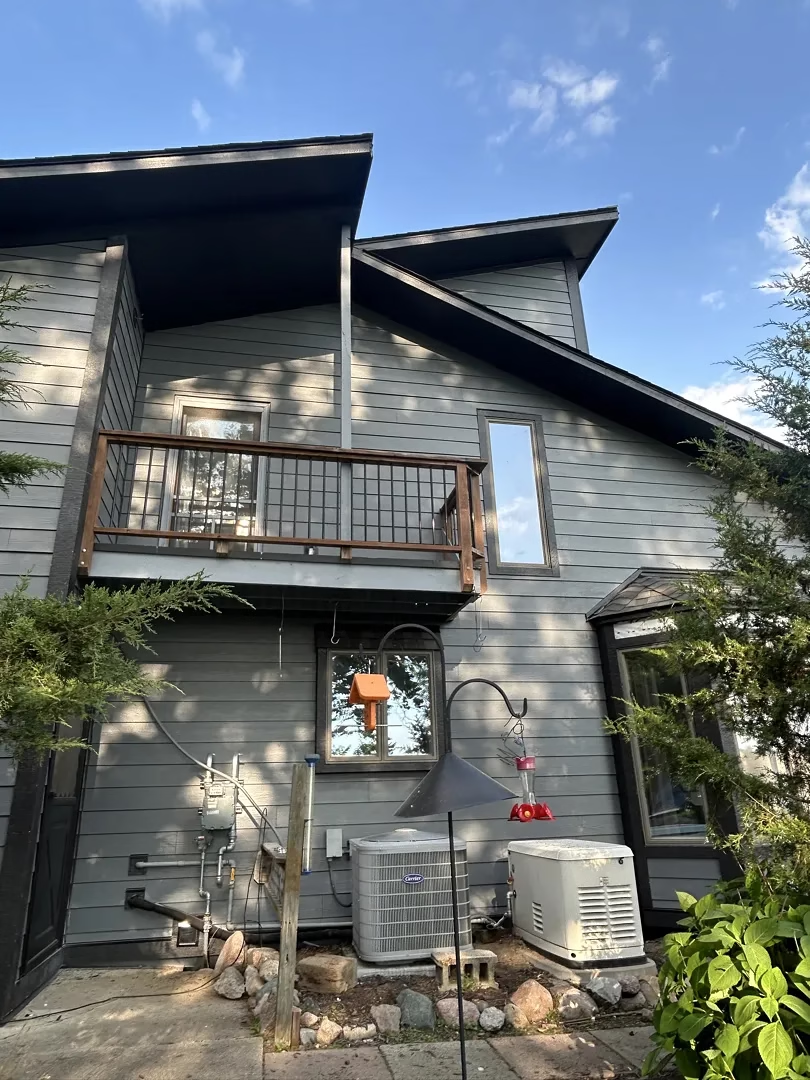
One of the most important parts of this project was the amount of attention given to transitions.
As the crew moved around the home, field conditions required additional work including:
- Custom flashing
- Additional step-flashing replacement
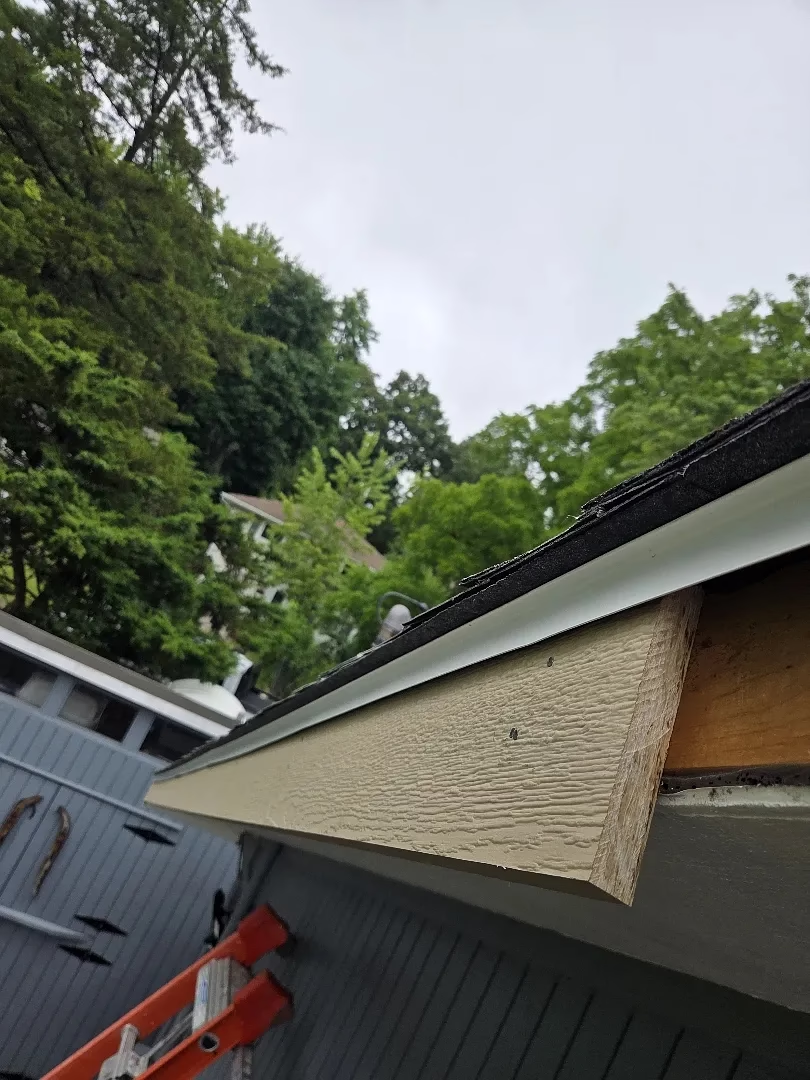
- Roofline transition boards
- Apron flashing
- Z-flashing above trim
- Window and door sill protection
- Split blocks around exterior penetrations
- Additional fascia replacement
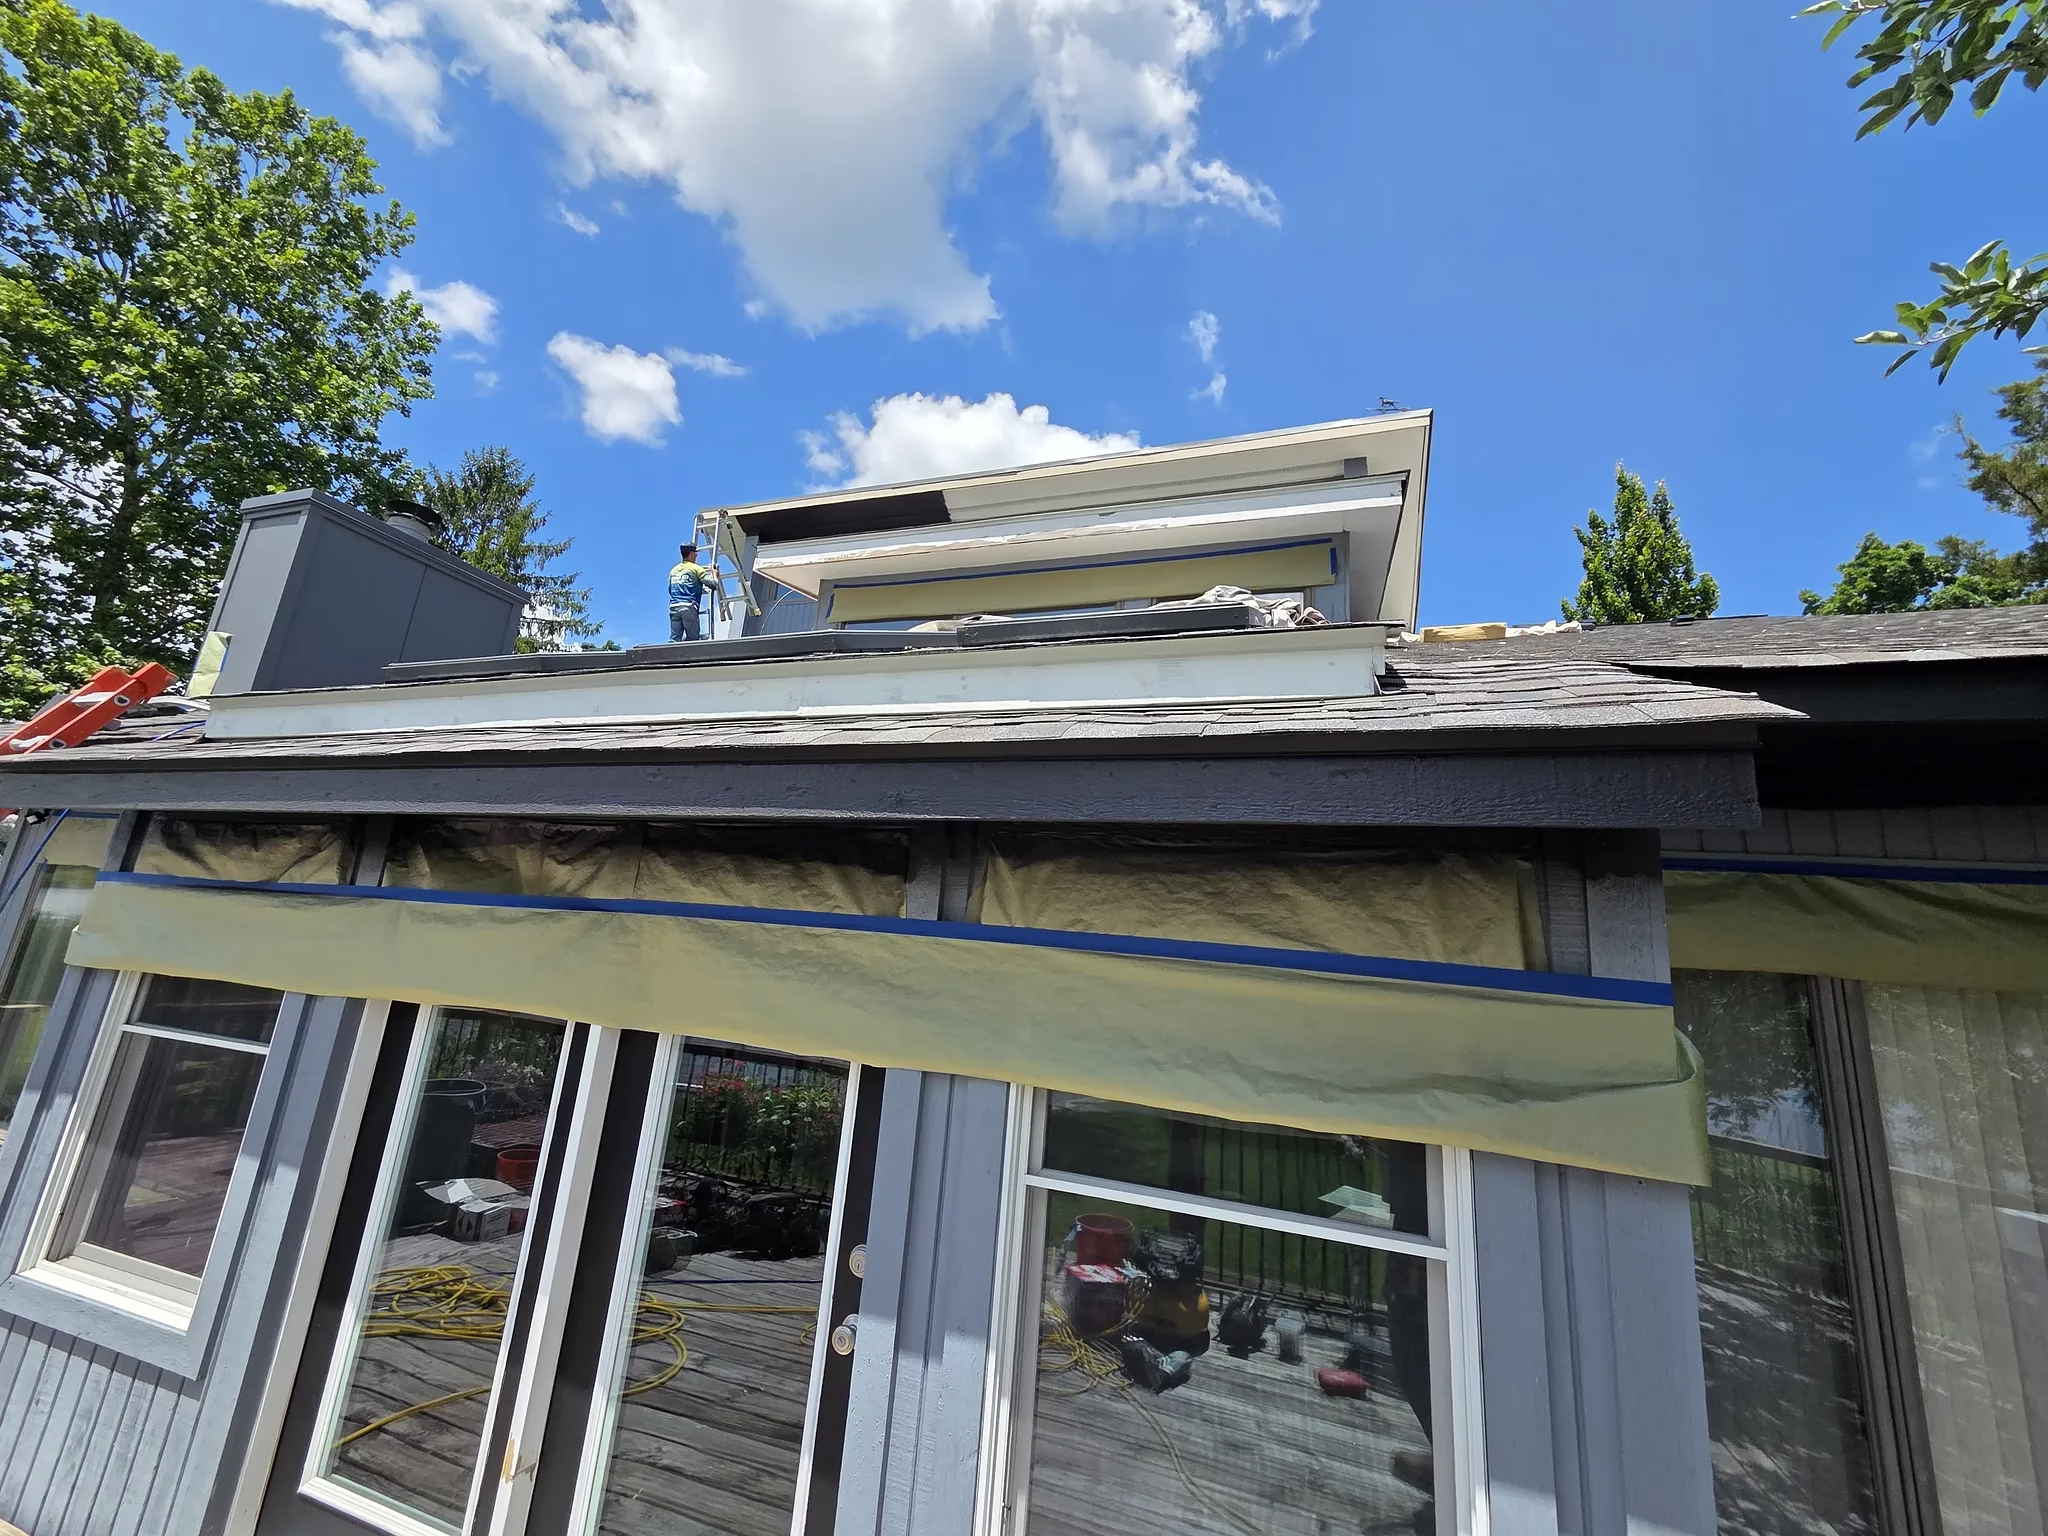
- Repairs around skylight-box trim
- Adjustments at existing roof and wall intersections
On one roof section, existing flashing around the skylight area had to be corrected once the trim was removed and the condition became visible.
Rather than treating those discoveries as unrelated problems, they were incorporated into the larger exterior system.
Exterior Painting and Finish Coordination
Several existing exterior components remained and were refinished to coordinate with the new siding.
Painting work included:
- Existing wood soffit, fascia, and frieze
- Wood windows
- Garage door
- Door frames and brickmould
- Underside of the upper deck
- Shed siding and trim
- Other remaining exterior elements
The primary exterior palette carried the new James Hardie colors throughout the property:
Night Gray for the main siding and select coordinating surfaces
Midnight Black for trim and architectural accents
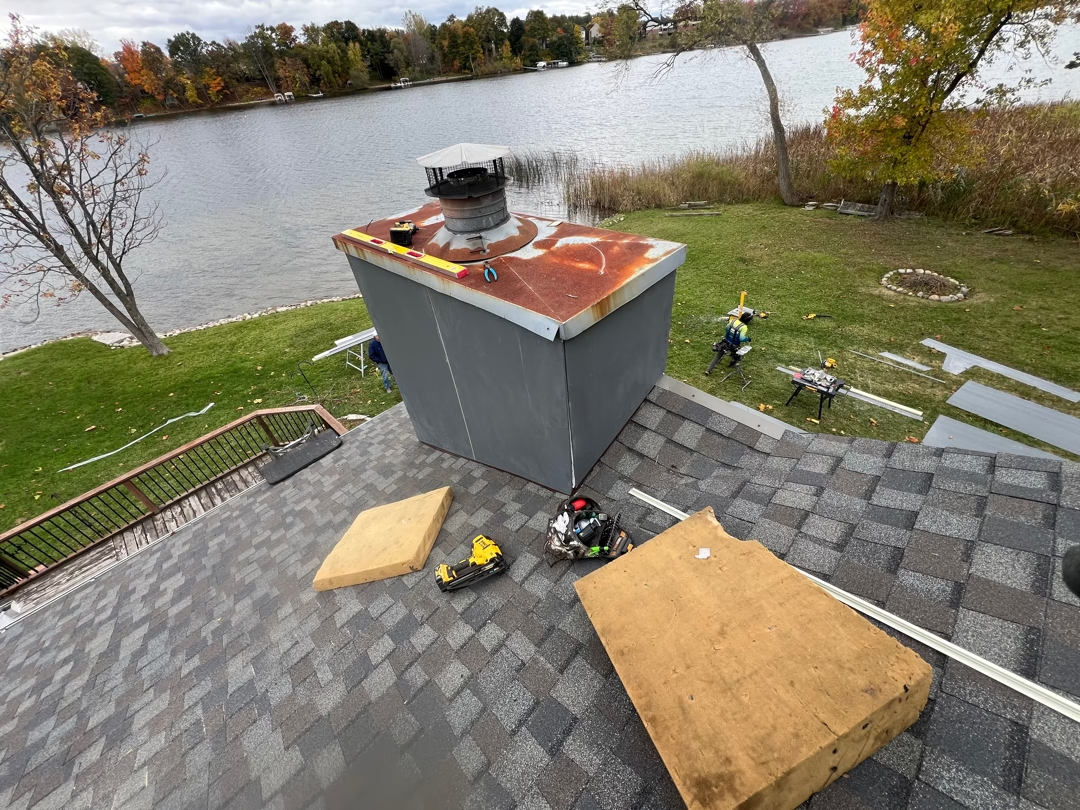
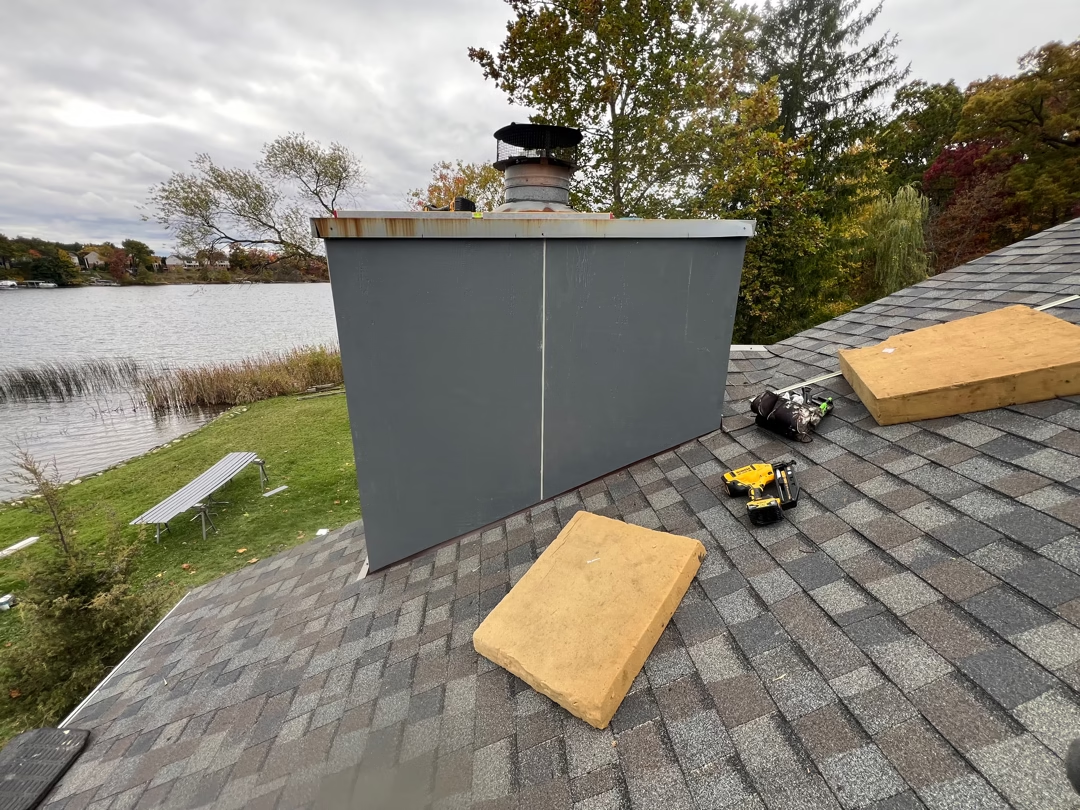
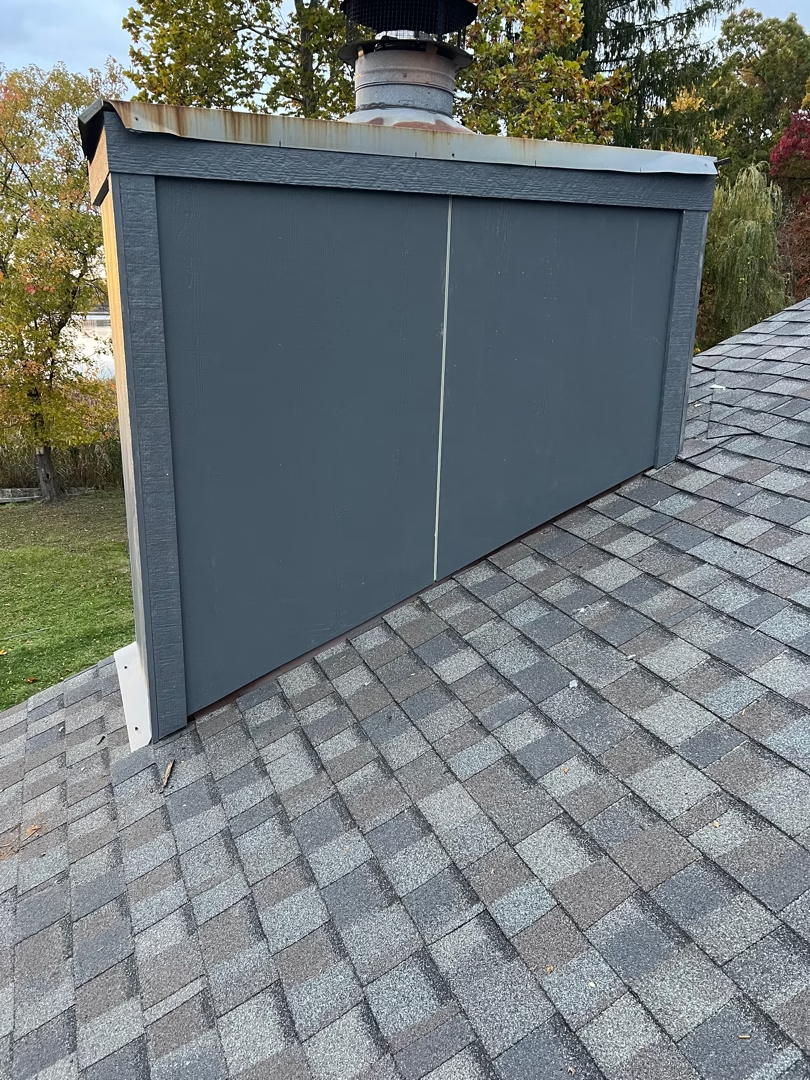
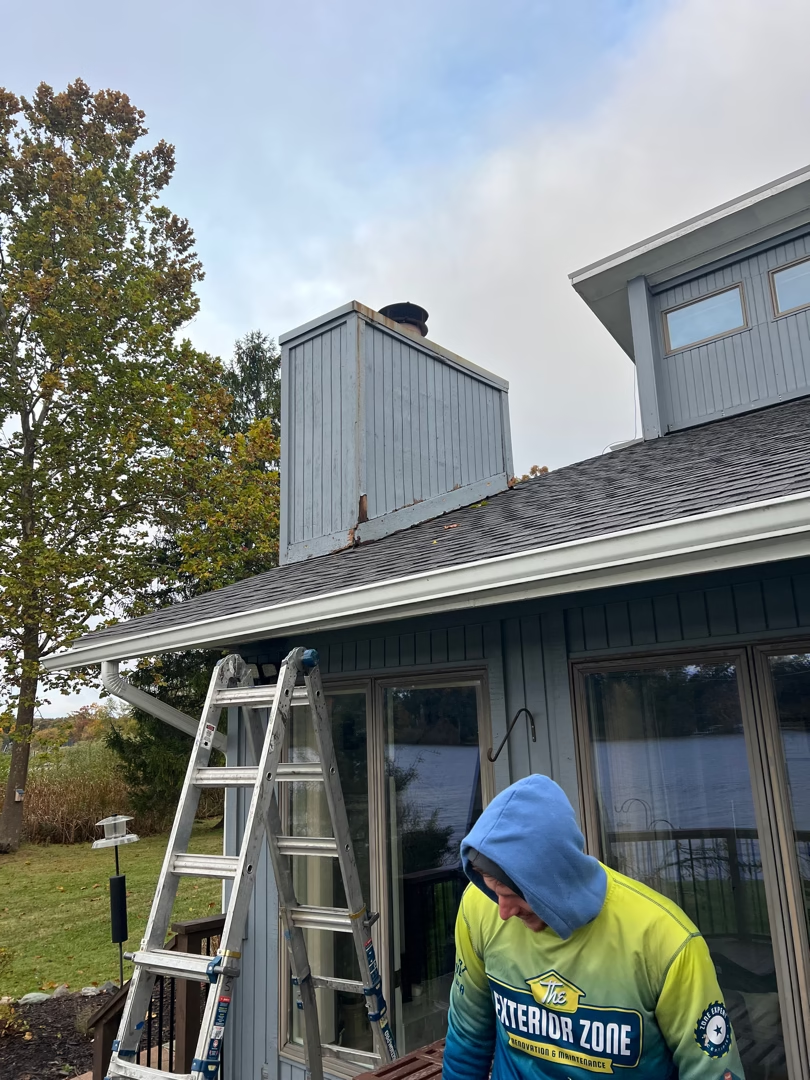
The chimney was also refinished in black while its existing metal cap remained in its factory finish.
The result was a home where the new siding did not look like an isolated replacement. The old and new exterior components were intentionally brought into the same design.
Rebuilding the Gutter and Drainage System
The final exterior also received a new gutter system.
The project included:
- 6-inch seamless .032 aluminum gutters
- Black finish
- New outlets and downspout straps
- Splash guards at high-flow areas
- Downspout connections and extensions as required
- Drainage adapters where applicable
- A cleanout filter at the designated downspout
The gutters were installed after the surrounding fascia, siding, painting, and trim work had been completed so the drainage system could integrate cleanly with the renovated exterior.
The Result
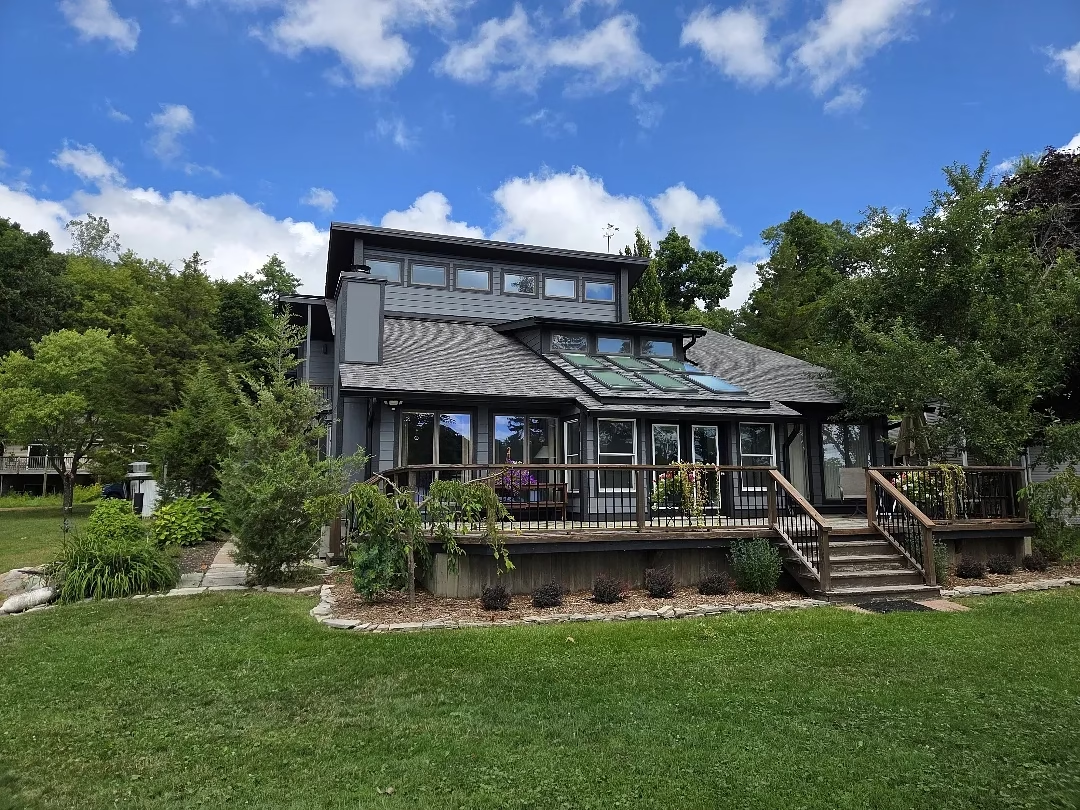
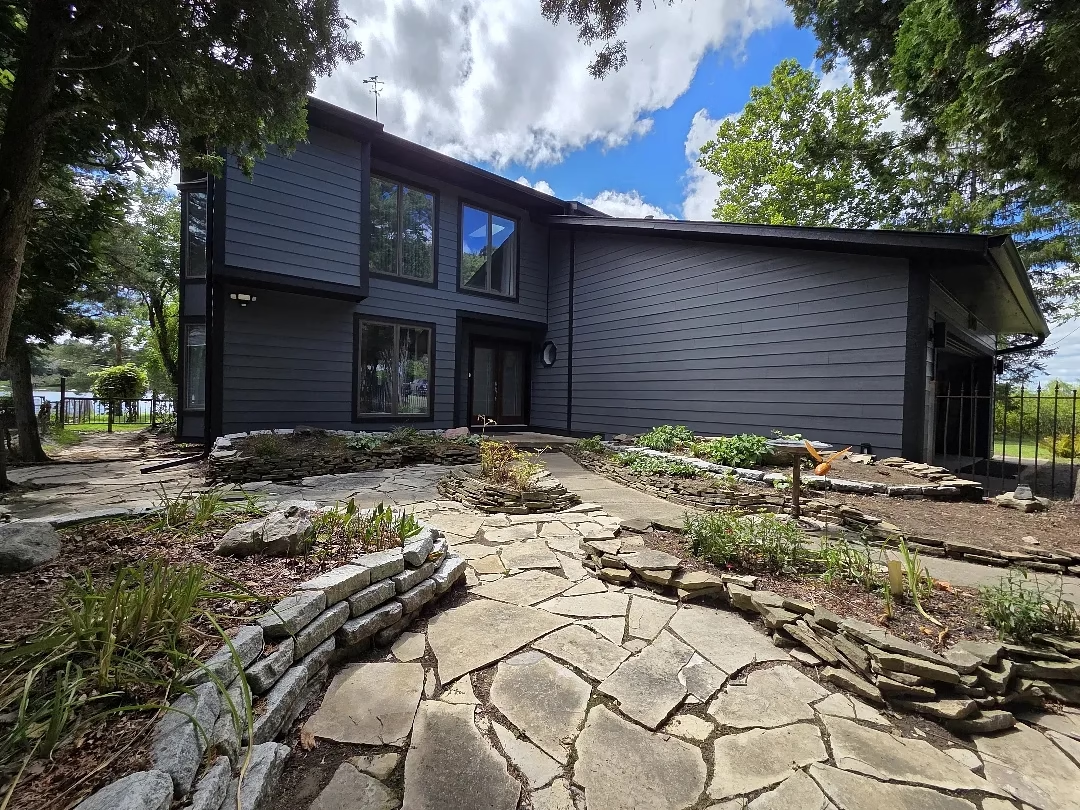
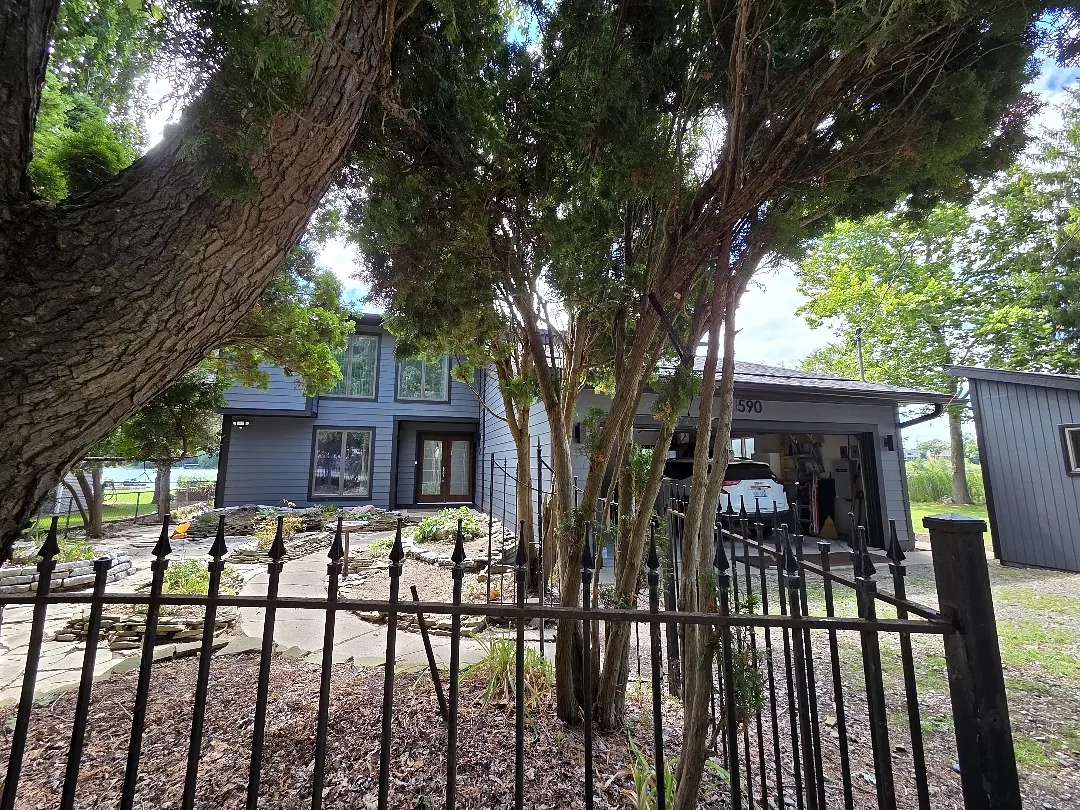
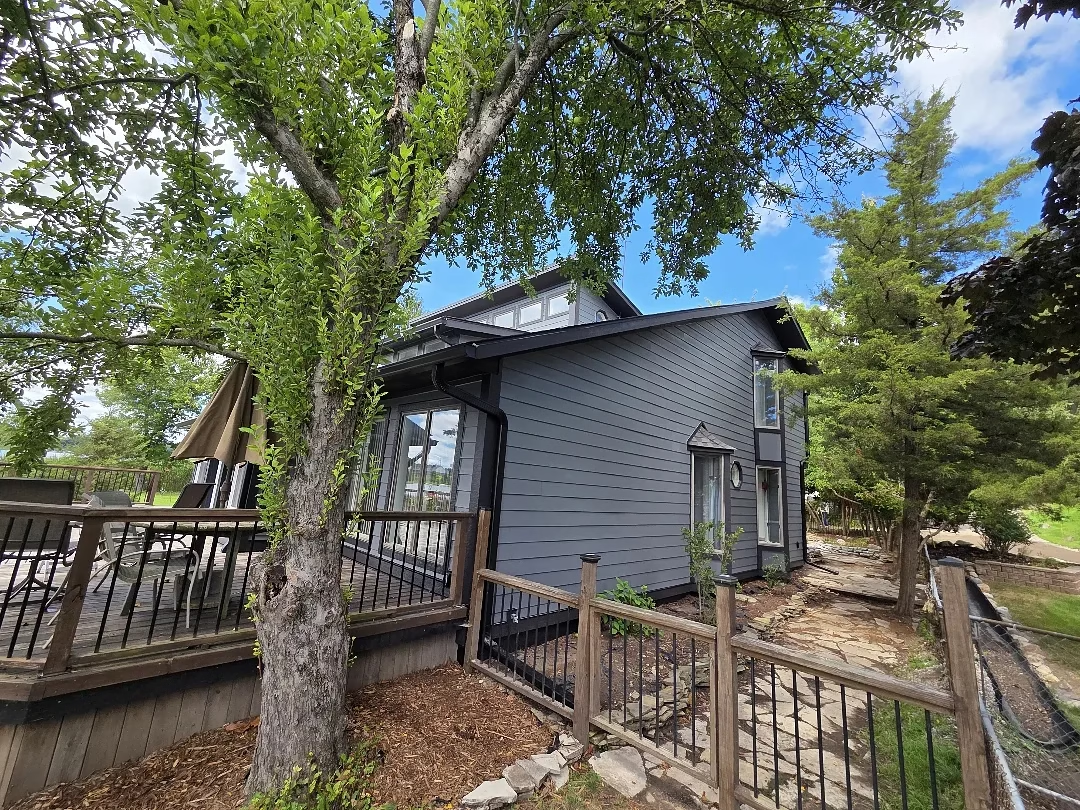
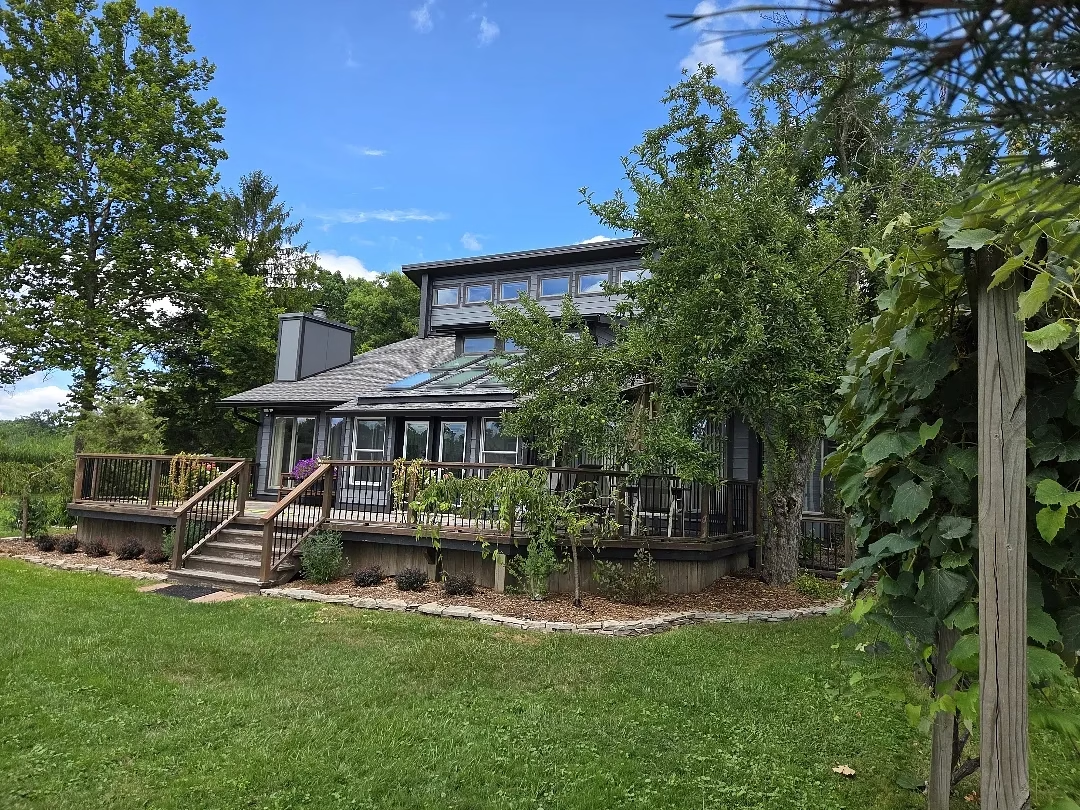
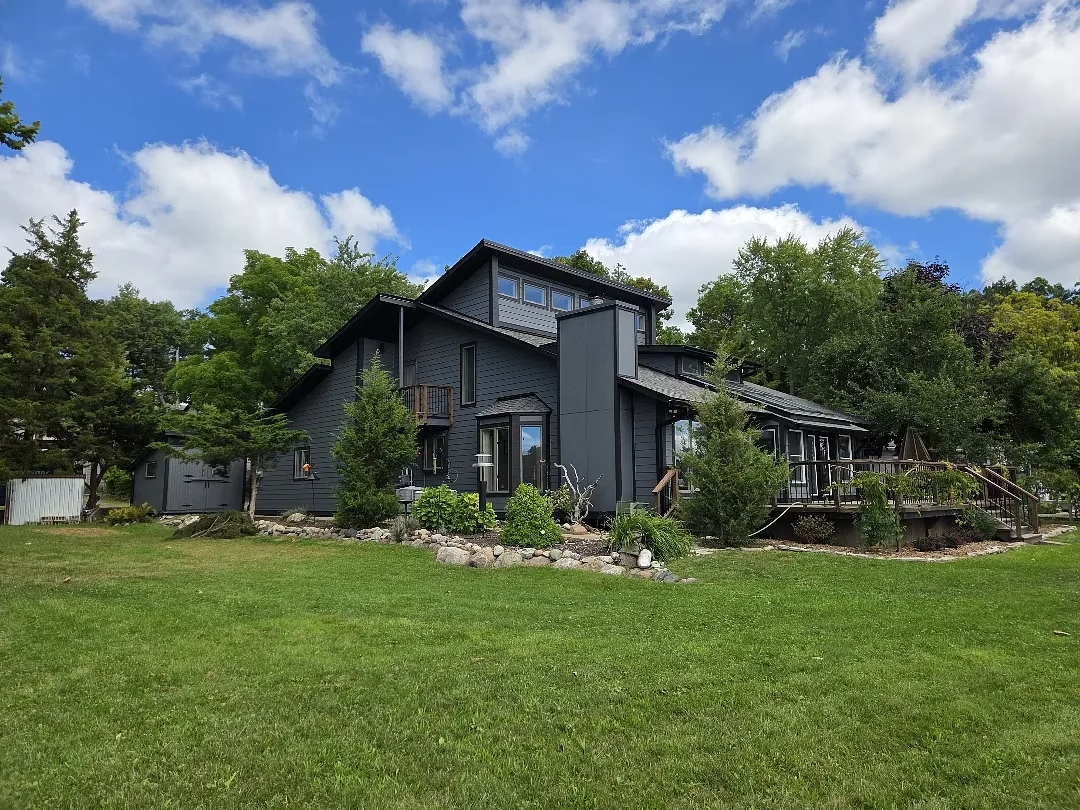
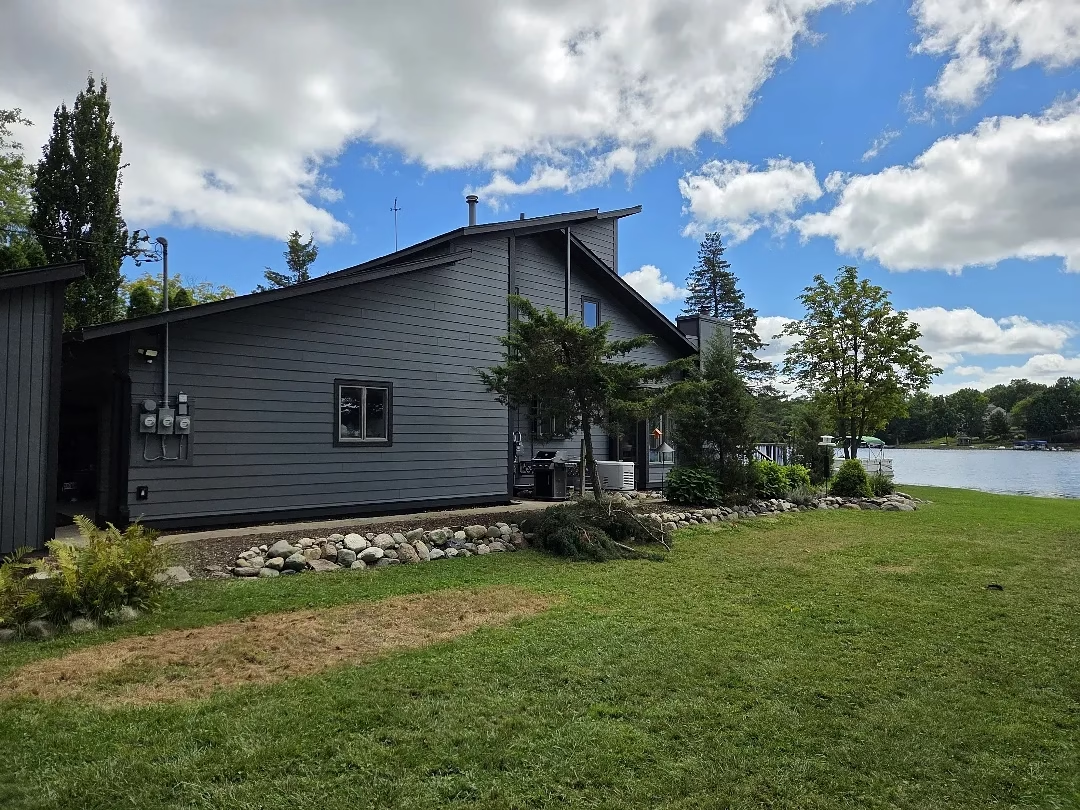
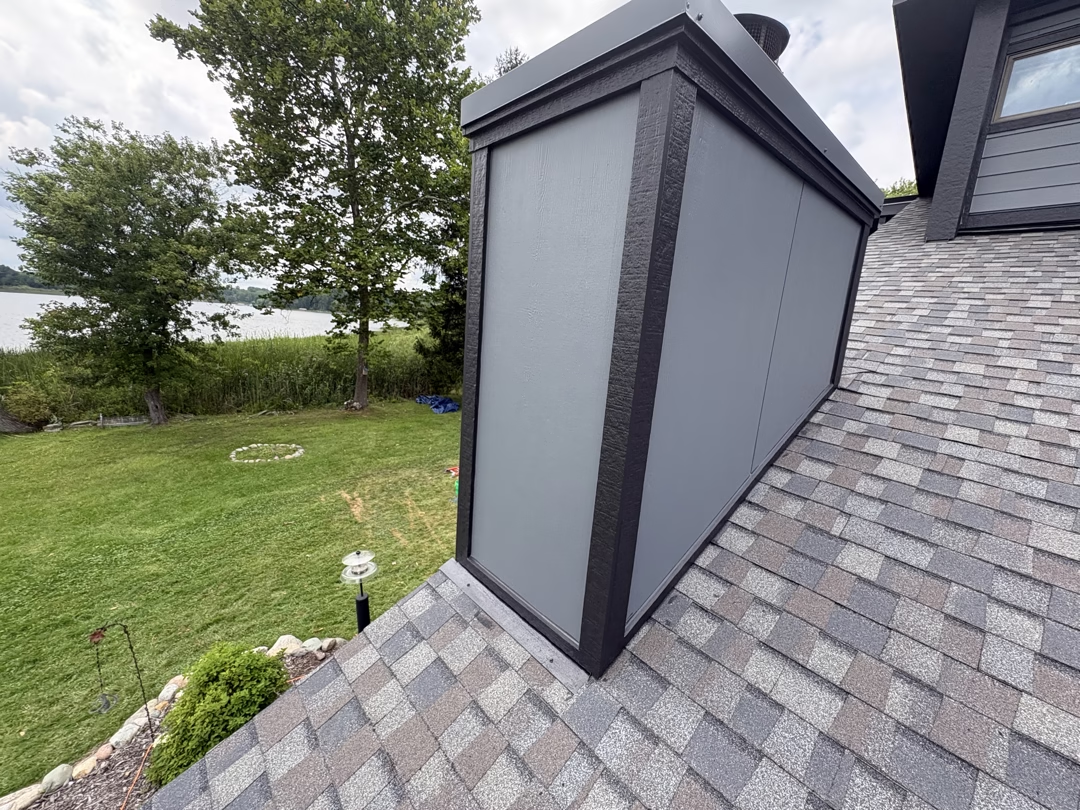
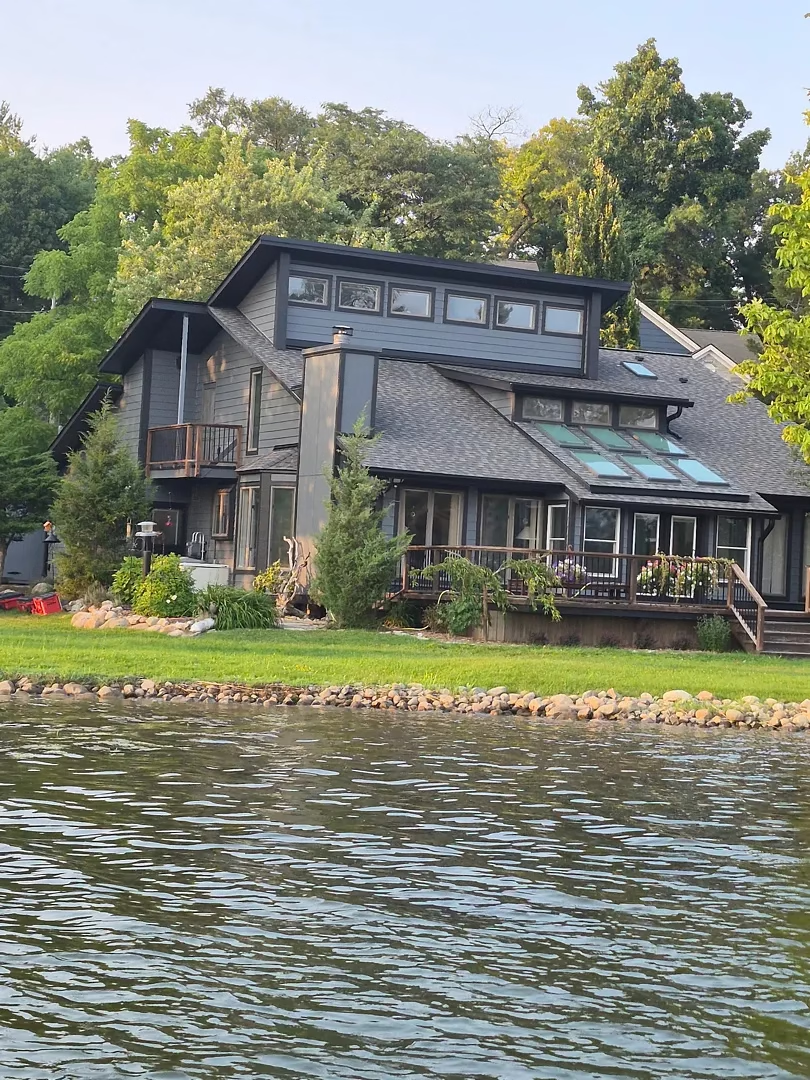
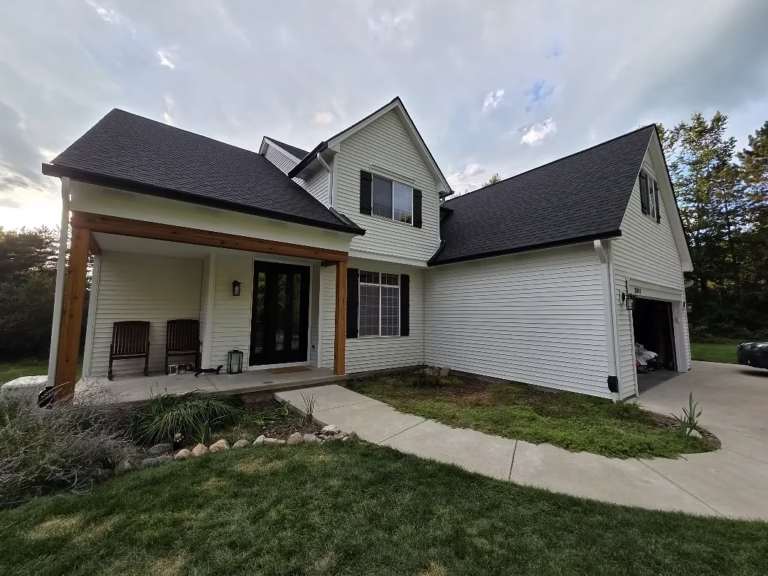
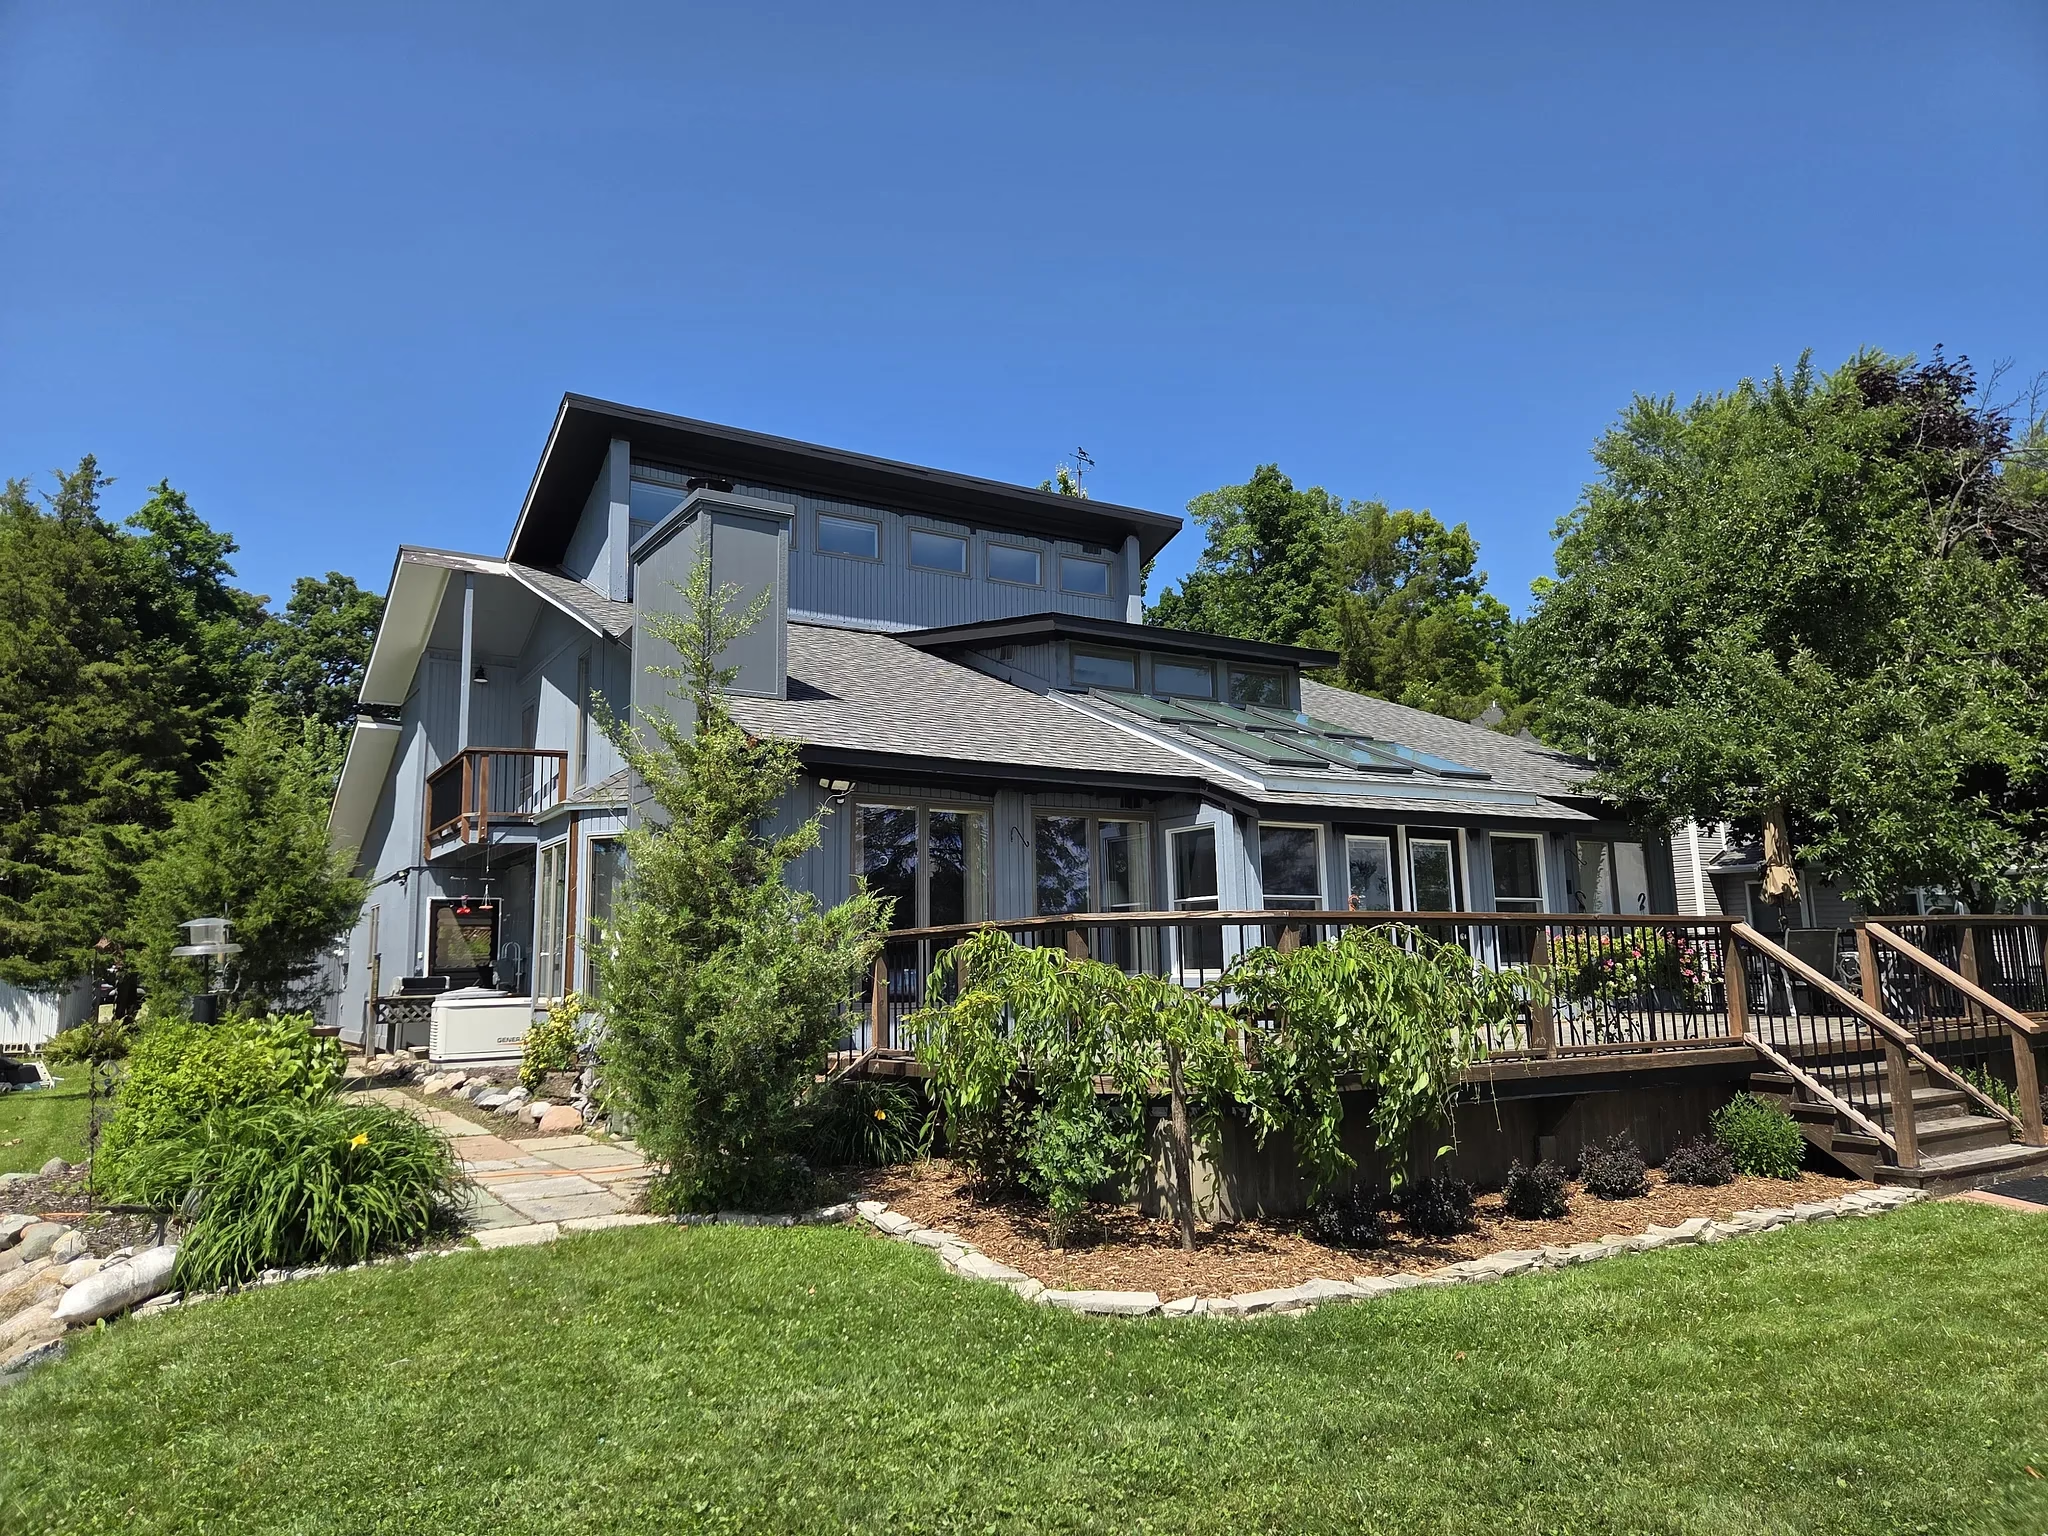
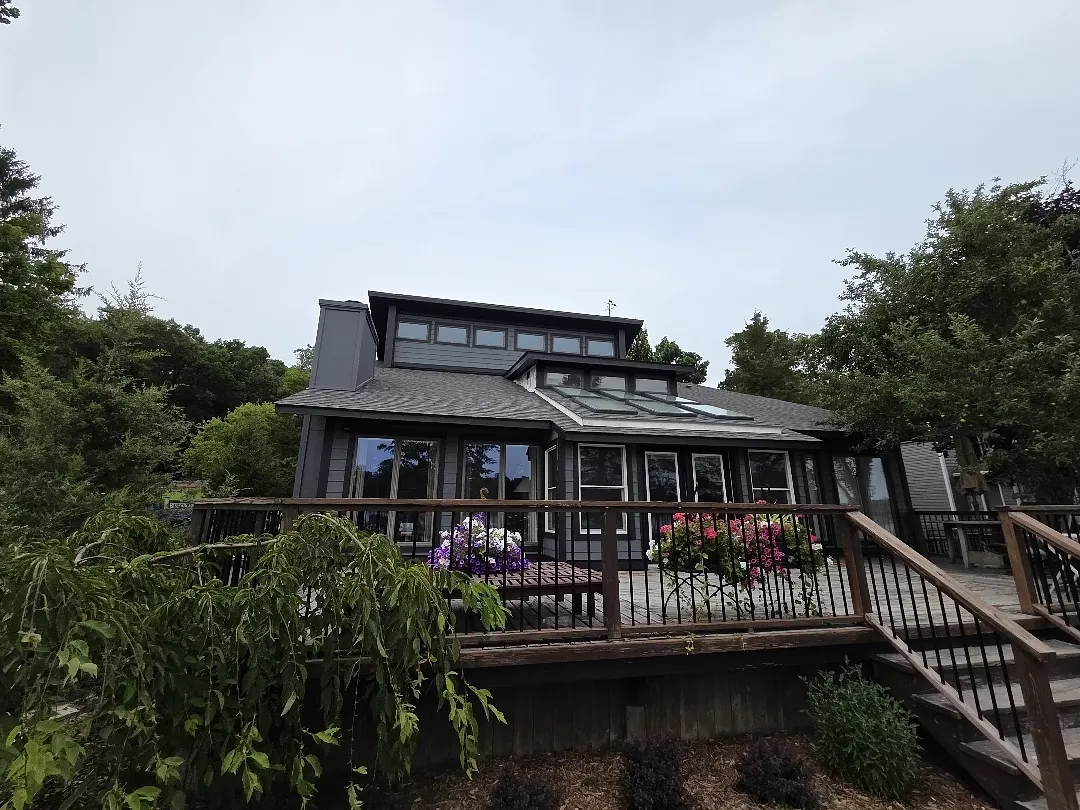
The finished project completely changed the appearance of the Walter family’s lakefront home.
The original aging wood exterior was transformed with Night Gray James Hardie siding and Midnight Black trim, creating a much sharper and more contemporary exterior from both the street and lake.
But the biggest transformation happened beneath and around the siding.
The project addressed:
- Widespread deteriorated fascia and trim
- Damaged wall materials
- Aging exterior siding conditions
- Window and door flashing
- Wall penetrations
- Roof-to-wall transitions
- Soffit intake ventilation
- Roof-edge exhaust ventilation
- Exterior drainage
- Gutters and downspouts
- Existing painted surfaces
- Numerous hidden conditions uncovered during construction
Instead of treating those systems independently, they were coordinated as one exterior renovation.
The Client Experience
After completion, Jim described the project as a “huge success” and “the best decision.”
He told The Exterior Zone that his daughter was blown away by the transformation and that neighbors and people passing the home from the lake had stopped to look at the finished exterior and ask who completed the work.
He also specifically praised the team’s professionalism, attention to detail, communication, and willingness to explain discoveries and correct previous construction problems as the project progressed.
His final assessment of the experience:
“Five stars plus.”
Why This Project Mattered
This project began with visible wood rot.
What the Walter family’s home ultimately needed was much broader.
The deteriorated trim, siding conditions, roof edges, ventilation, flashing, penetrations, gutters, and drainage were all connected to how the exterior managed water, air, and weather exposure.
Addressing those systems together allowed the finished renovation to do more than change the appearance of the home.
It rebuilt how the exterior worked.
Related Homeowner Questions
Can James Hardie siding be installed over T1-11 siding?
In some situations, an existing wall surface can remain as part of the underlying assembly, but its condition and fastening must first be evaluated.
On the Walter project, the existing T1-11 was resecured before the new weather-resistant barrier and siding system were installed. Damaged areas were repaired or replaced where necessary.
The right approach depends on the condition and construction of the existing wall.
Why does wood fascia rot?
Fascia can deteriorate when it experiences repeated moisture exposure from roof edges, gutters, failed coatings, flashing problems, or other water-management conditions.
On this project, deteriorated fascia was found in multiple locations and replaced before the new exterior finishes and gutter system were installed.
Can siding replacement improve attic ventilation?
Siding itself does not ventilate an attic, but an exterior renovation can provide an opportunity to correct the soffit and roof-edge systems that supply intake and exhaust airflow.
For the Walter home, selected soffit areas were rebuilt with new vents and additional baffles, while a roof-edge exhaust vent was added at the upper shed roof.
Why is flashing important around siding?
Flashing helps control water at the places where exterior materials change direction or intersect.
That includes:
- Windows
- Doors
- Rooflines
- Skirt boards
- Decks
- Utility blocks
- Wall penetrations
- Siding transitions
The Walter renovation required several types of custom flashing because the home contained many different transitions.
Why can an exterior renovation uncover additional repairs?
Some damage is hidden behind trim, siding, soffits, roofing, or other exterior materials.
Once those components are removed, deteriorated sheathing, framing, flashing, insulation, or other conditions may become visible.
The Walter project included several field discoveries that could only be properly evaluated after portions of the existing exterior were opened.
Project Takeaway
A whole-exterior renovation is not simply several individual projects happening at the same time.
When siding, trim, soffits, ventilation, roof edges, flashing, gutters, and drainage intersect, decisions made in one area can affect the others.
The Walter Family project is a strong example of what can happen when those details are evaluated and rebuilt as one connected exterior system.